You can connect GSuite SSO with Appbot so that team members can use their Google credentials to access Appbot.
Before you configure your GSuite SSO integration
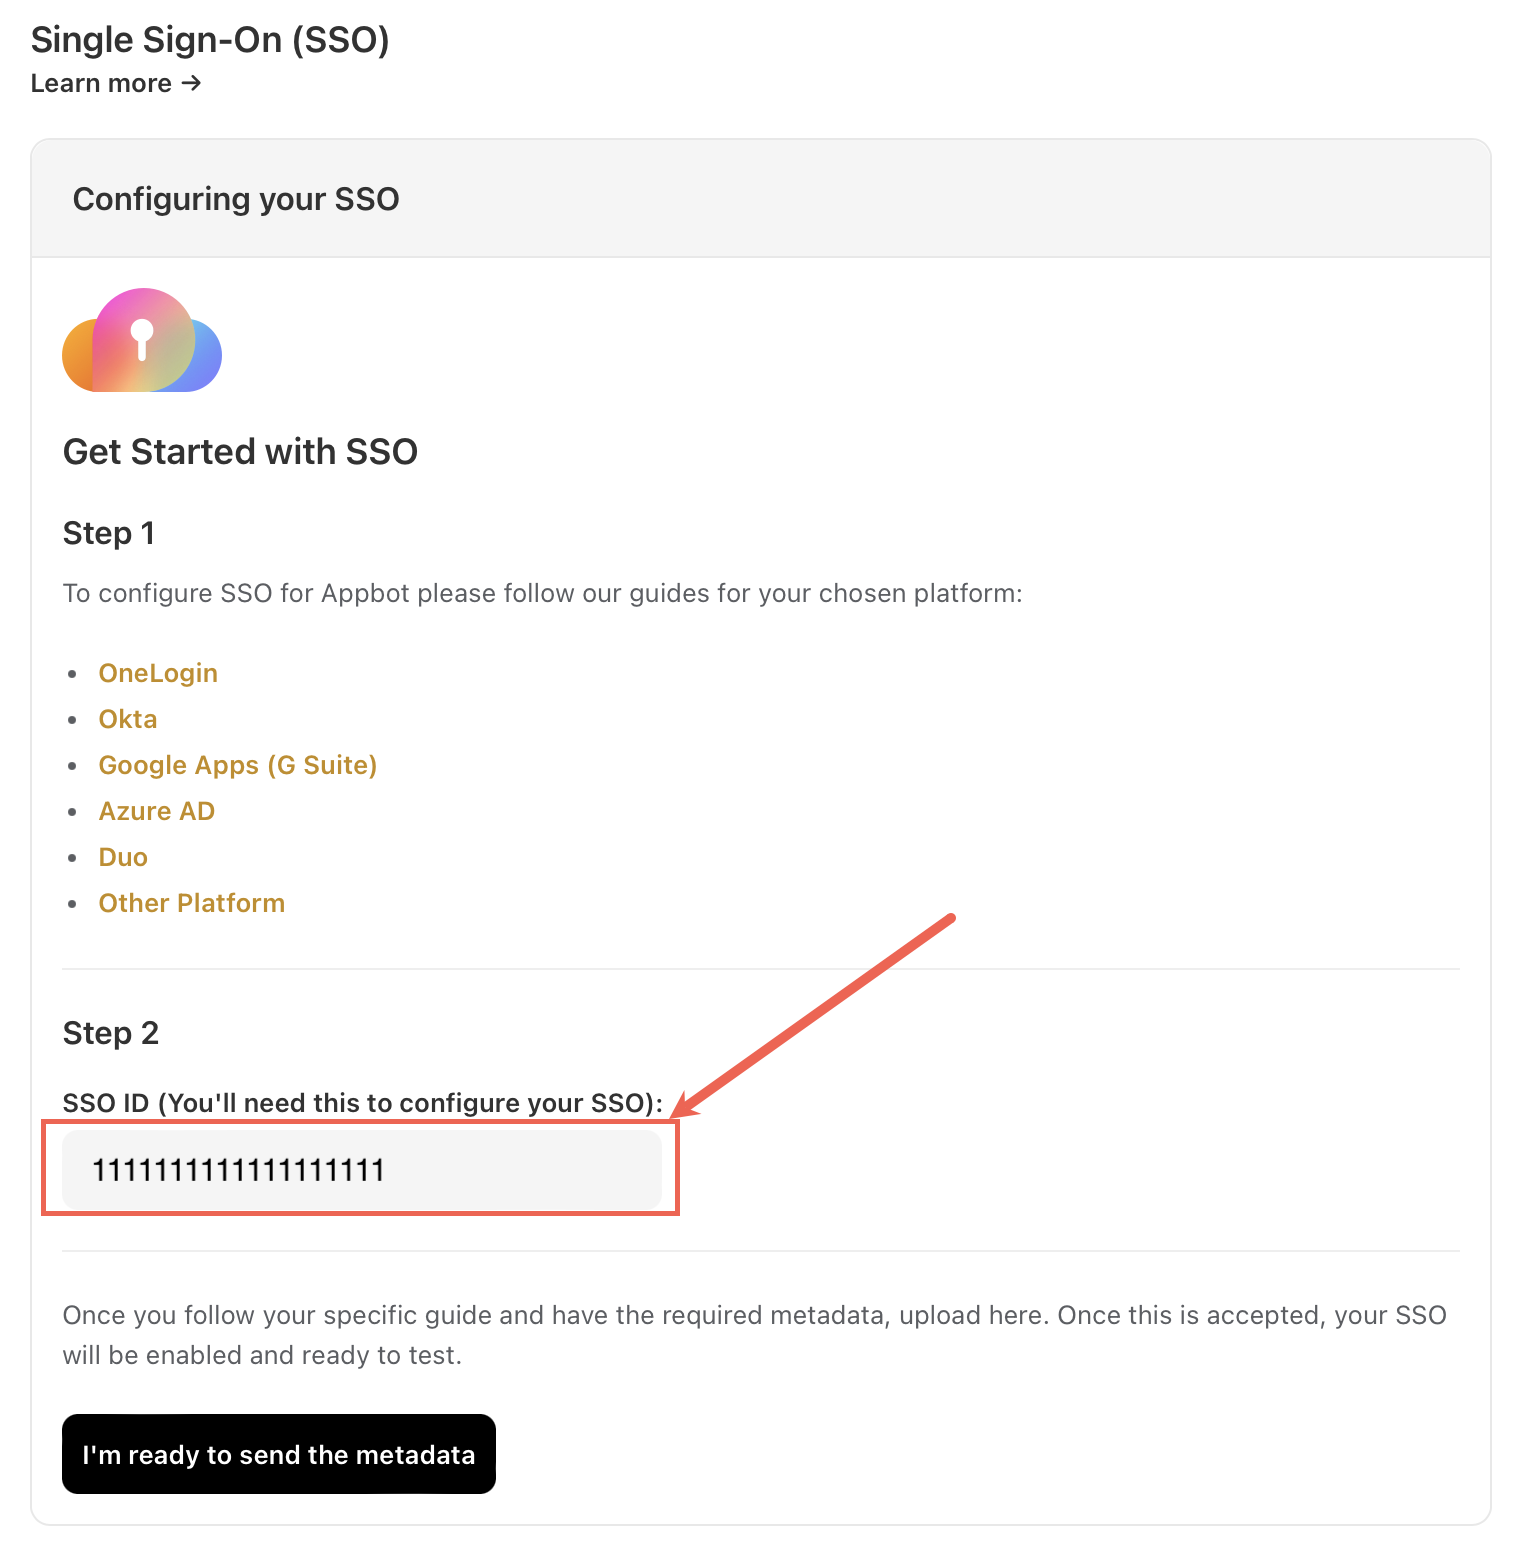
Head to the Appbot SSO page and copy your Appbot SSO ID.
Configure an Appbot SSO Integration with the GSuite
Follow These Steps To Complete The SSO Authentication:
- Log in to your Google Admin Console at admin.google.com to setup the SSO integration.
- Click Apps > SAML apps. Where is it?
- Select the Add a service/App to your domain link or click the plus (+) icon in the bottom corner.
- Click Setup my own custom SAML App.
- The Google IDP Information window opens and the Single Sign-On URL and the Entity ID URL fields automatically populate.
- Download the IDP metadata by clicking Option 2 > IDP Metadata > Download.
- In the Basic Application Information window, call the SSO authentication application “Appbot”
- Click Choose file next to the Upload Logo field to upload a PNG or GIF file to serve as an icon. Suggested file; https://drive.google.com/file/d/0B2DnTWyVsMN0WFZNWVoxdHhlcjA/view.
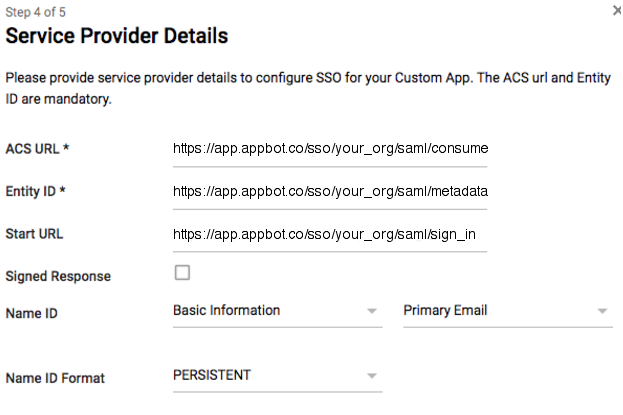
- In the Service Provider Details window enter the following, replacing “your_org” with the SSO ID from Appbot:
ACS URL: https://app.appbot.co/sso/your_org/saml/consume
Entity ID: https://app.appbot.co/sso/your_org/saml/metadata
Start URL: https://app.appbot.co/sso/your_org/saml/sign_in
Signed Response: Unchecked
Name ID: Basic Information / Primary Email
Name ID Format: PERSISTENT
- Click Next.
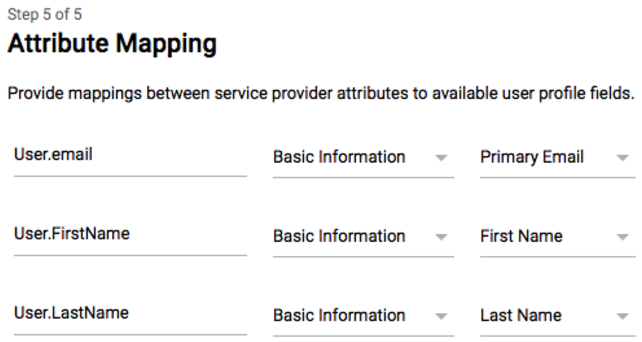
- Click Add new mapping and add the following three mappings with the exact capitalization specified;
User.email Basic Information Primary Email
User.FirstName Basic Information First Name
User.LastName Basic Information Last Name

- Click Finish.
- Go back to Apps > SAML apps.
- Select the new Appbot app.
At the top of the gray box, click More and choose:- On for everyone to turn on the service for all users (click again to confirm).
- Off to turn off the service for all users (click again to confirm).
- On for some organizations to change the setting only for some users.
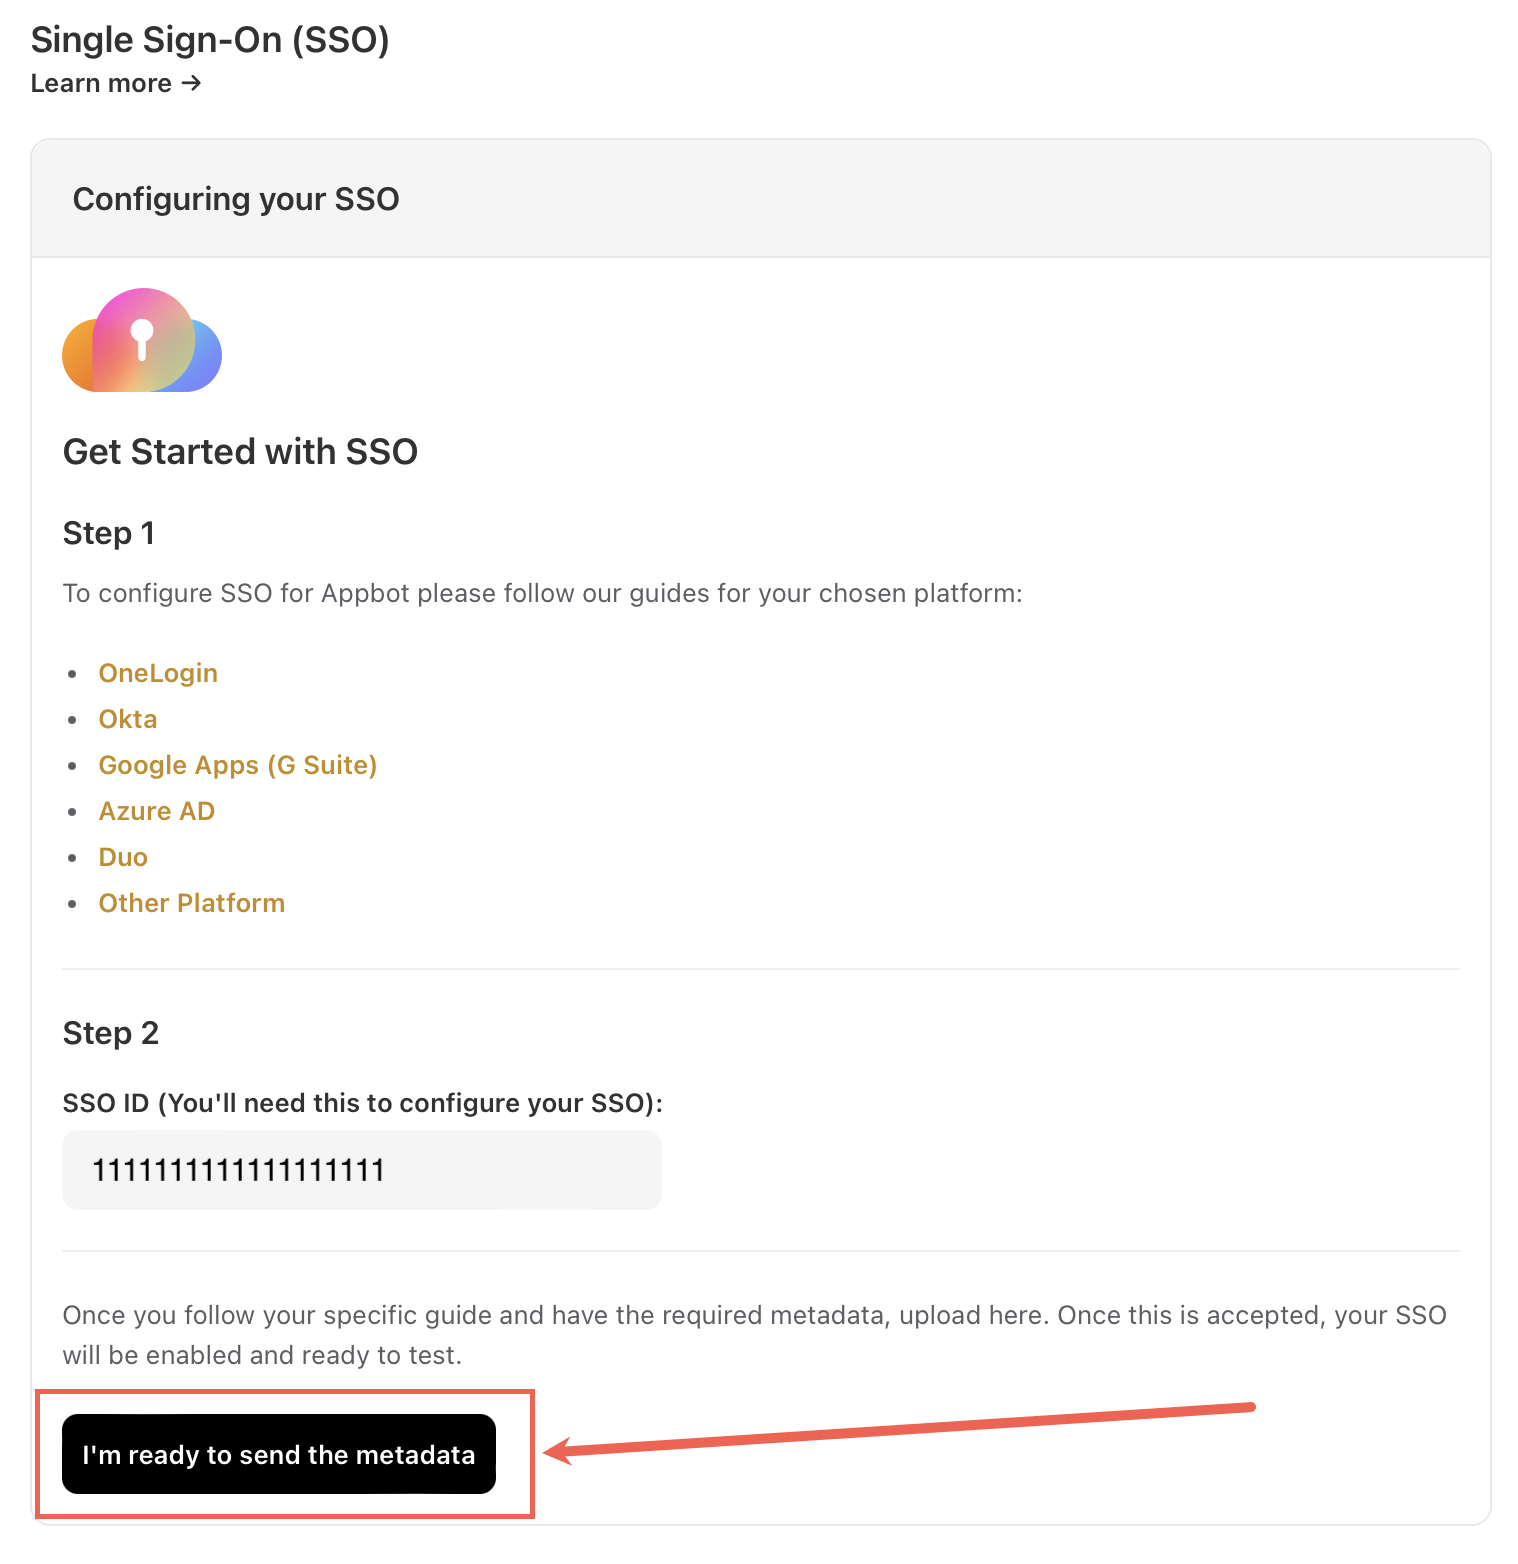
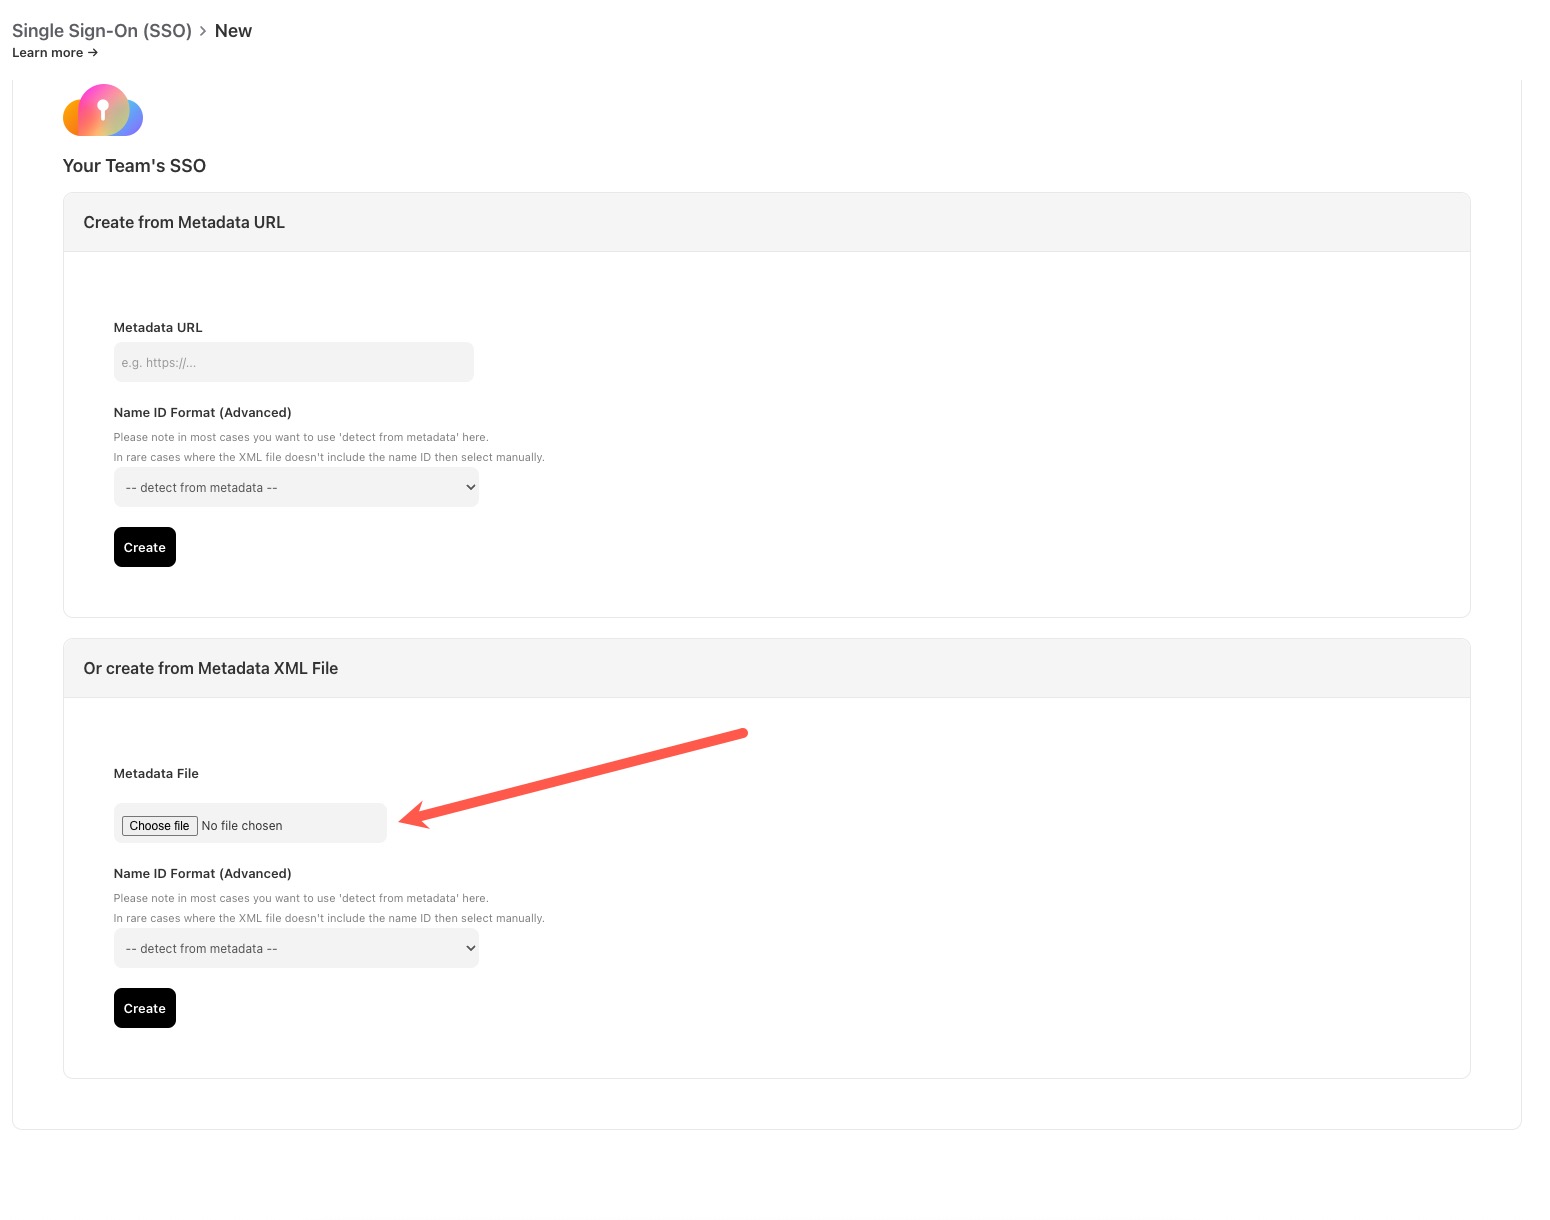
- In Appbot go back to the SSO page and select “I’m ready to send the metadata” button.

- Upload the XML data file from GSuite and select the “Create” button. The success message will appear at the top of the page.
 Now you are all set to use SSO in Appbot.
If you need any further assistance on Appbot’s SSO Integration or SSO Authentication, don’t hesitate to contact us with any questions or check out our FAQ section here.