Azure AD is secure and seamless access for all your users and apps – from any location, using any device, which can be integrated with your Appbot Premium account or is available as an add-on for Large plans.
Before you configure your Azure AD SSO integration
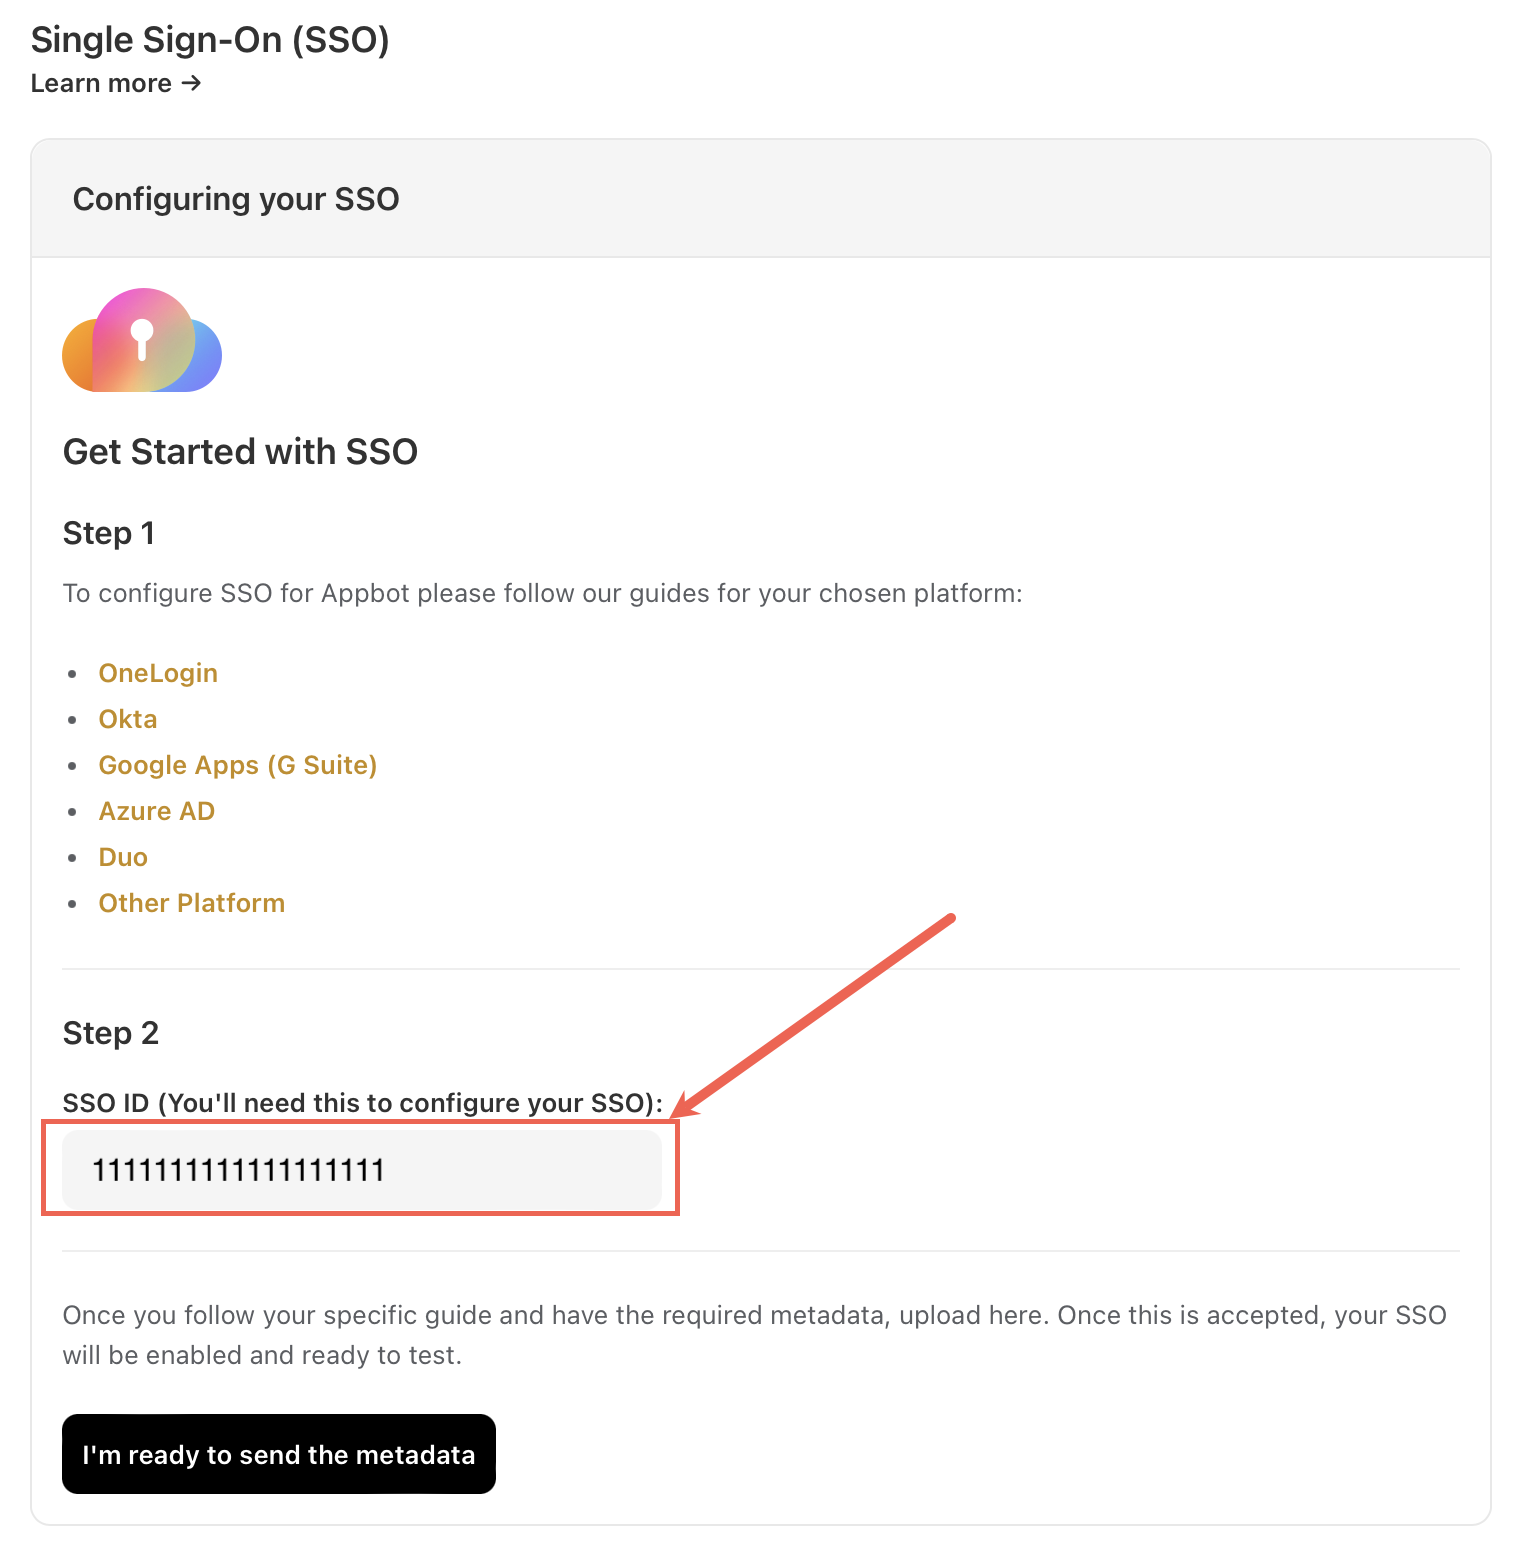
Head to the Appbot SSO page and copy your Appbot SSO ID.
Configure an Appbot SSO Integration with the Azure AD
In SAML terminology, what you will be doing here is configuring Azure AD (your SAML Identity Provider or “SAML IdP”), with the details of Appbot (the new SAML Service Provider or “SAML SP”).
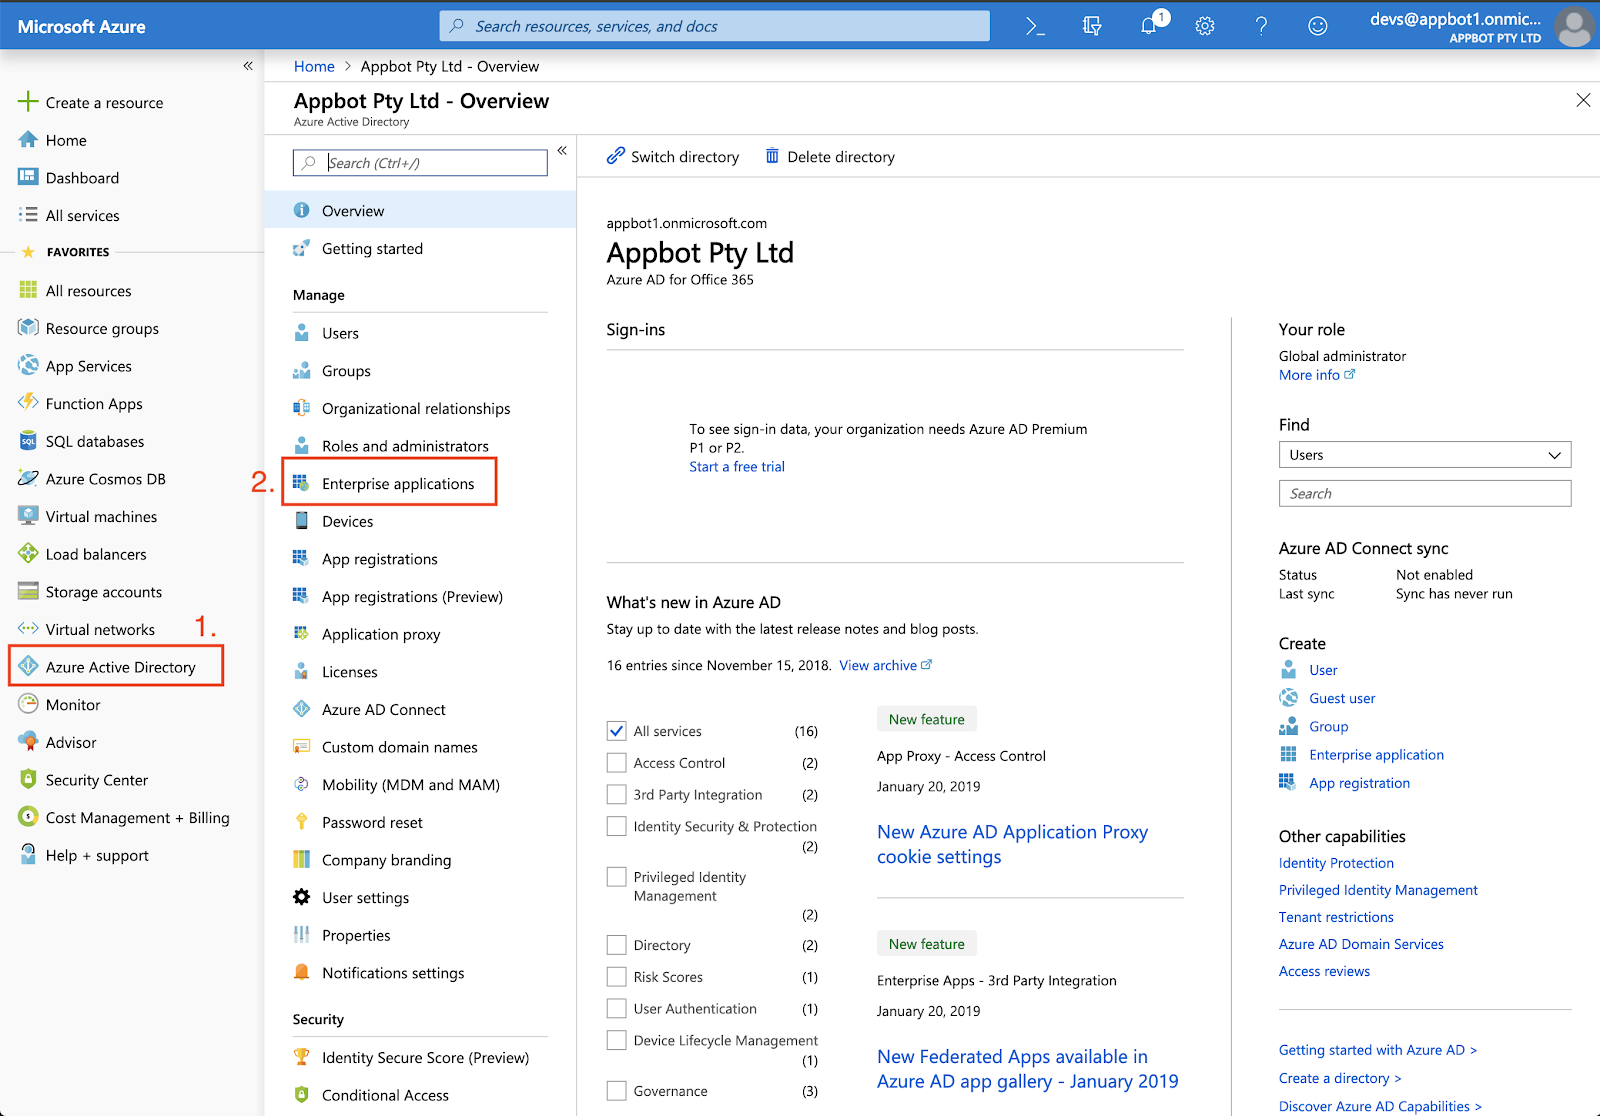
- In the Azure control panel, navigate to Azure Active Directory, then choose “Enterprise applications” in the sub-sidebar.

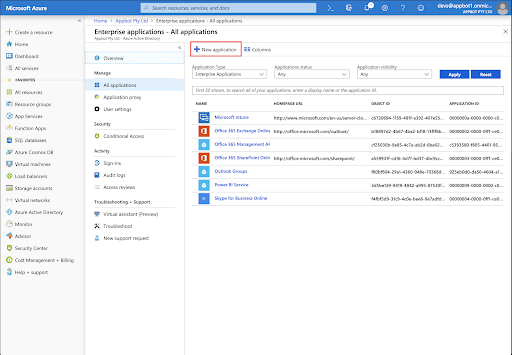
- In the header, choose “New application”.

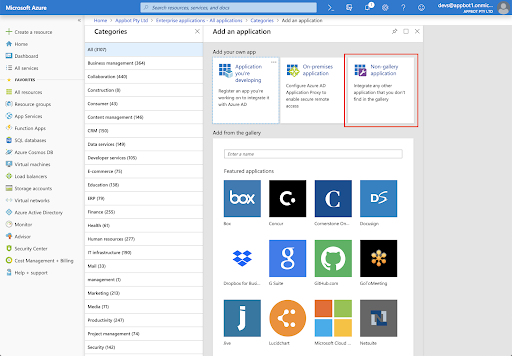
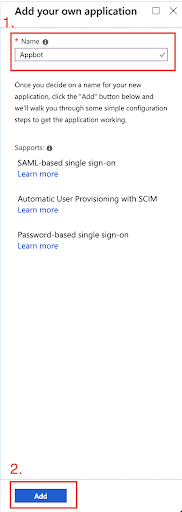
- In the “Add an application” pane, choose “Non-gallery application”.

- Name the application “Appbot” and click “Add”.

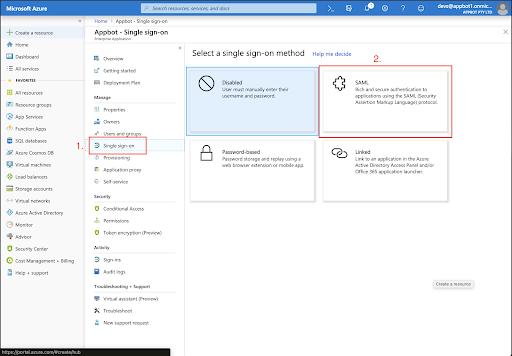
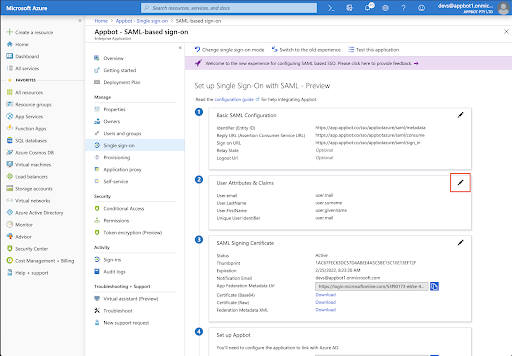
- Inside the app’s control panel, click “Single sign-on” in the sub-sidebar, and then choose “SAML” inside the pane.
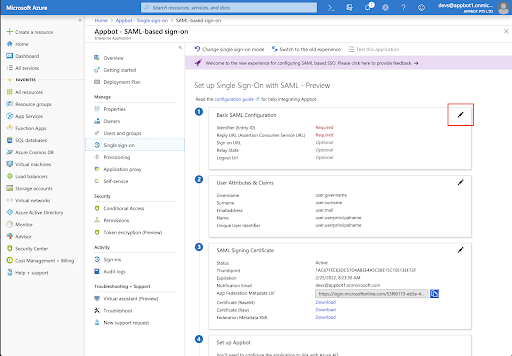
- In the configuration panel shown, click the Pencil icon within the “Basic SAML Configuration” box.
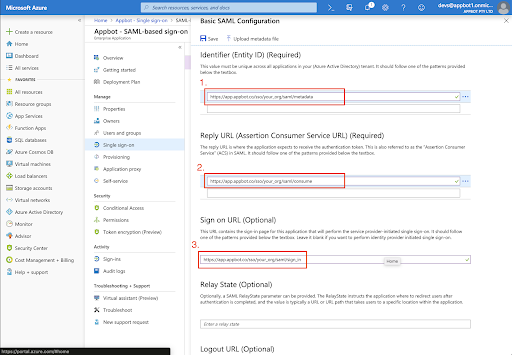
- Enter the following information, replacing “your_org” with the SSO ID from Appbot;
Identifier: https://app.appbot.co/sso/your_org/saml/metadata
Reply URL: https://app.appbot.co/sso/your_org/saml/consume
Sign on URL: https://app.appbot.co/sso/your_org/saml/sign_in
Then click the “Save” button, and the “X” to exit the panel.
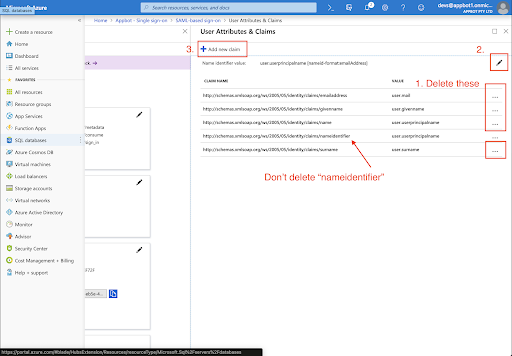
- In the configuration panel, click the Pencil icon within the “User Attributes & Claims” box.
- Firstly, click the “…” button next to each of the listed Claim Names (except the one named “name identifier”), and choose “Delete”.
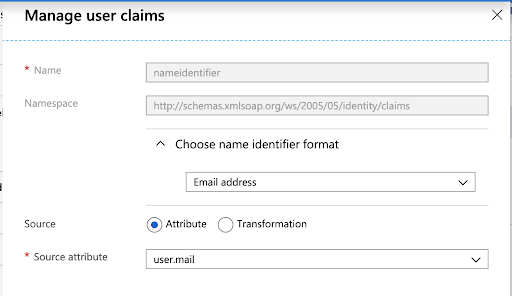
Secondly, choose the Pencil icon next to “Name identifier value”, and set the Name identifier format to “Email address” and the Source attribute to “user.email”.
Thirdly, use the “Add new claim” button to add the following two claims;
| Name | Namespace | Source | Source attribute |
| User.FirstName | Leave blank | Attribute | user.givenname |
| User.LastName | Leave blank | Attribute | user.surname |
Then click the “X” to exit the panel.


10. Click the “Download” button next to “Federation Metadata XML”.
 11. Back in the Appbot SSO page select the “I’m ready to send the metadata” button.
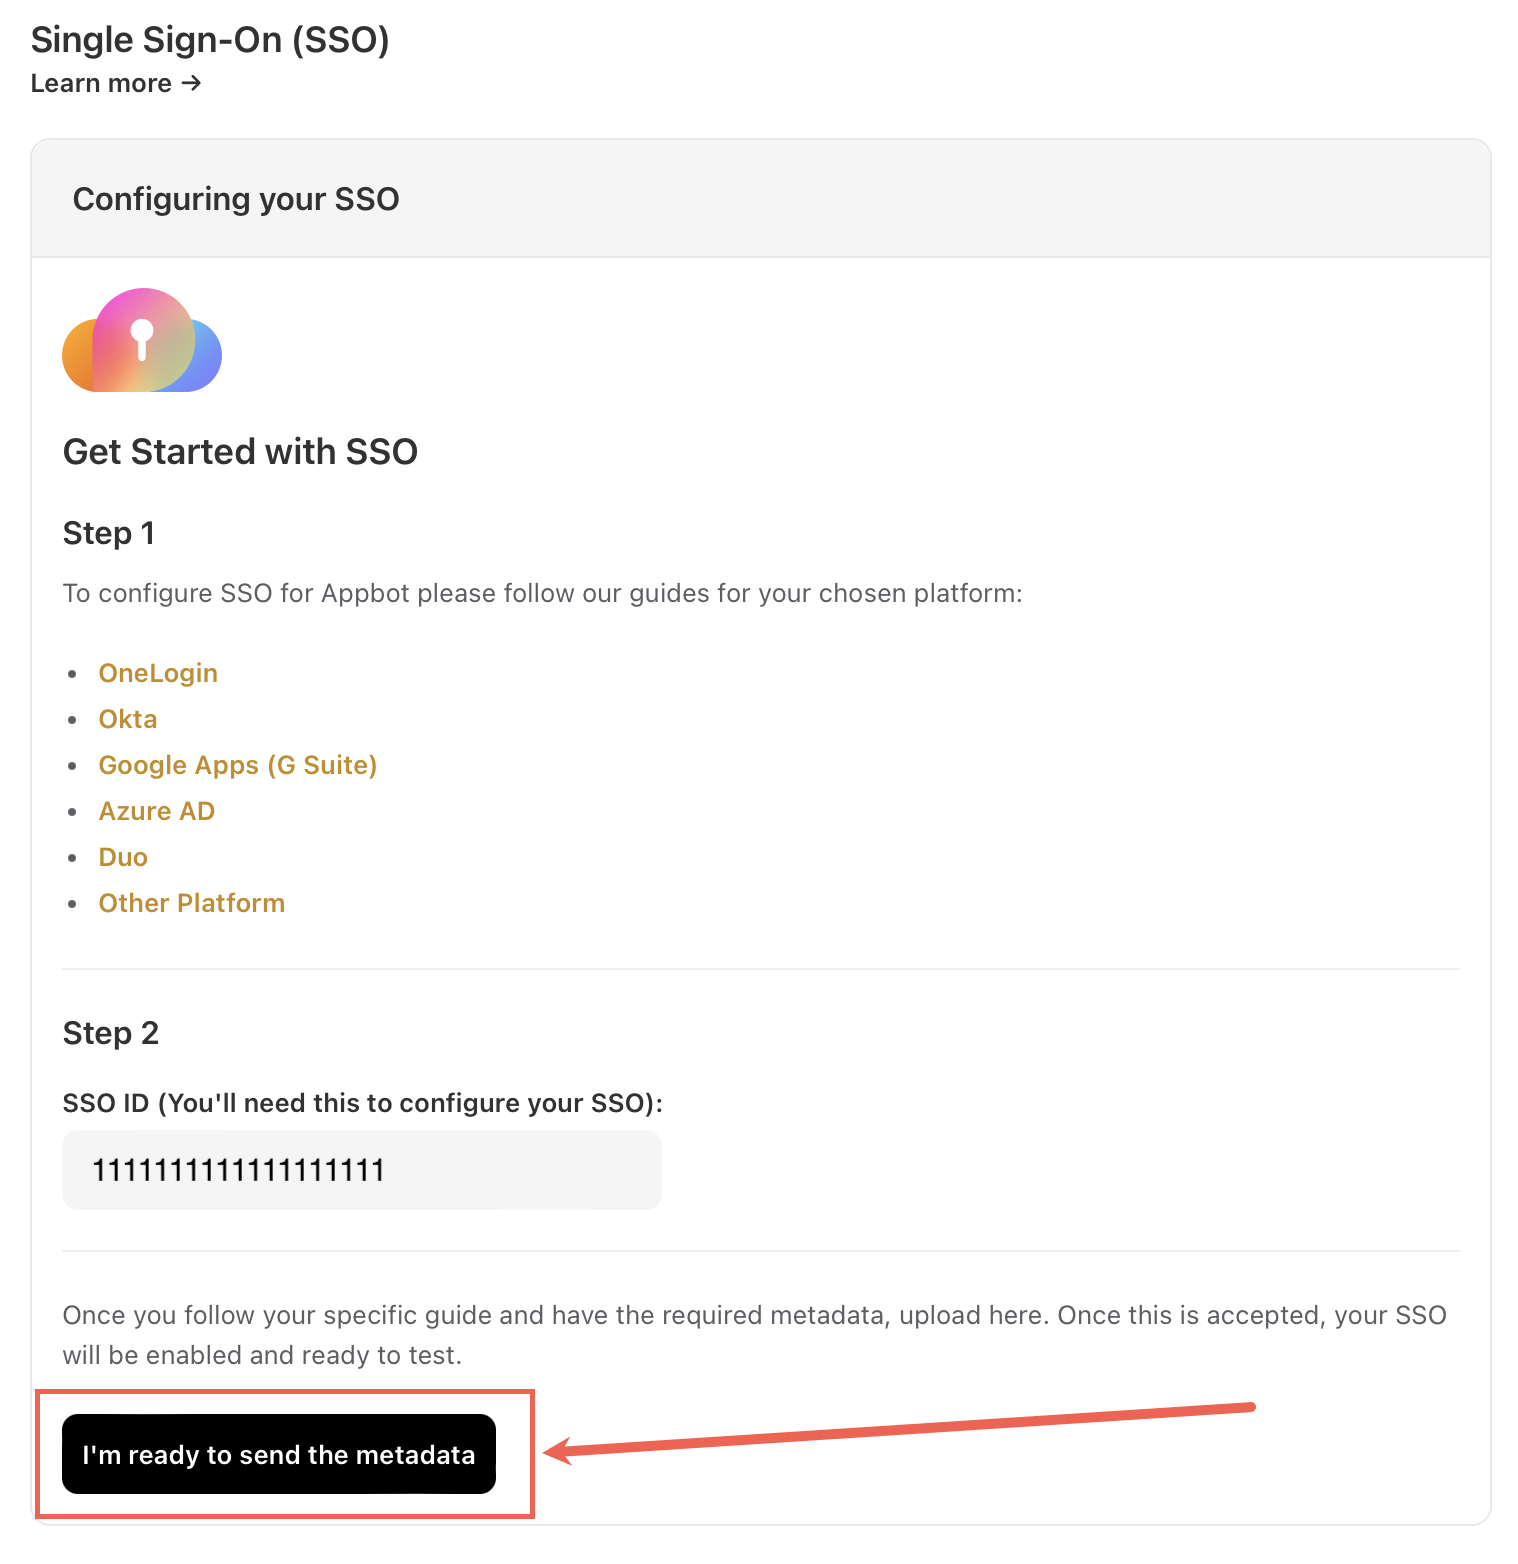
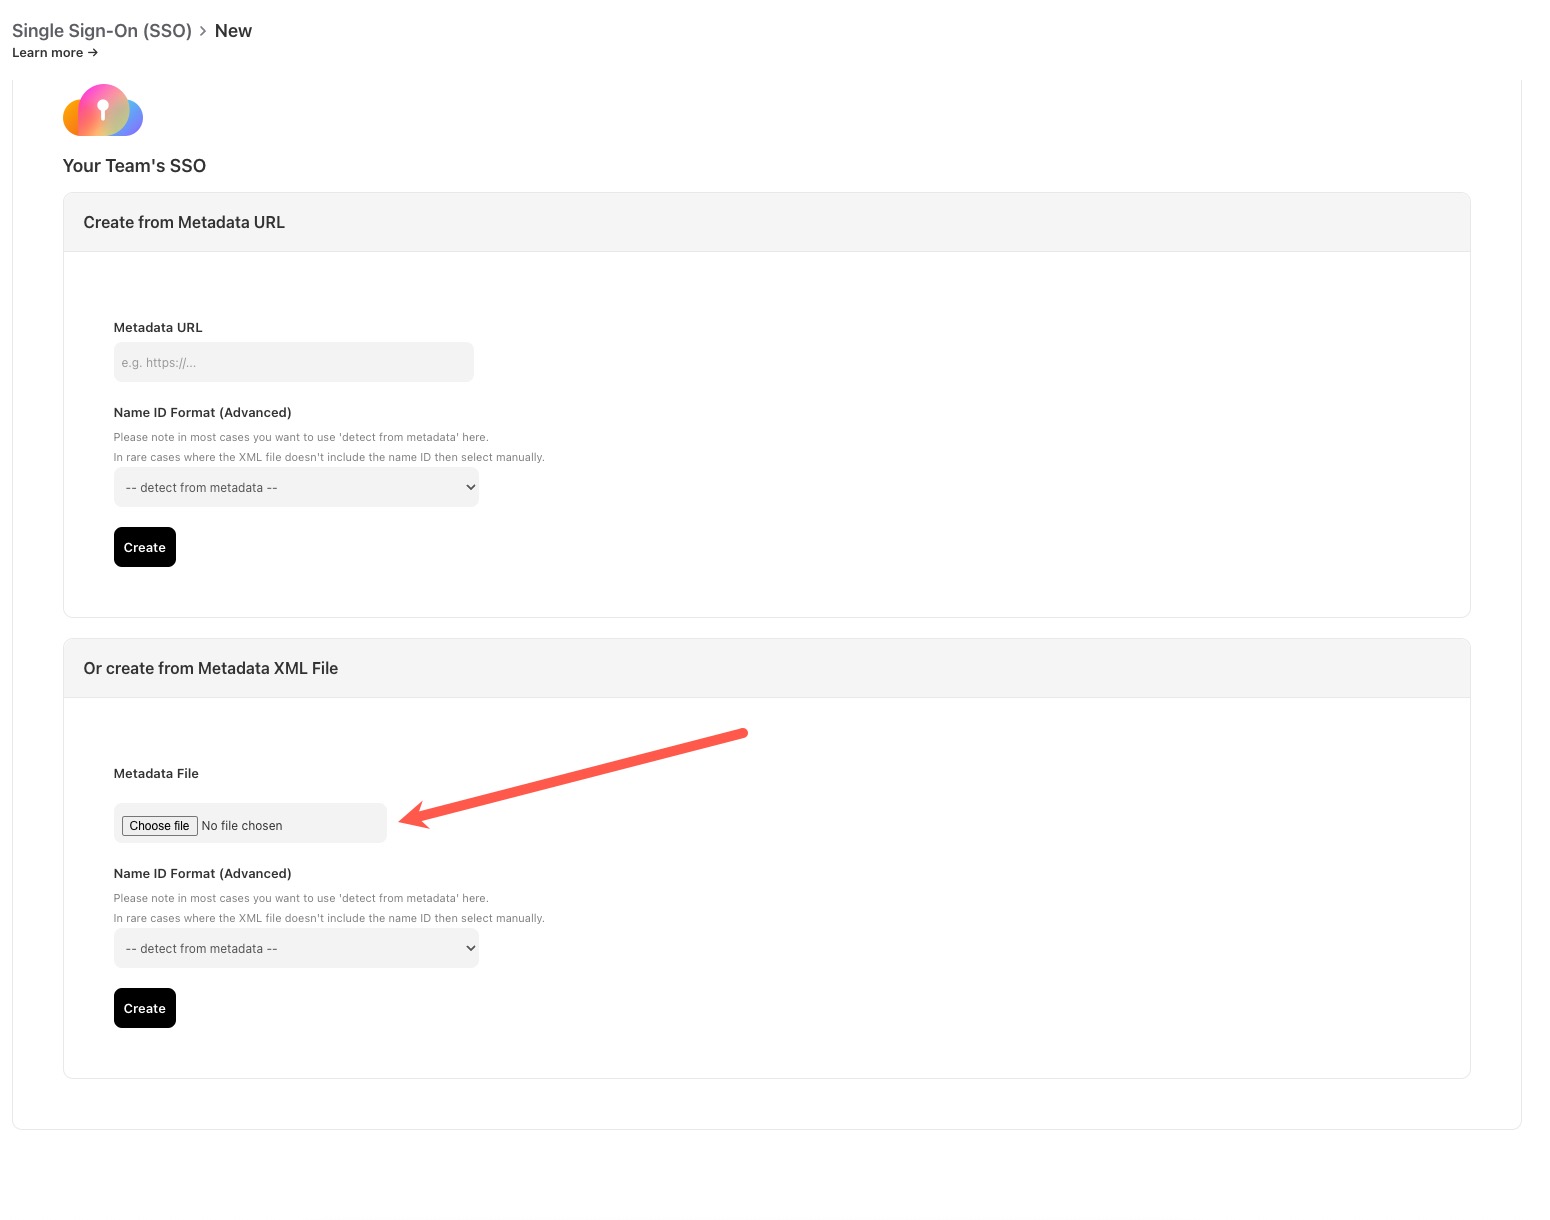
12. Upload the XML data file from Azure and select the “Create” button.
That is it! SSO is now set up on the account and ready to use.
If you need any further assistance with Azure single sign-on or any of Appbot’s other Single Sign On (SSO) solutions, don’t hesitate to contact us with any questions or check out our FAQ section here.