This guide is intended to supplement specific steps of the guide at https://duo.com/docs/dag-generic. Please follow all the steps in that guide, referencing this supplement at the specific steps indicated.
Before you configure your Duo SSO integration
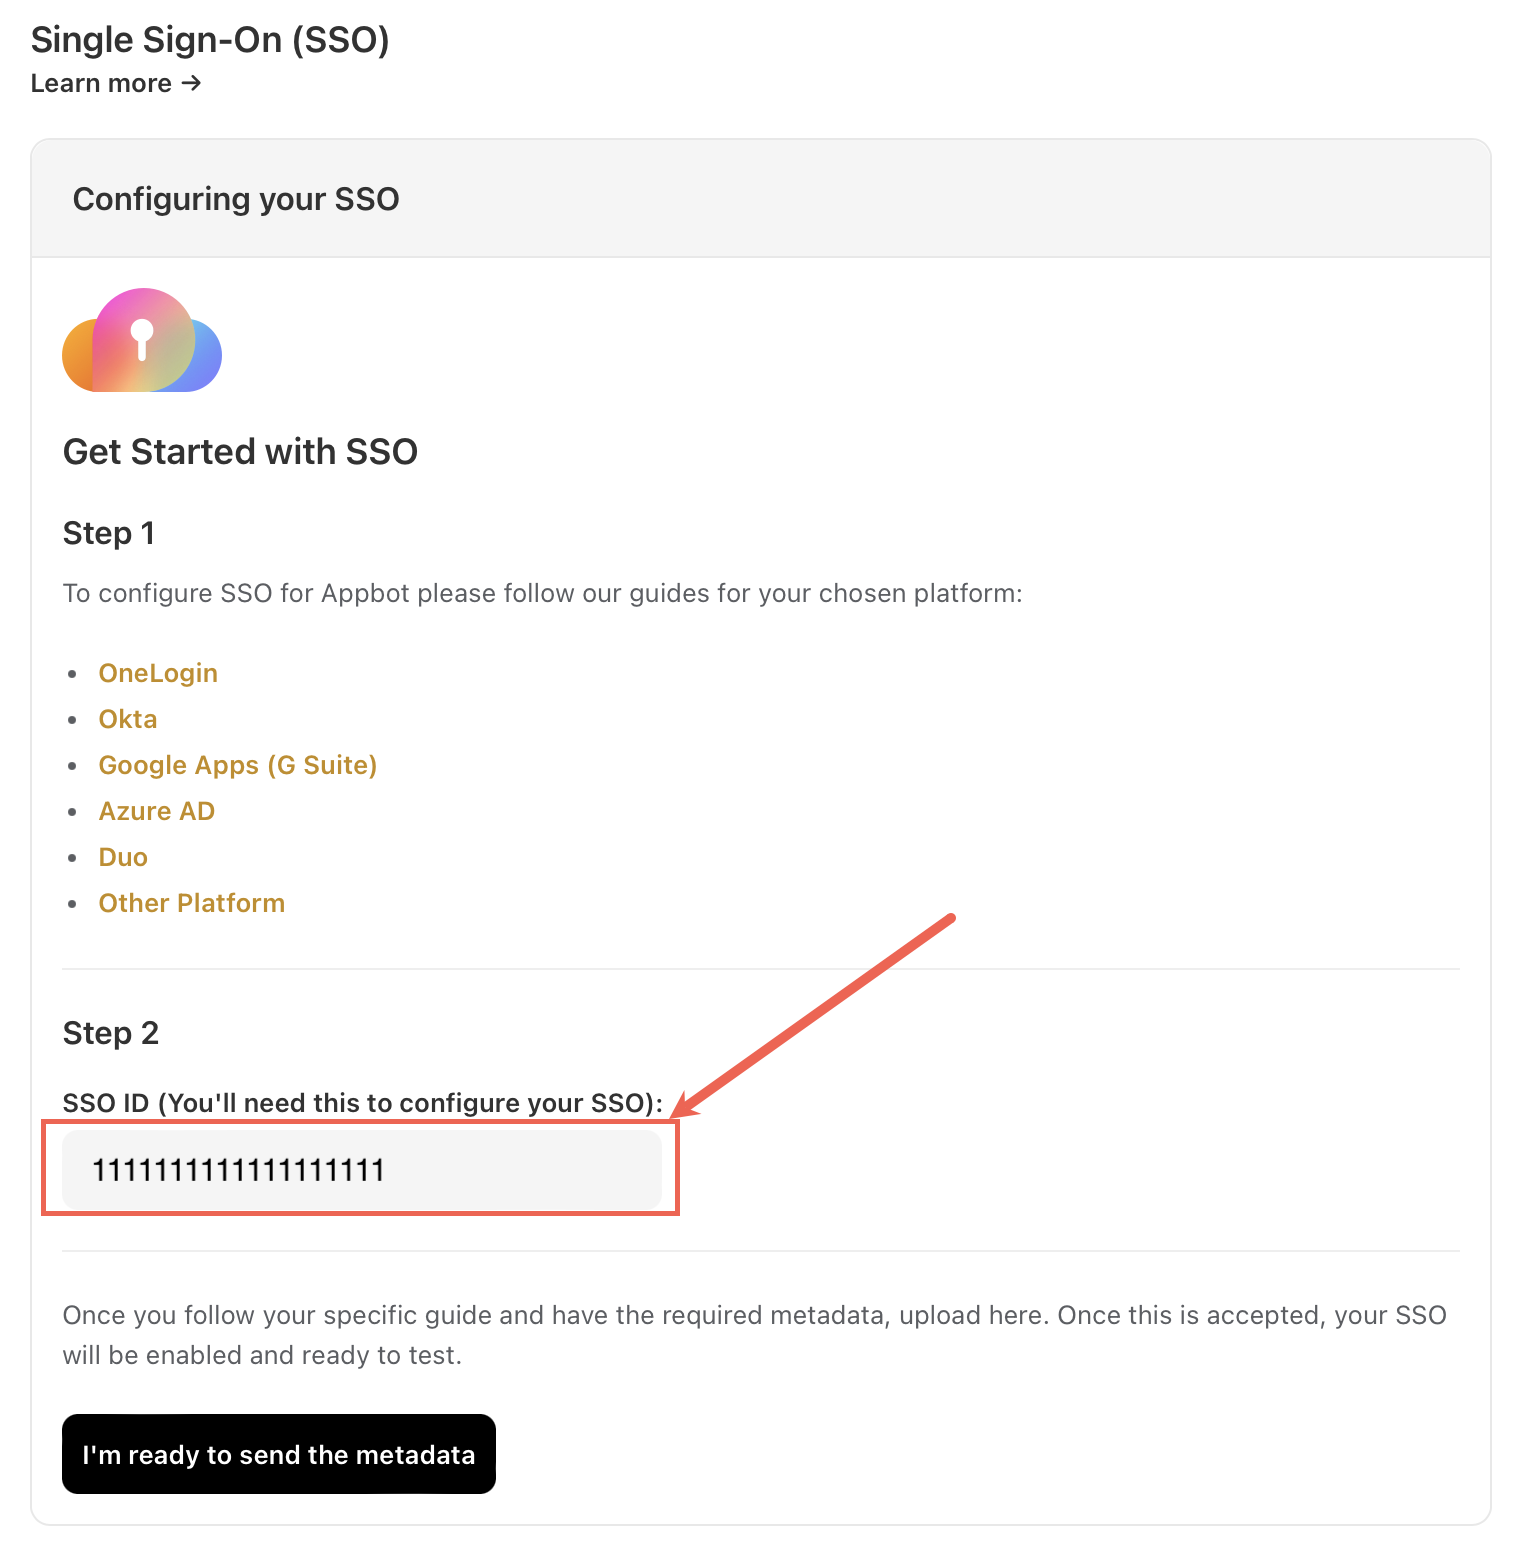
Head to the Appbot SSO page and copy your Appbot SSO ID.
 Create Your Cloud Application in Duo – Step 3
At Step 3 of the Create Your Cloud Application in Duo section, enter the following. Substitute “your_org” with the Appbot SSO ID.
| Name | Description |
| Service Provider Name | Appbot |
| Entity ID | https://app.appbot.co/sso/your_org/saml/metadata |
| Assertion Consumer Service | https://app.appbot.co/sso/your_org/saml/consume |
| Single Logout URL | Leave Empty |
| Service Provider Login URL | https://app.appbot.co/sso/your_org/saml/sign_in |
| Default Relay State | Leave Empty |

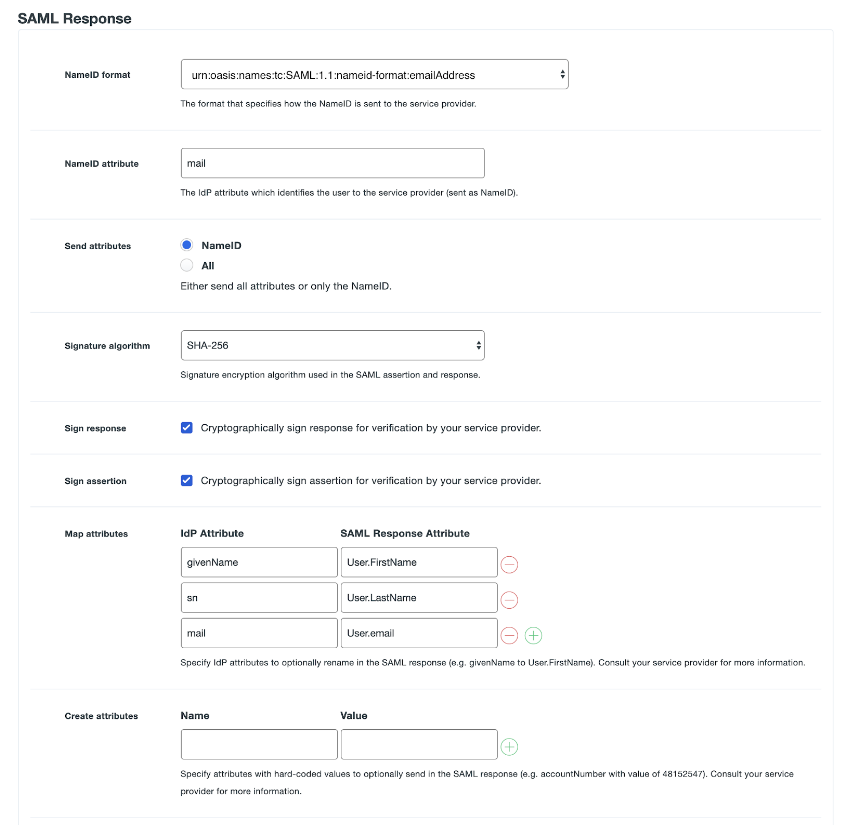
Create Your Cloud Application in Duo – Step 4

At Step 4 of the Create Your Cloud Application in Duo, enter the following;
| Name | Description |
| NameID format | urn:oasis:names:tc:SAML:1.1:nameid-format:emailAddress |
| NameID attribute | We want this set to the “Mail Attribute” of your IdP source, refer to the SAML Attribute Table section below to determine what it is called. |
| Send attributes | NameID |
| Signature Algorithm | Leave as default |
| Sign response | Leave as default |
| Sign assertion | Leave as default |
| Map attributes | For each of these mappings, enter the attribute from the SAML Attribute Table section below in the left column, and the specified string in the right column.
For example, if you were using Active Directory, the mappings would be
|
| Create attributes | Leave empty |
SAML Attribute Table
Depending on the Duo Access Gateway authentication source you use, the exact attributes you need in particular situations is different. Use this table to look them up.
| Attribute | Active Directory | OpenLDAP | SAML IdP | Azure | |
| Mail attribute | |||||
| First name attribute | givenName | gn | givenName | given_name | givenName |
| Last name attribute | sn | sn | sn | family_name | surname |
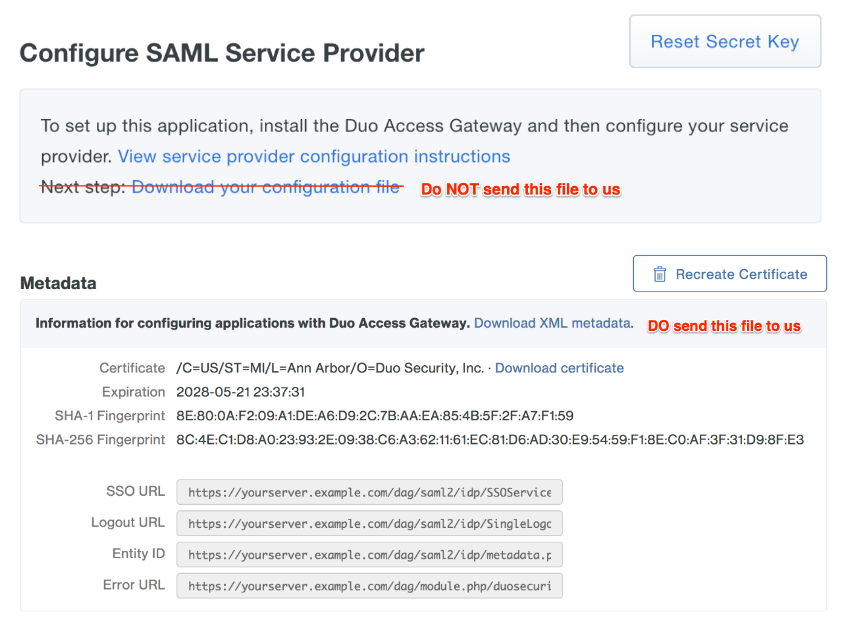
Configure Your Service Provider Section
When in this section, choose “Download XML Metadata”,
Please take note that you should use the JSON configuration file created in step 4, but the XML metadata file created in the later section.
Go back to the Appbot SSO page and select “I’m ready to add the metadata” button.
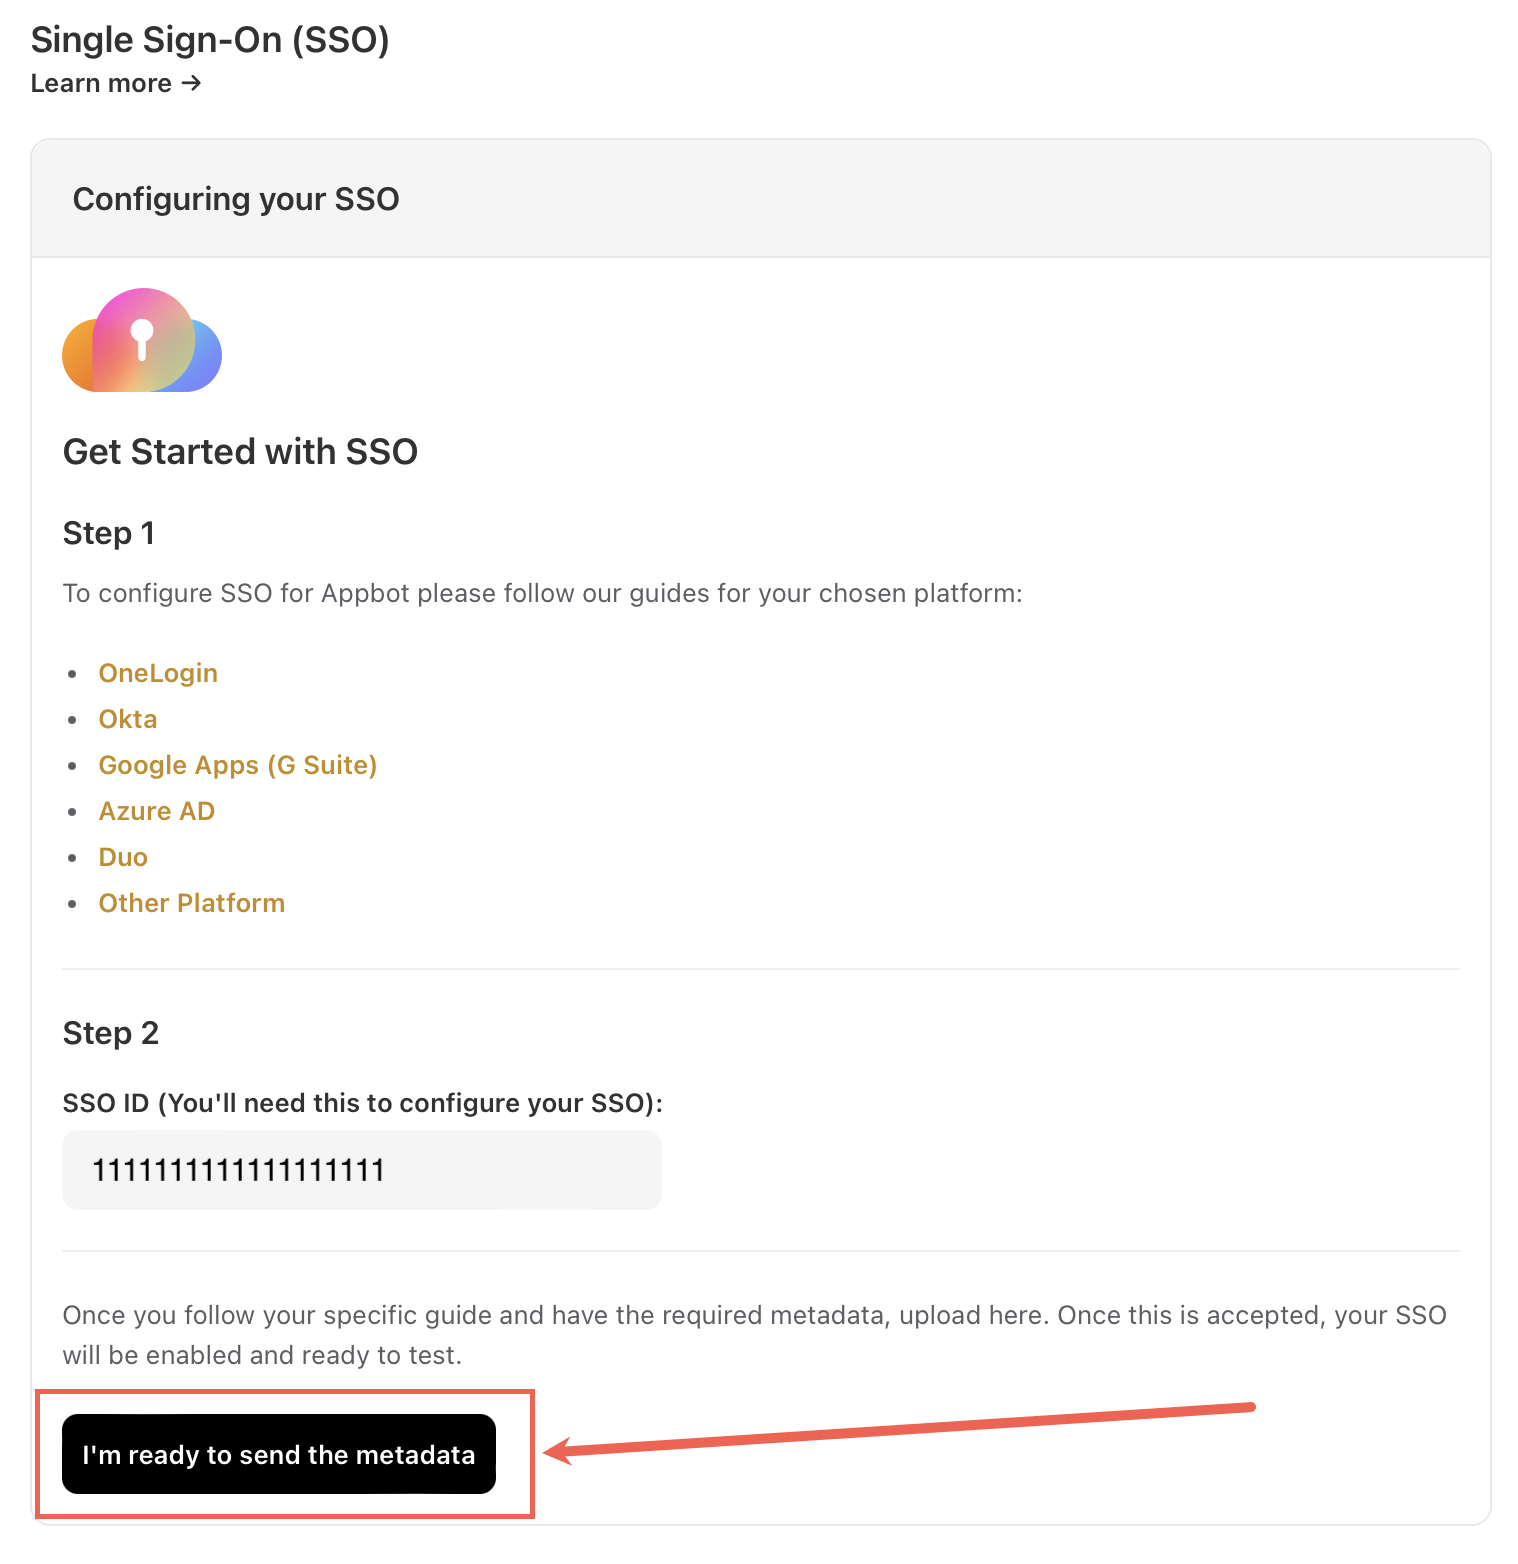
Then upload the XML file, leave the Name ID Format as “– detect from metadata–” and select the “Create” button.
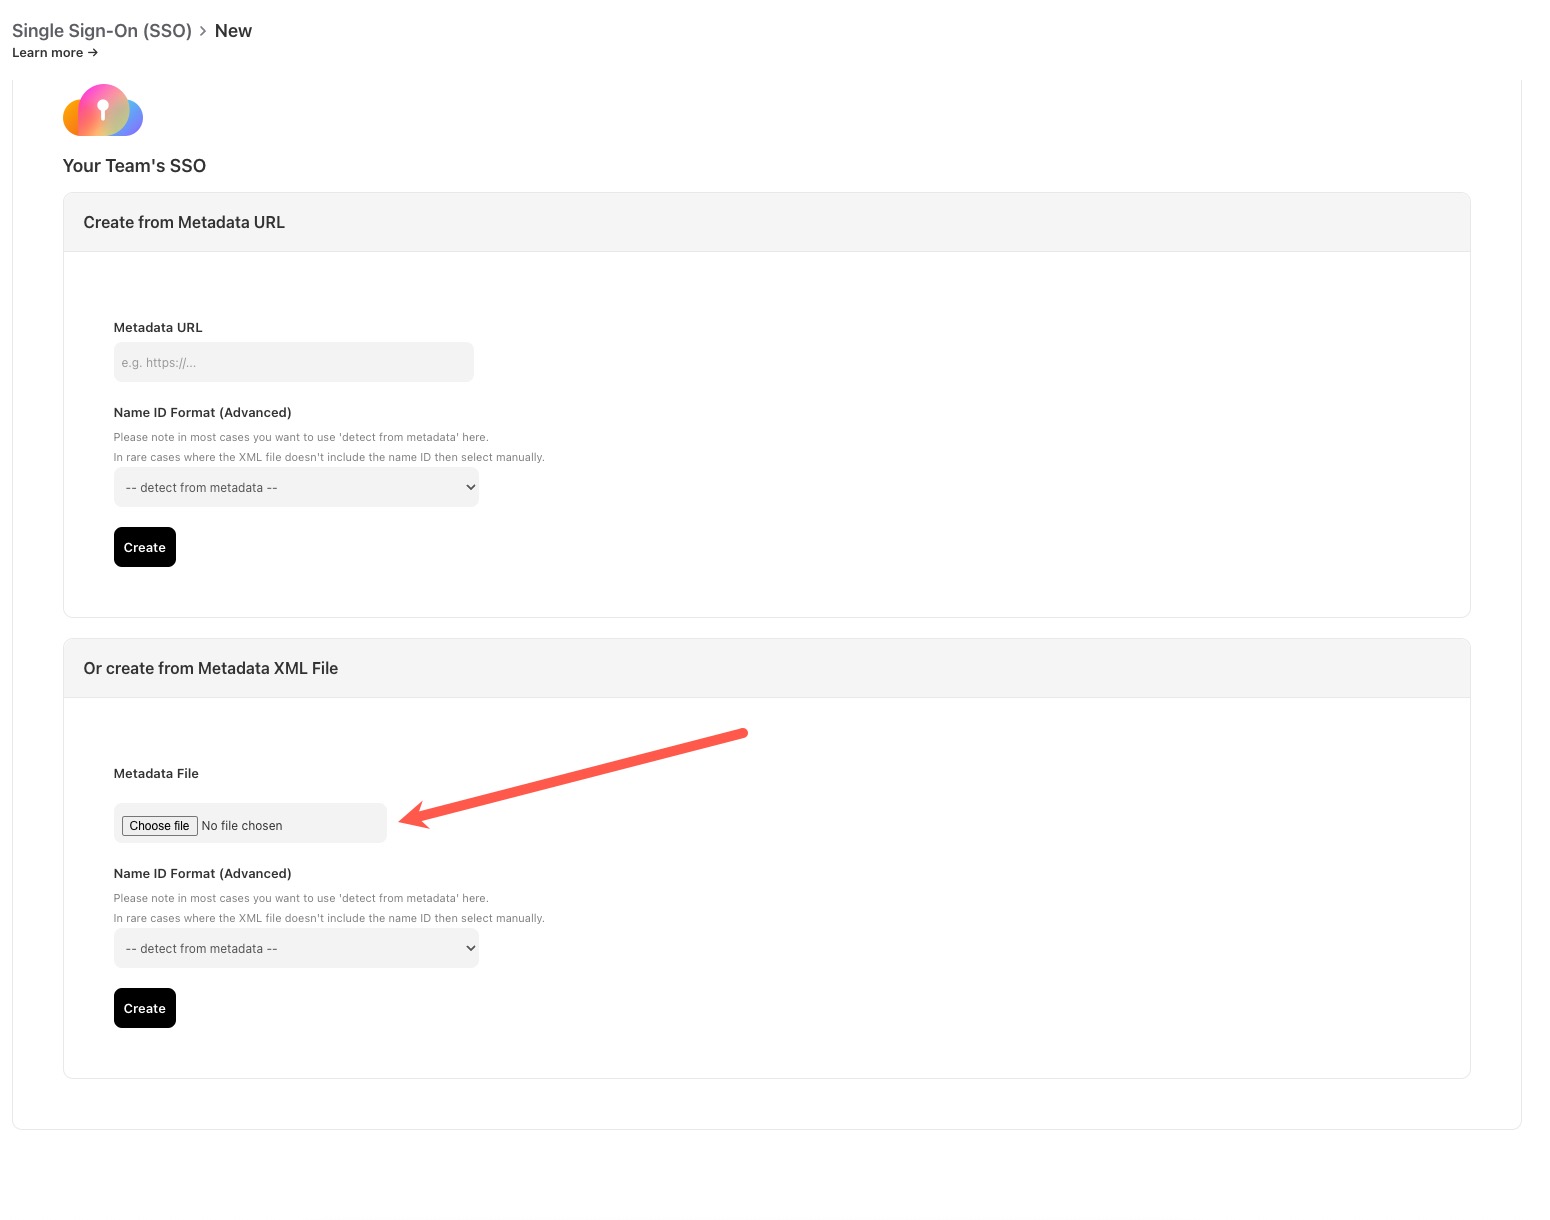 Once successfully uploaded the success message will appear and you can now use SSO for Appbot.
If you need any further assistance on configuring the Appbot SSO Login, don’t hesitate to contact us with any questions or check out our FAQ section here.