Okta is an SAML 2.0 compatible SSO solution, which can be integrated with your Appbot Premium account or added to a Large plan.
The first step is to set up Appbot in your Okta organization.
In SAML terminology, what you will be doing here is configuring Okta (your SAML Identity Provider or “SAML IdP”), with the details of Appbot (the new SAML Service Provider or “SAML SP”).
Before you configure your Okta SSO integration
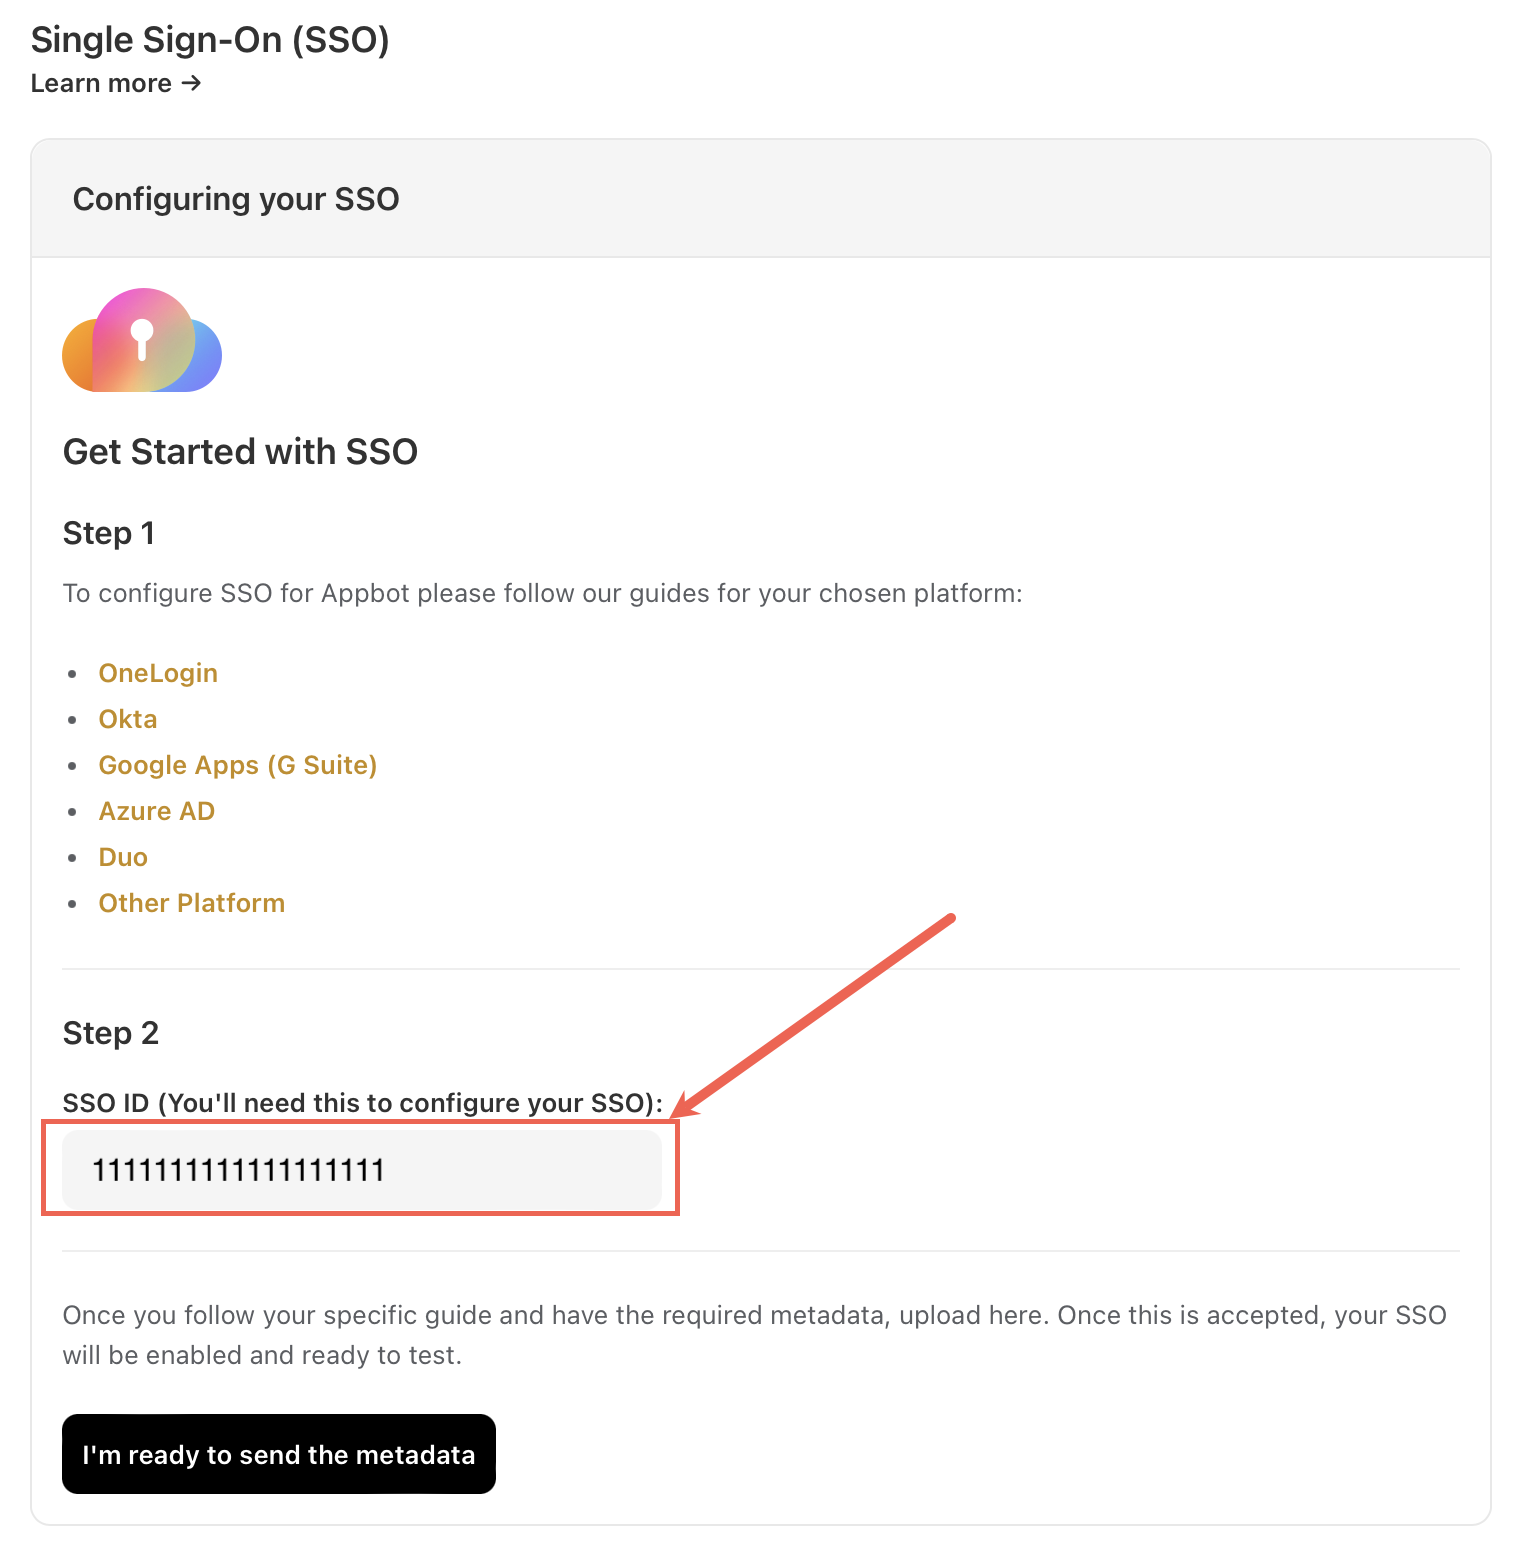
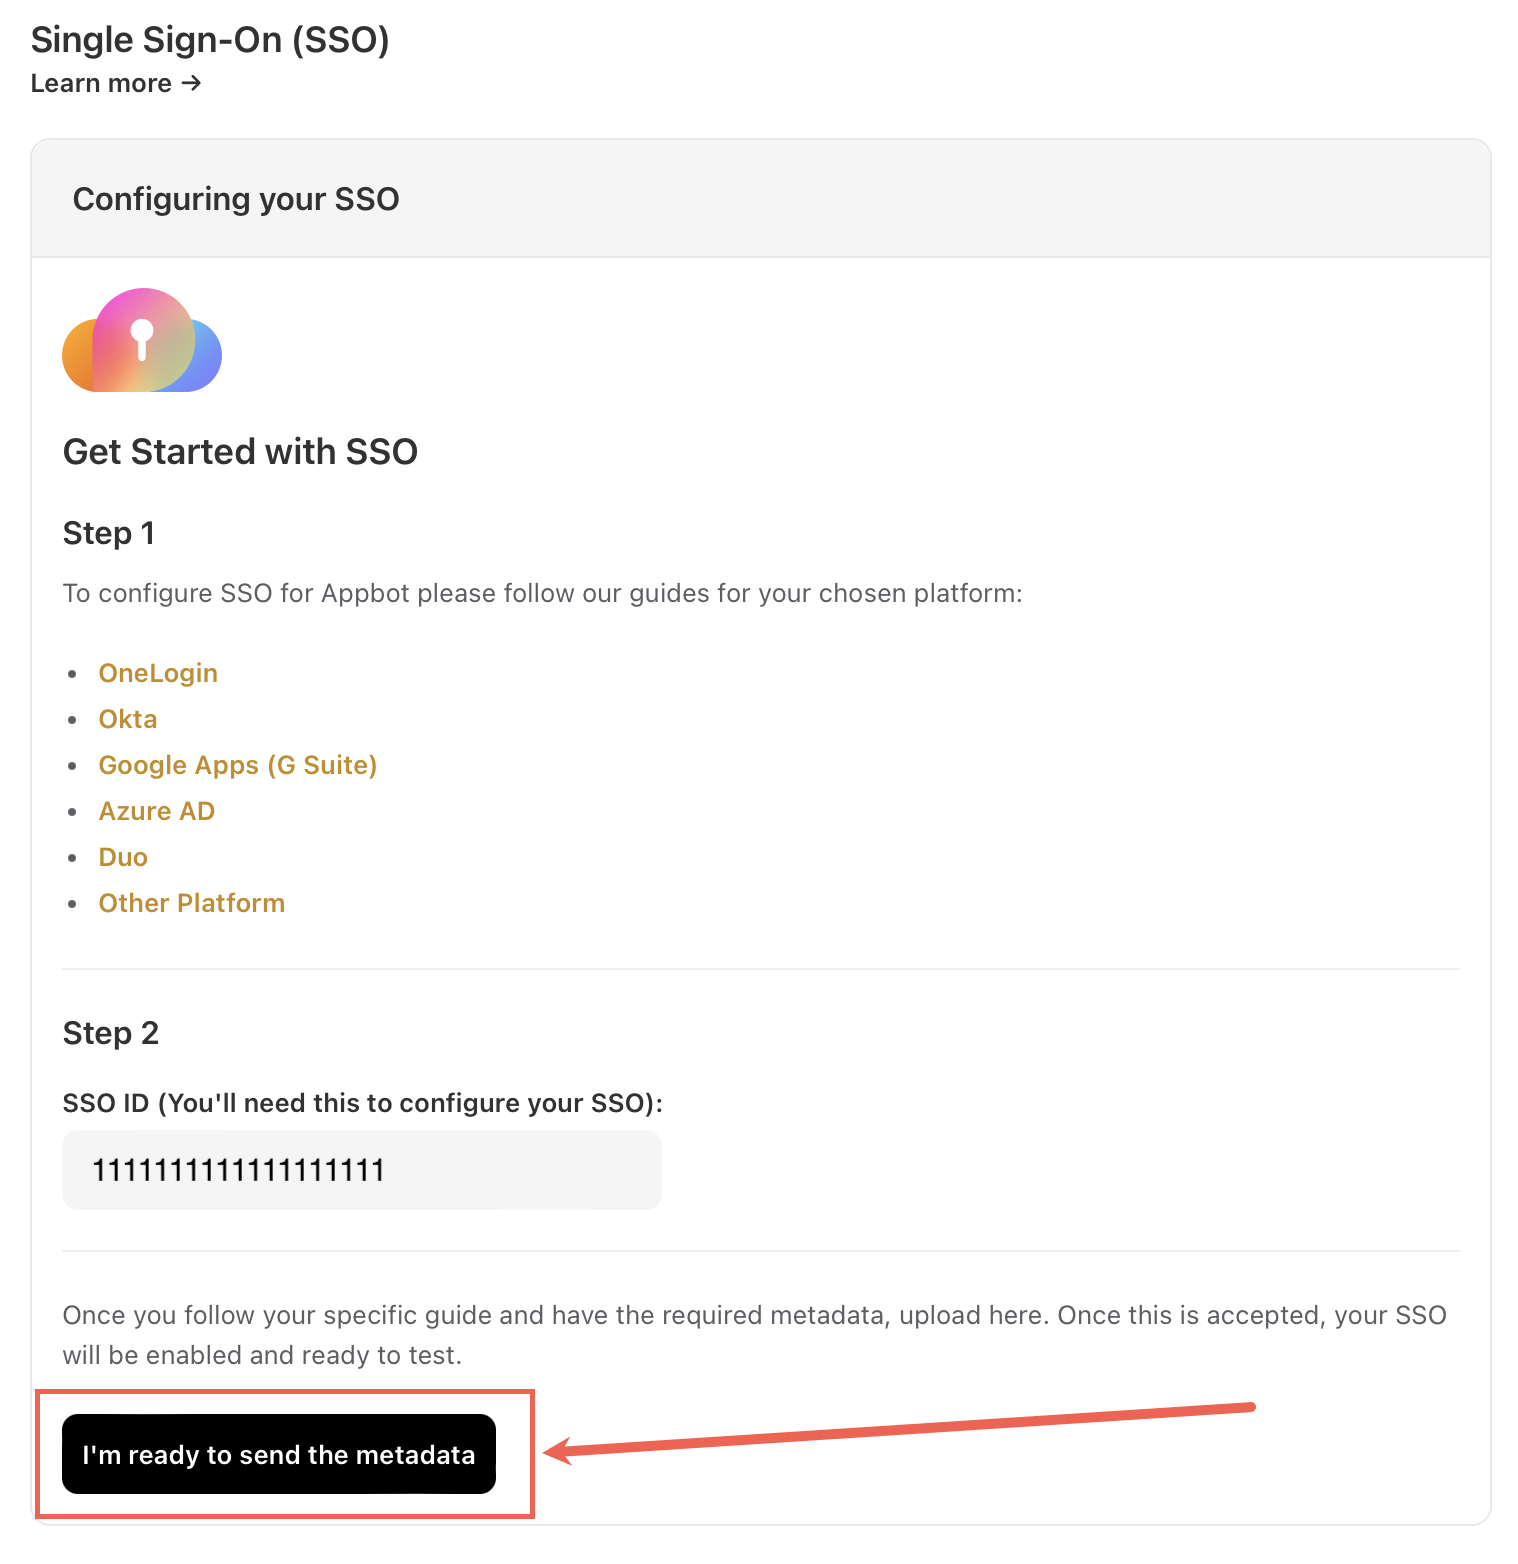
Head to the Appbot SSO page and copy your Appbot SSO ID.
How to set up Appbot as a Service Provider in Okta
- Log in to your Okta Organization as a user with administrative privileges.
- Click on the blue “Admin” button
- Click on the “Add Applications” shortcut
- Click on the green “Create New App” button
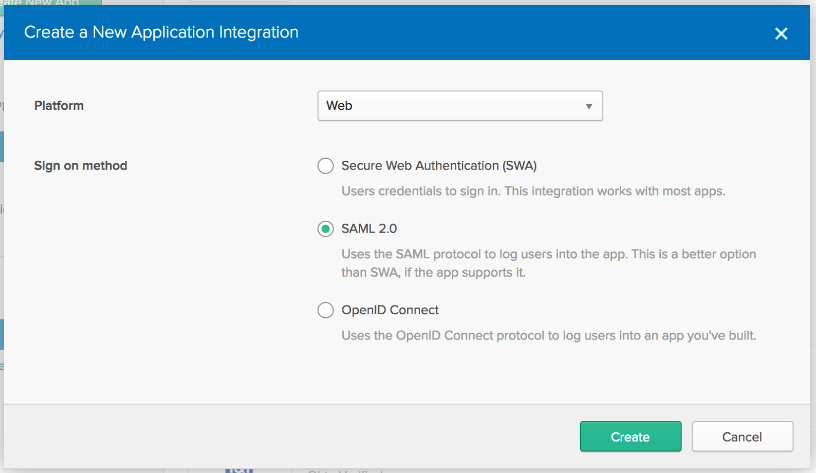
- In the dialog that opens, select the “SAML 2.0” option, then click the green “Create” button.

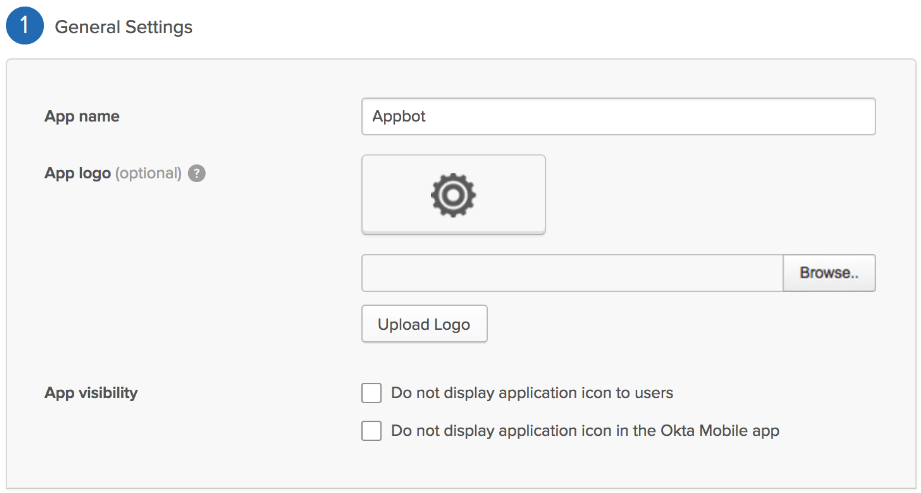
- In Step 1 “General Settings”, enter “Appbot” in the “App name” field, then click the green “Next” button.

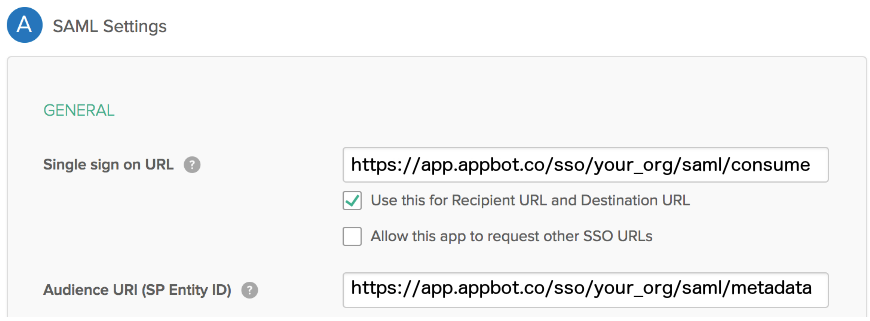
- In Step 2 “Configure SAML,” section A “SAML Settings”, paste the URL below into the “Single sign-on URL” (replacing “your_org” with the Appbot SSO ID):
https://app.appbot.co/sso/your_org/saml/consume - and the following into the “Audience URI (SP Entity ID)” field (replacing “your_org” with the Appbot SSO ID. The org ID should be alphanumeric characters only.):
https://app.appbot.co/sso/your_org/saml/metadata
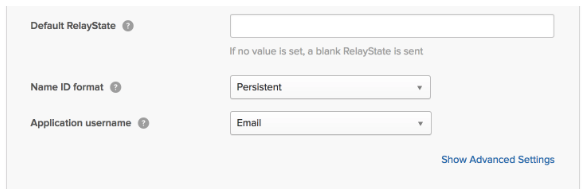
- Configure the other attributes as shown in this screenshot;
- Default RelayState: leave blank
- Name ID format: Persistent
- Application username: Email

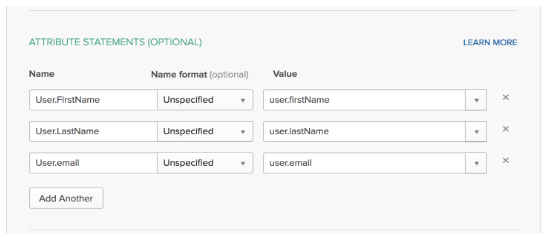
- In the “Attribute Statements” section, add three attribute statements (with the exact capitalizations shown)
- “User.FirstName” set to “user.firstName”
- “User.LastName” set to “user.lastName”
- “User.email” set to “user.email”

- Click Next to continue.
- In Step 3 “Feedback”, select “I’m an Okta customer adding an internal app”, then click Finish on this single sign-on solutions.
- Navigate to the “Sign On” section of your newly created Appbot single sign-on application. Copy the “Identity Provider metadata” link, it should be similar to https://yourorg.okta.com/app/xxx/sso/saml/metadata.
- Head back to the Appbot SSO page and select “I’m ready to send the metadata” button.

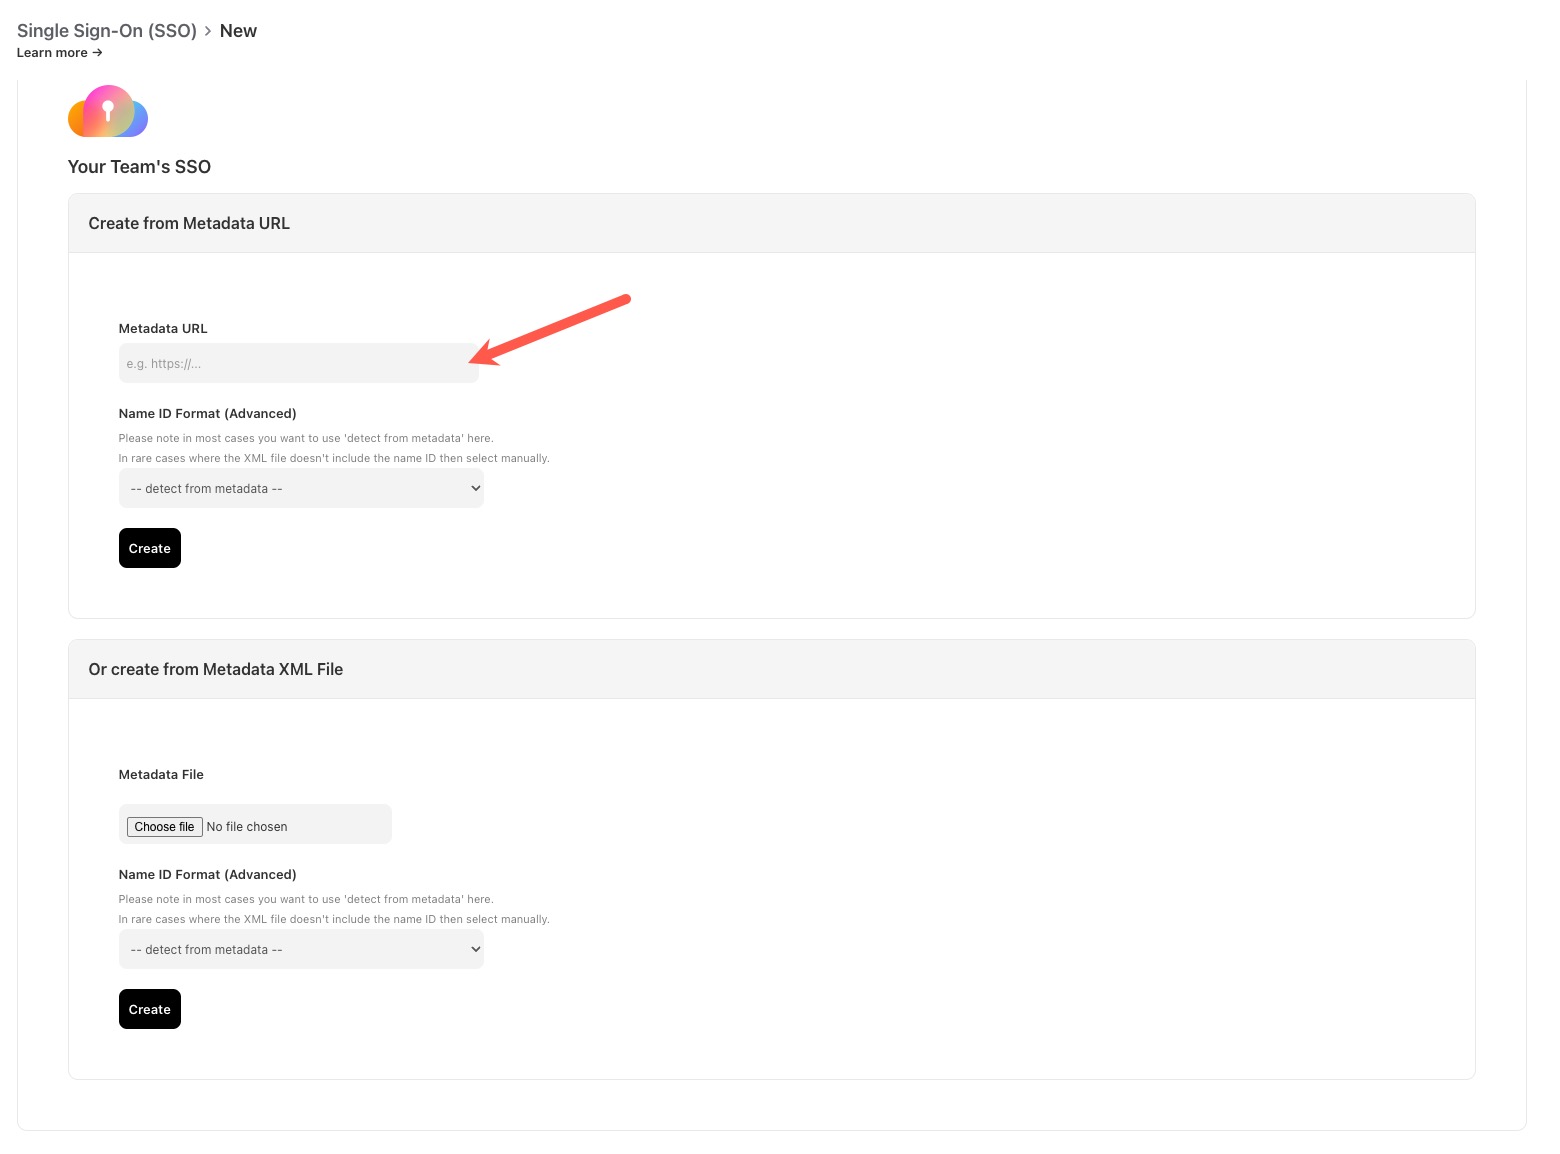
- Add the metadata URL provided by Okta, leave the Name ID Format as “– detect from metadata–, then the “Create” button.

- A success message will show at the top of the page and you are now all set to use SSO on the Appbot account.
If you need any further assistance with Okta single sign-on or any of Appbot’s other single sign-on solutions, don’t hesitate to contact us with any questions or check out our FAQ section here.