OneLogin is a SAML 2.0 compatible Single Sign-On (SSO) tool that can be integrated with Appbot.
Before you configure your OneLogin SSO integration
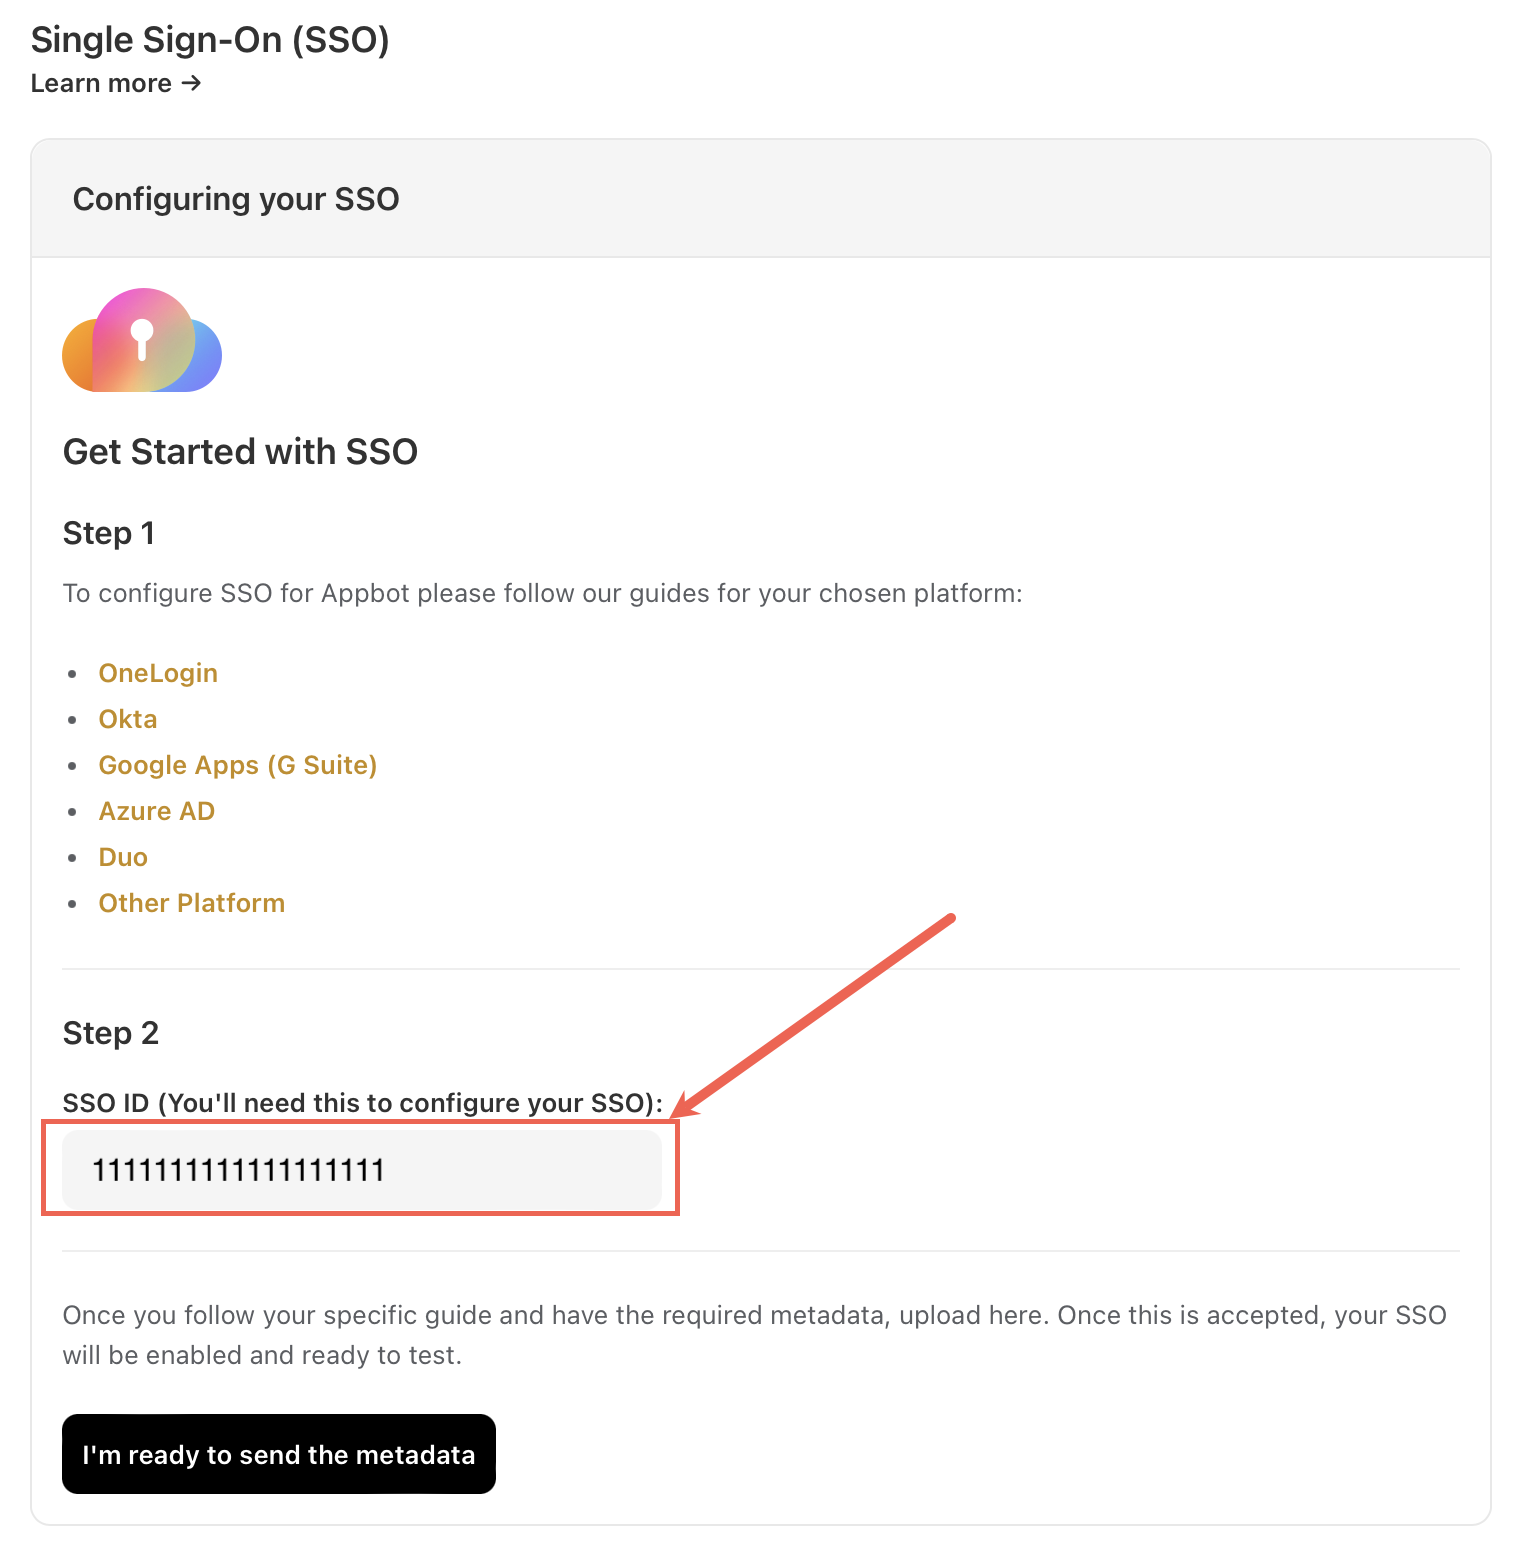
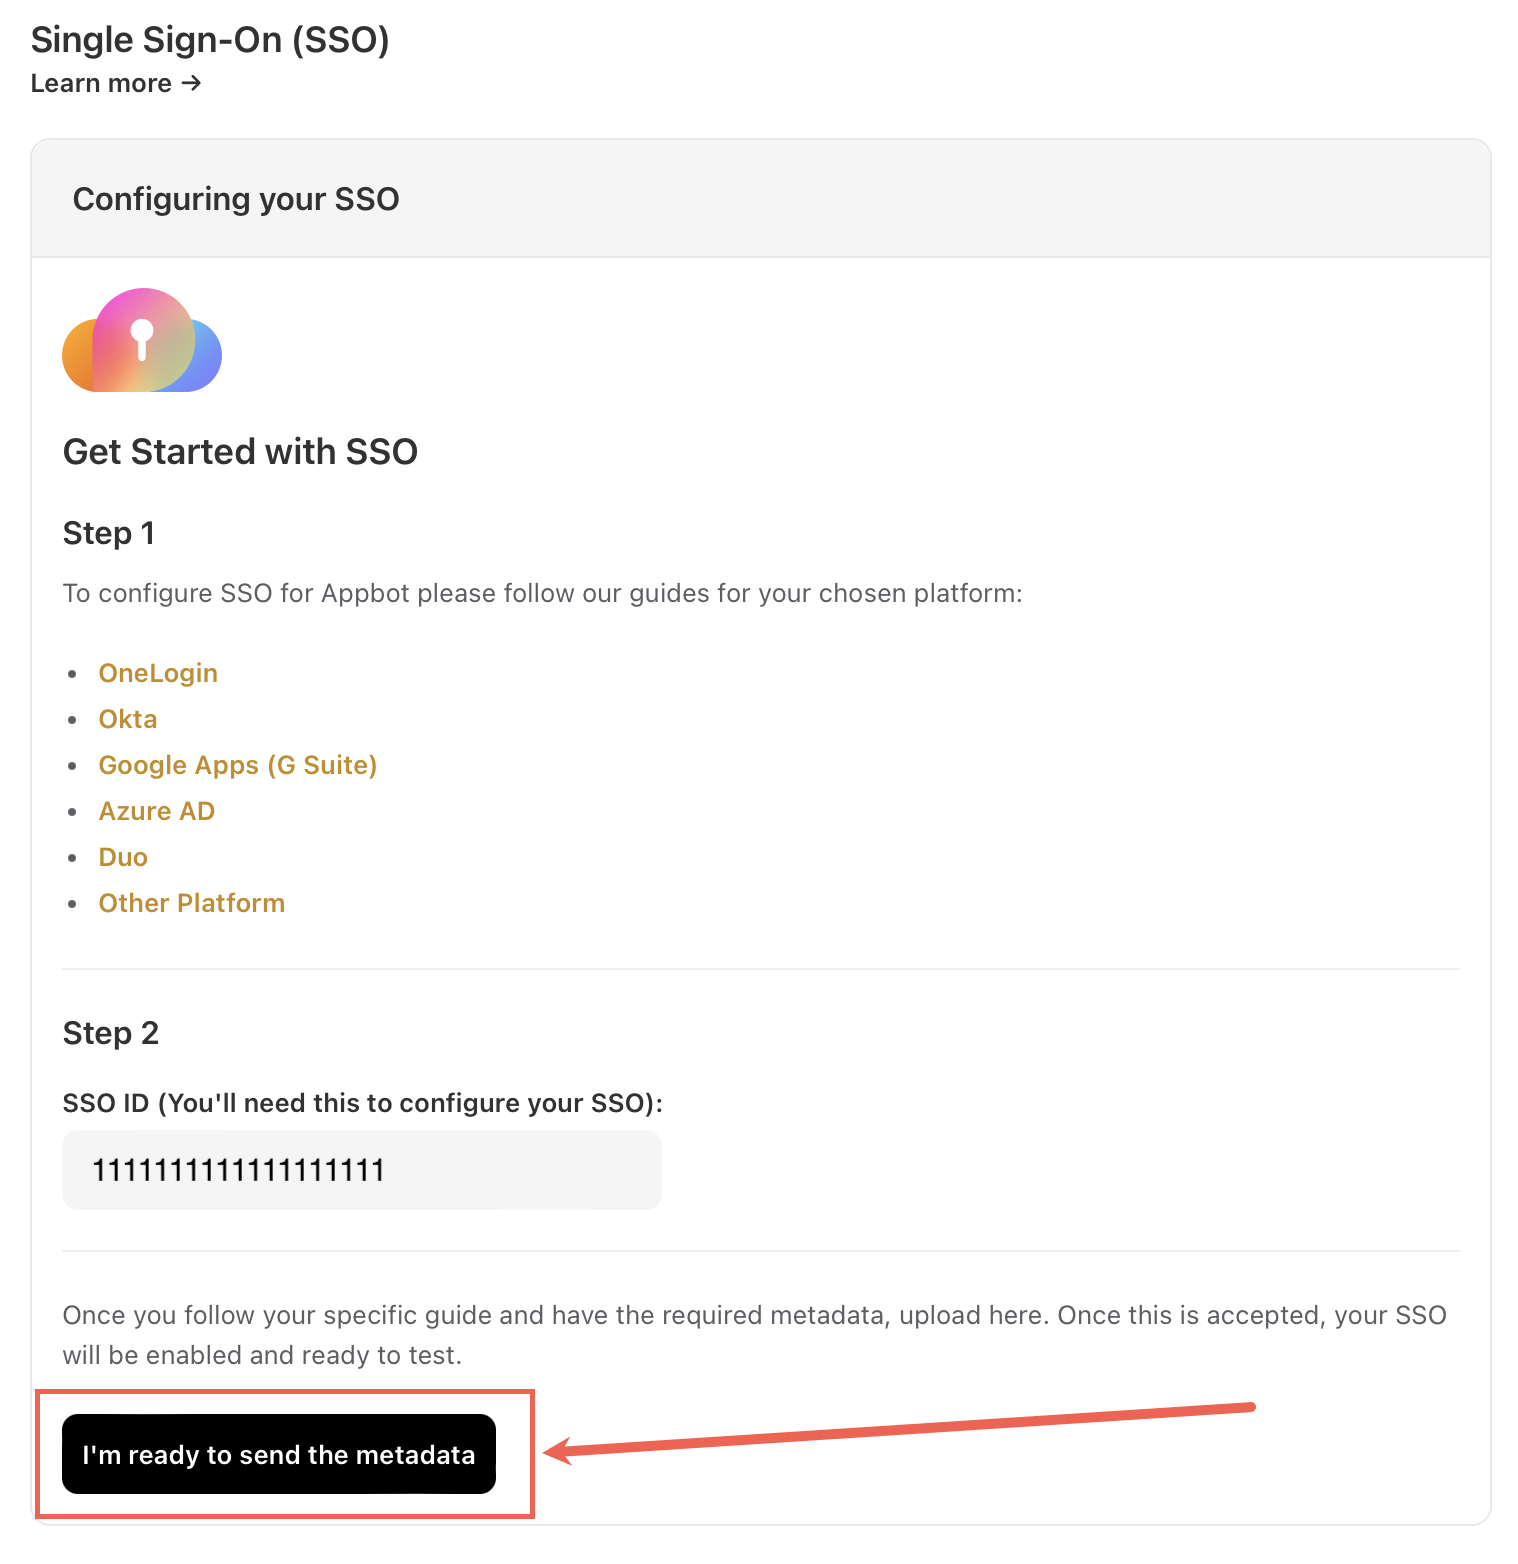
Head to the Appbot SSO page and copy your Appbot SSO ID.
Configure an Appbot SSO Integration with the OneLogin
- Login to your OneLogin administrator panel with your SSO login details and choose the Apps tab, and choose “App App” to configure Appbot SSO Login.

- In the resulting screen, search for “Appbot”, then select it.

- Choose the “Save” button to save the Application.

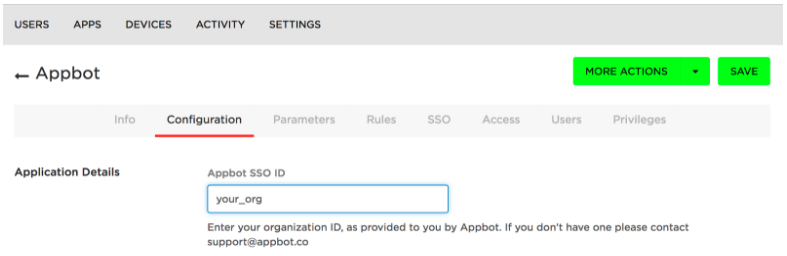
- In the resulting screen, select the “Configuration” tab, and enter the Appbot SSO ID.

- Choose the “Save” button.
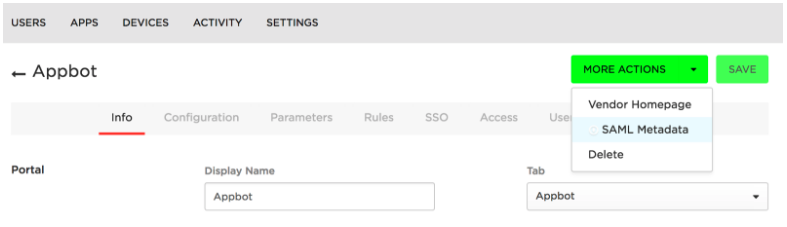
- On the resulting page, under the “More Actions” button, choose “SAML Metadata”.

- A “onelogin_metadata_xxxxx.xml” file will be downloaded.
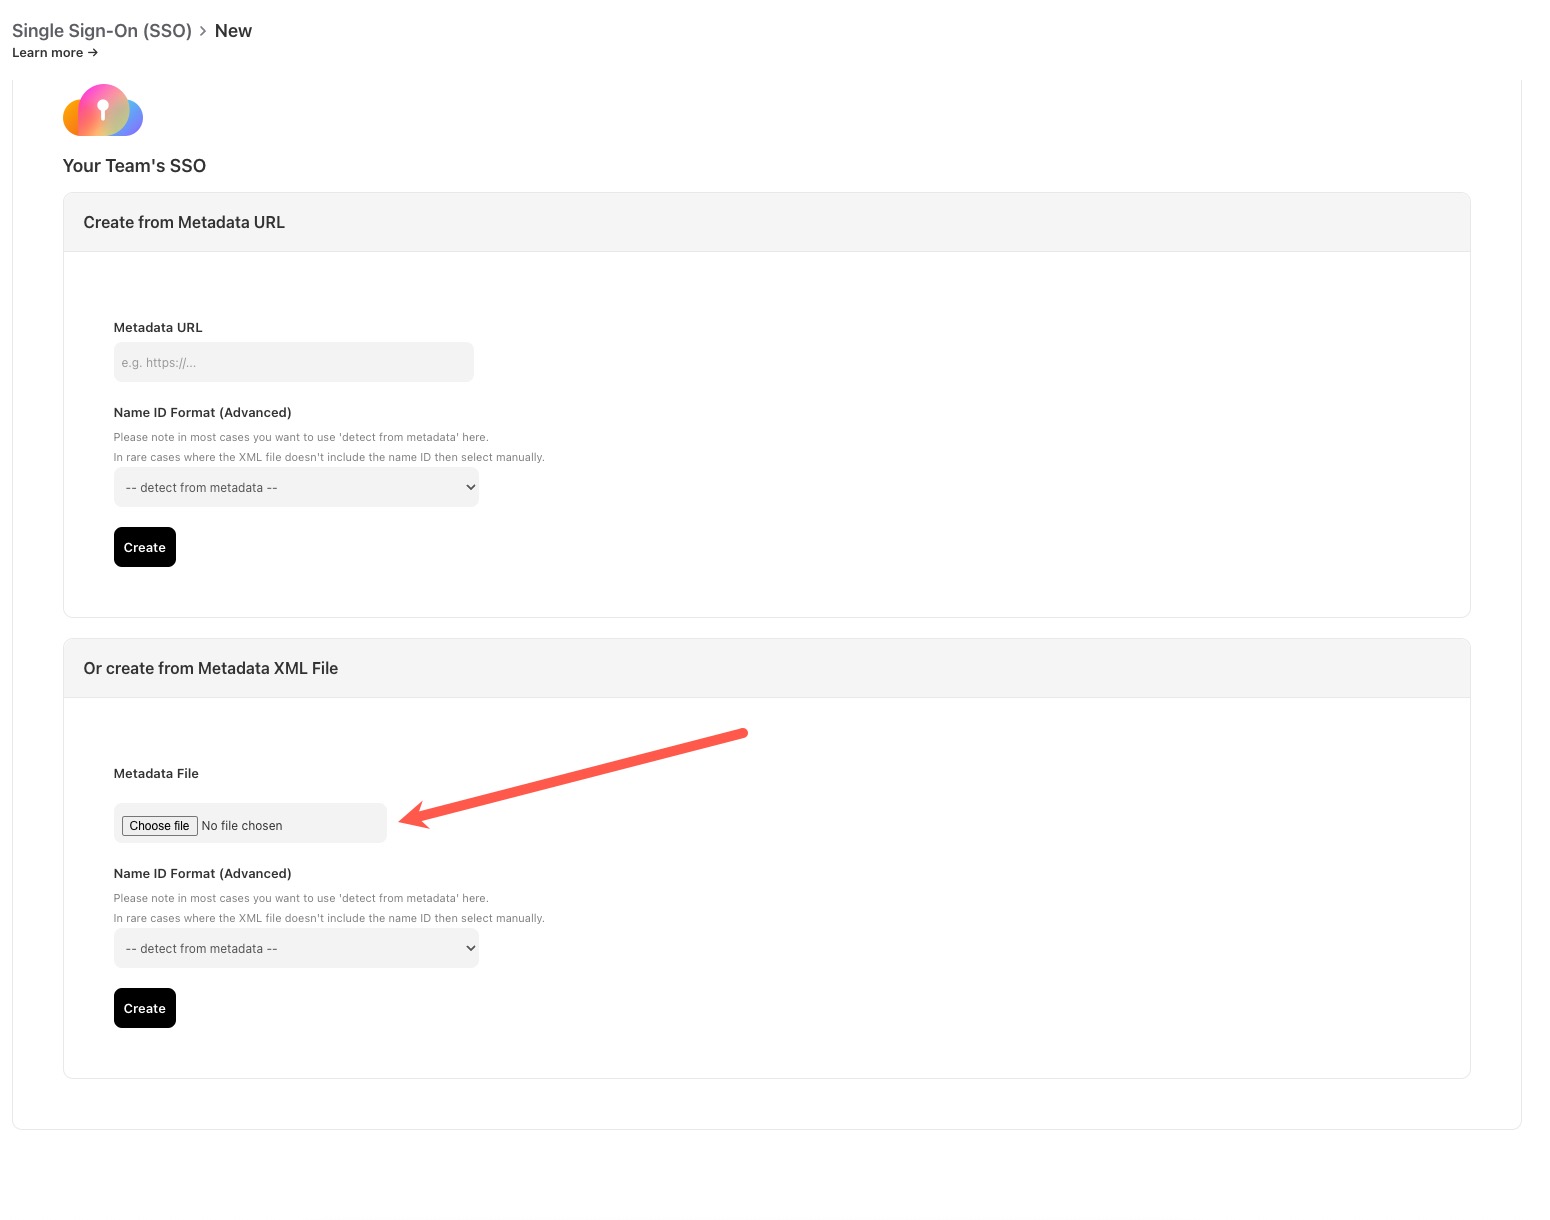
- Go back to the Appbot SSO page and choose the “I’m ready to send the metadata” button.

- Then upload the XML file from OneLogin, leave the Name ID Format as “– detect from metadata–, and hit the “Create” button. Once successfully uploaded a success message will appear at the top of the page.

- All done! You have now set up SSO for Appbot.


If you need any further assistance on configuring the Appbot SSO Login, don’t hesitate to contact us with any questions or check out our FAQ section here.