You can use the Appbot Zapier integration to send your app reviews to Google Sheets and thousands of other services, automatically.
Using Zapier to send your reviews to different tools can save your team hours every week. The Appbot Zapier integration can replace manual data entry or export and import of your reviews.
Popular uses include:
- Sending reviews into a Zapier supported CRM or chat tool Appbot does not integrate with directly
- Automatically collecting reviews into a Zapier supported database like MySQL, PostgreSQL etc.
- Pushing reviews into any of the other services Zapier integrates with, like Google Sheets.
In this guide we will send app reviews to Google Sheets, as an example. At the end of the guide you’ll see what your Appbot data looks like in Google Sheets. Storing your app reviews in a Google Sheet can be useful in lots of ways. You can then use the Google Sheet to:
- Produce your own multi-series/multi-app charts on reviews
- Connect to third-party tools eg. business intelligence platforms
- create an aggregate list of reviews from multiple app store platforms
- and lots more – get creative!
How to send app reviews to Google Sheets using Zapier
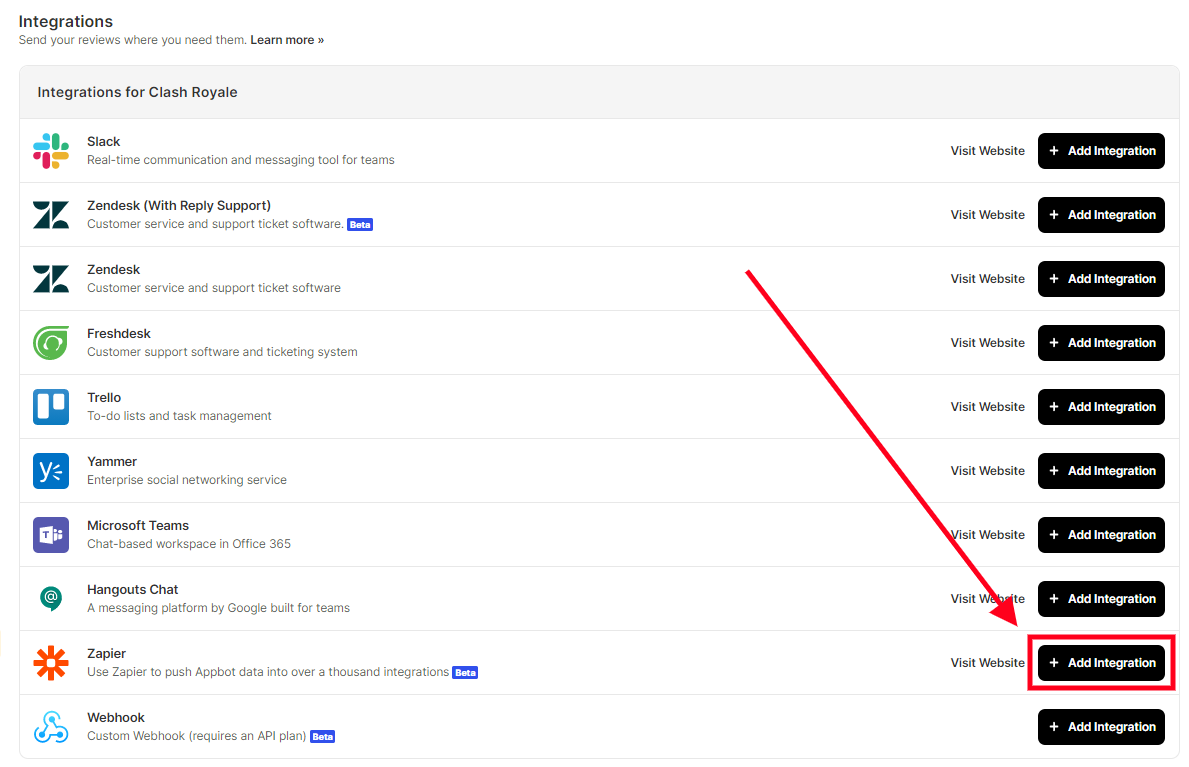
- Navigate to the Integrations section for an app, and choose the “Add Integration” button.

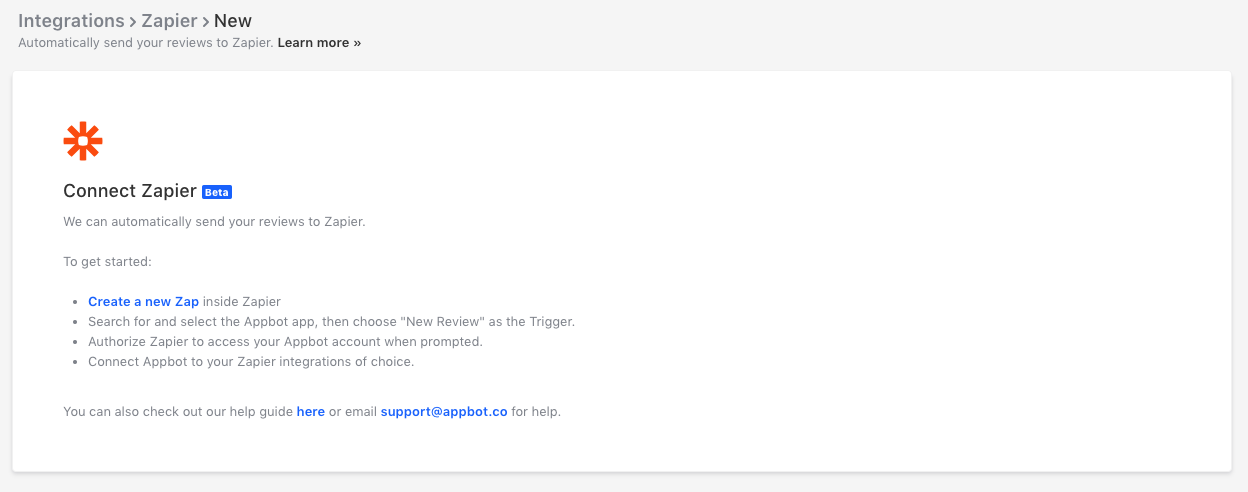
- Choose the “Create a new Zap” link to be taken to the Zapier editor.

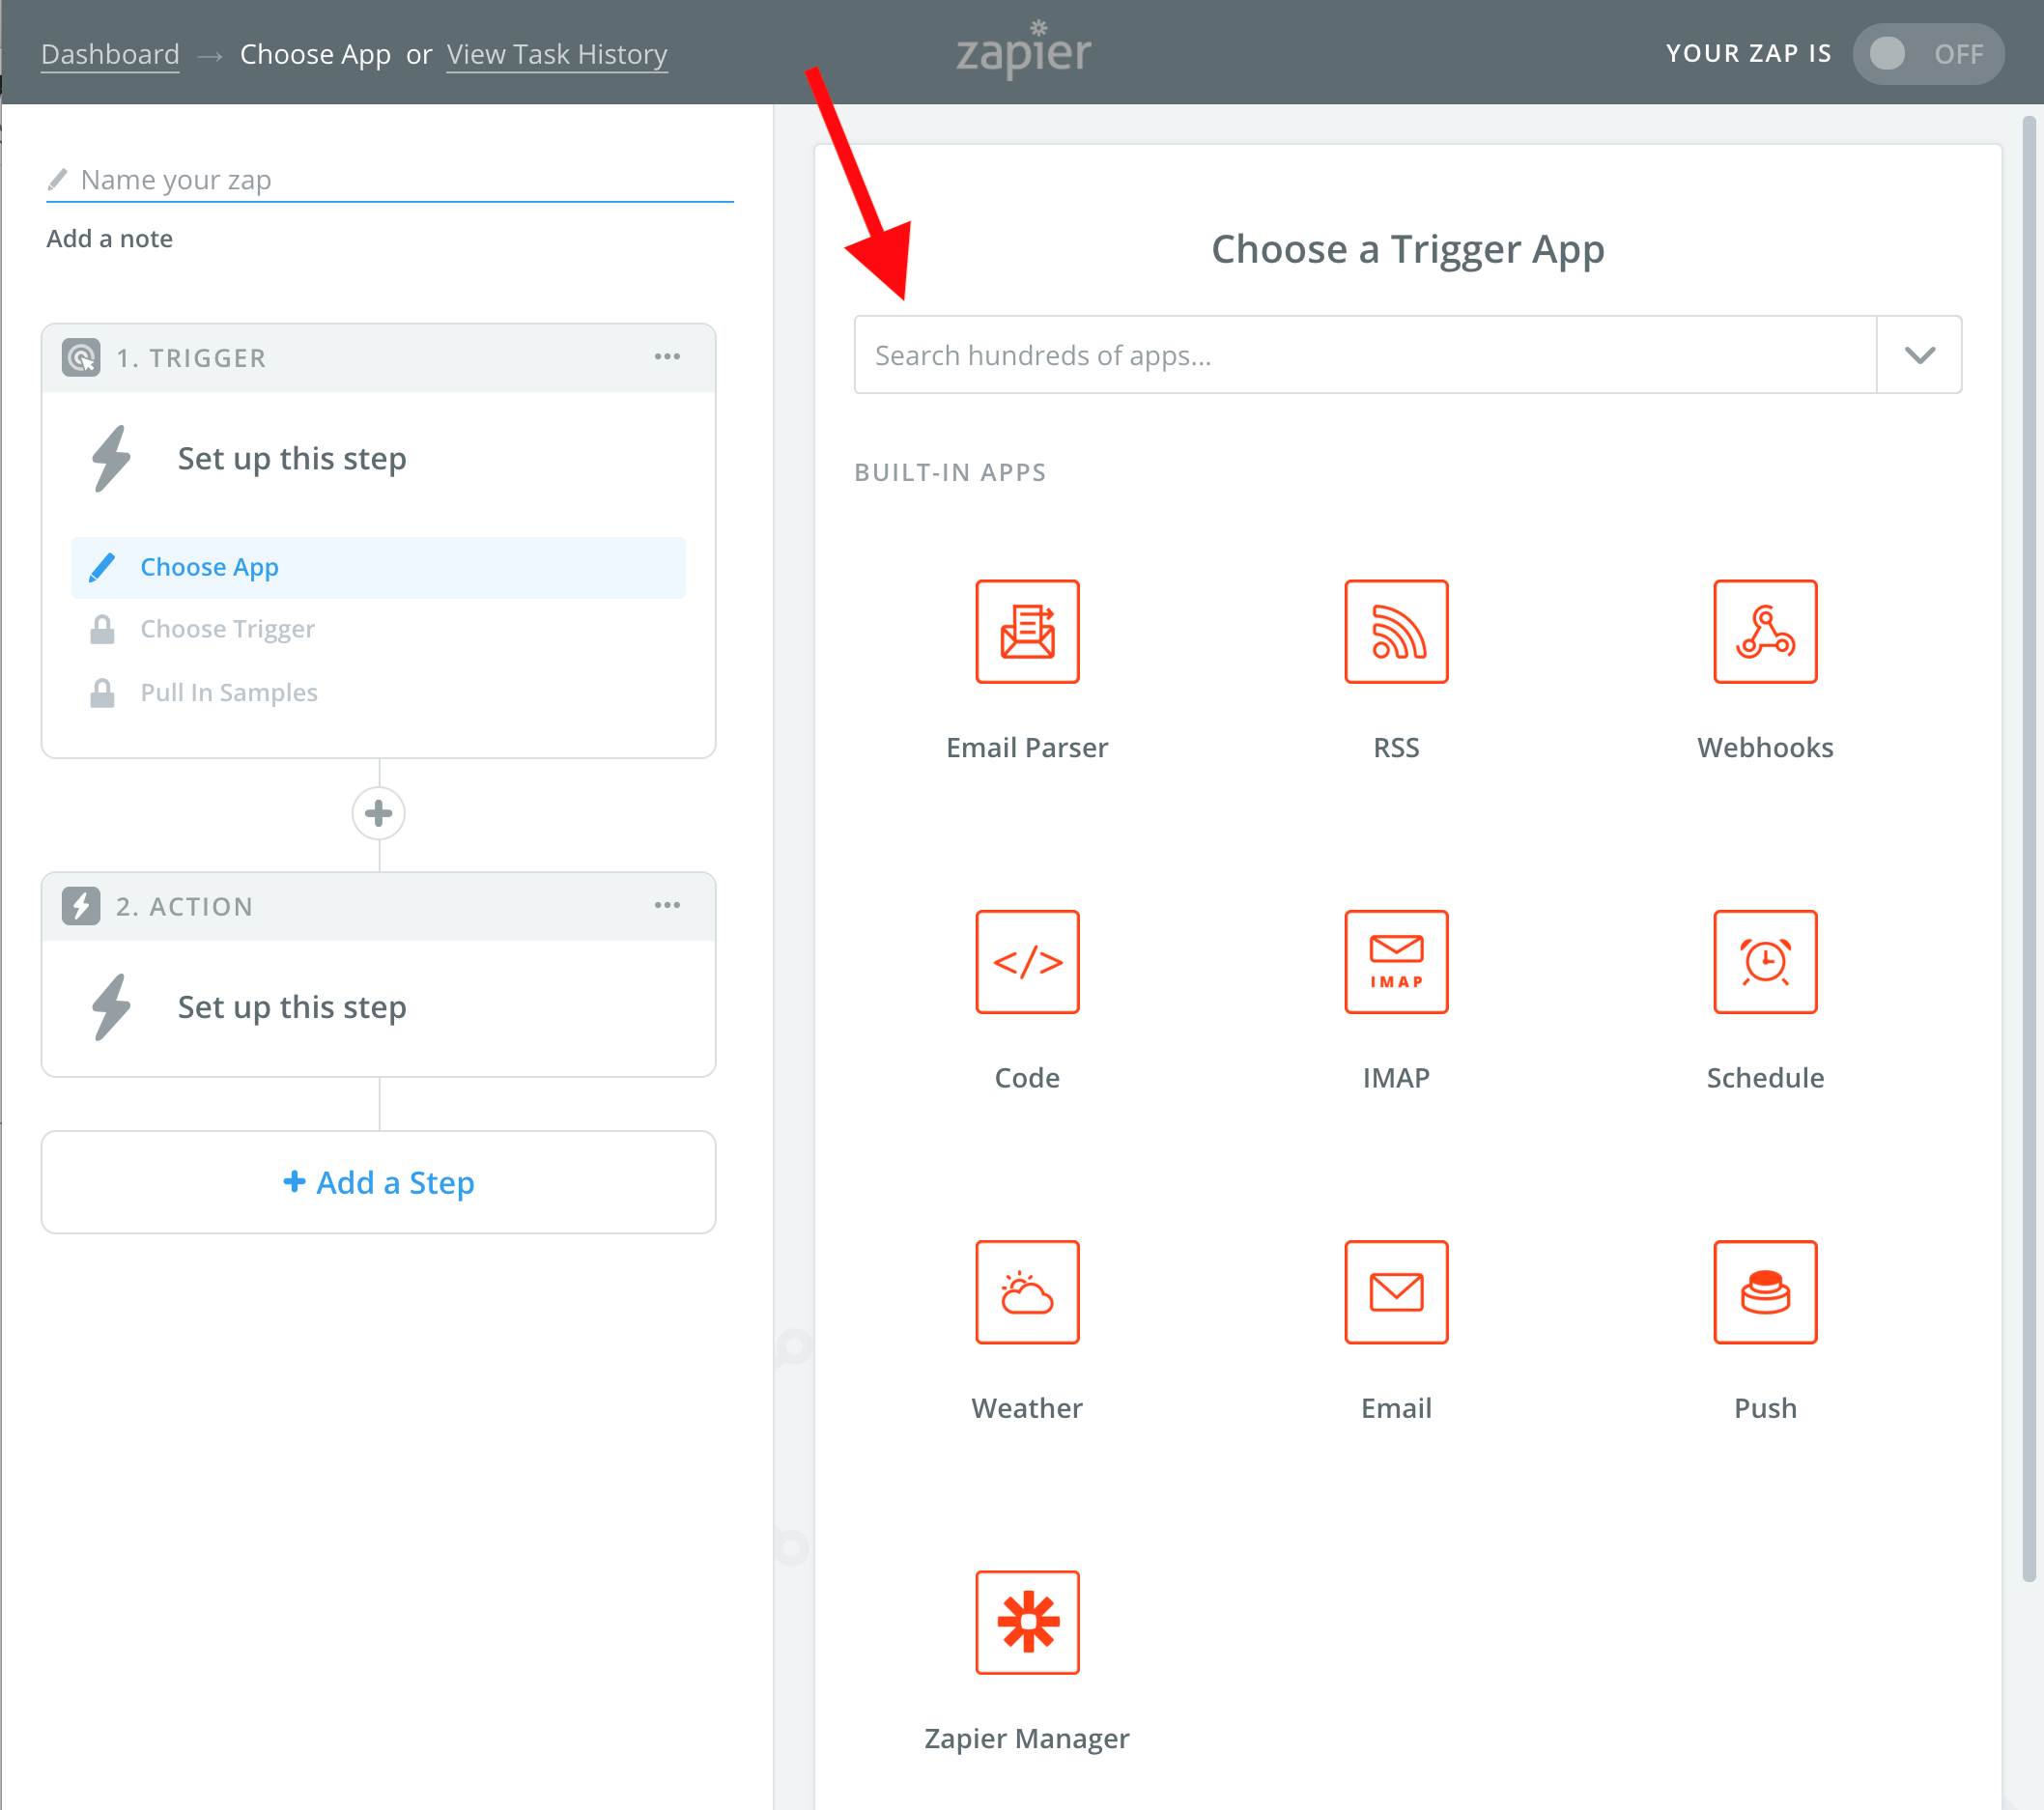
- In the list of Trigger Apps shown, search for Appbot.

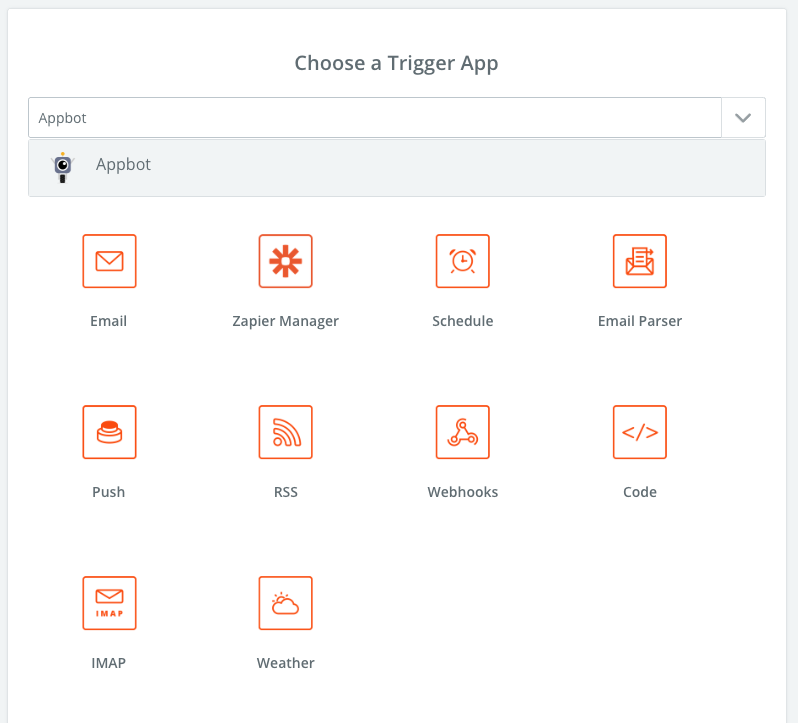
- Choose Appbot from the list.

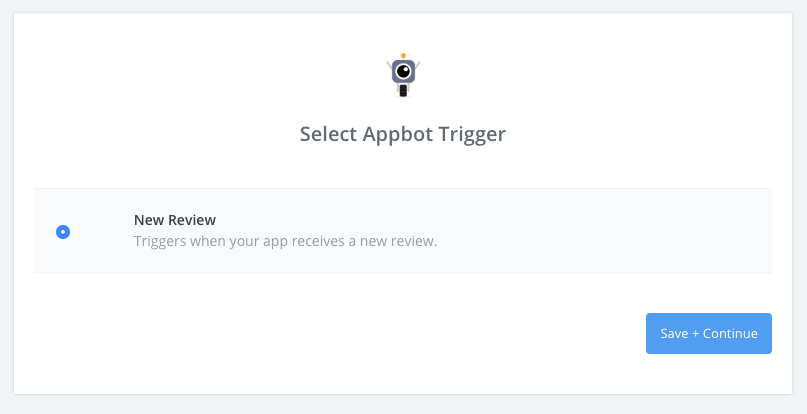
- From the Appbot trigger list, choose “New Review”.

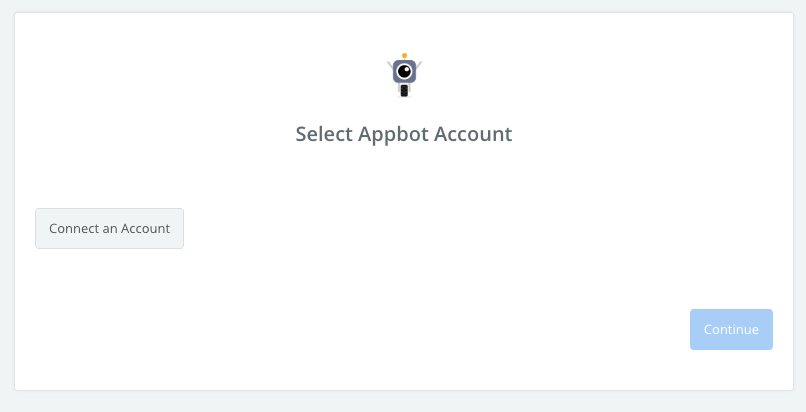
- You will be asked to connect your Appbot account. Click the “Connect an Account” button to proceed.

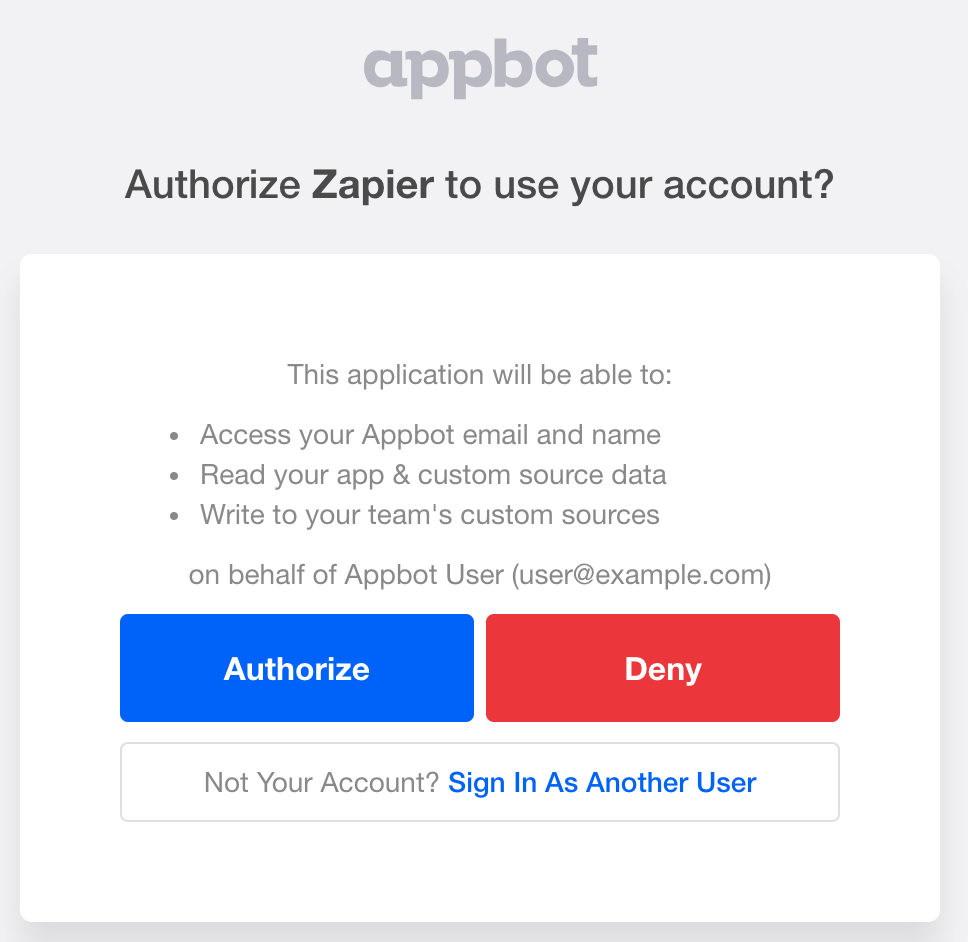
- In the popup, if you are not signed into Appbot, you will be asked to sign in. Once you are signed in you will be prompted to authorize Zapier to access your account data. If your account is not the one listed, click the “Sign In As Another User” button and sign into the correct account.

- In the original window, Zapier should now indicate you have successfully linked your Appbot account. Choose “Save + Continue”.

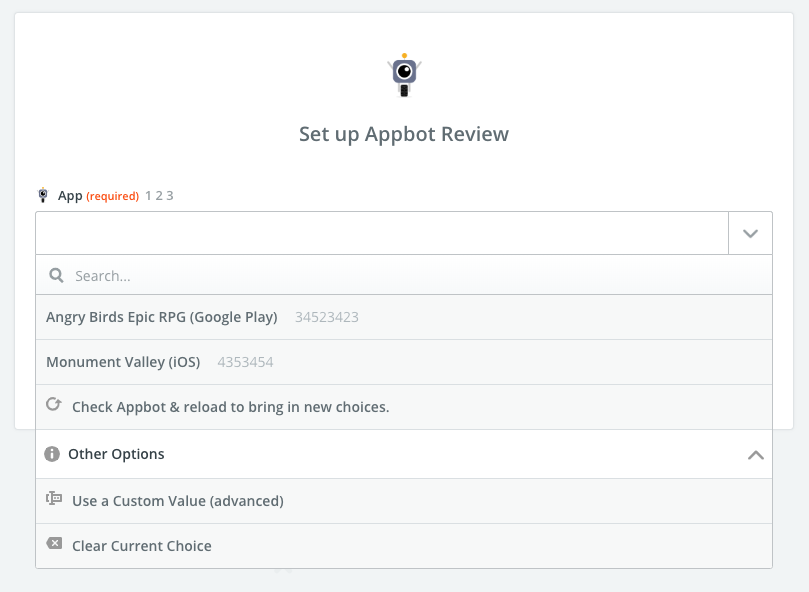
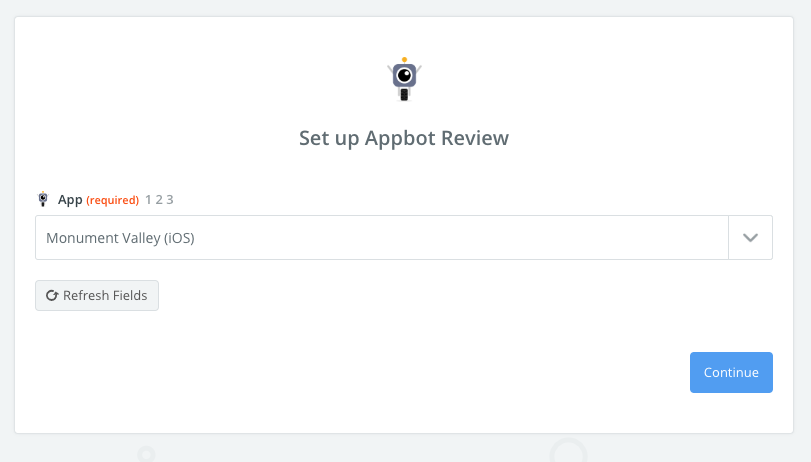
- You will now be prompted to select an app whose new reviews will be passed to the Zap. Click the dropdown button.

- A list of your supported apps will appear, please select the app you wish to use. If the app you want is not in the list, ensure you are tracking the app. To reload the list once you have tracked a new app, select “Check Appbot & reload to bring in new choices.”
- Once you have selected an app, choose “Continue”.

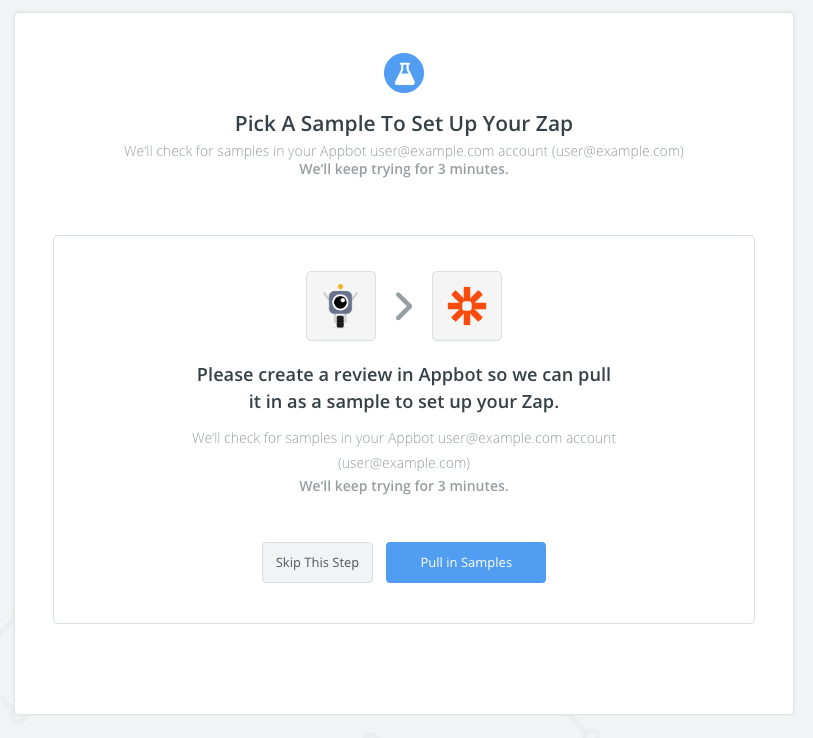
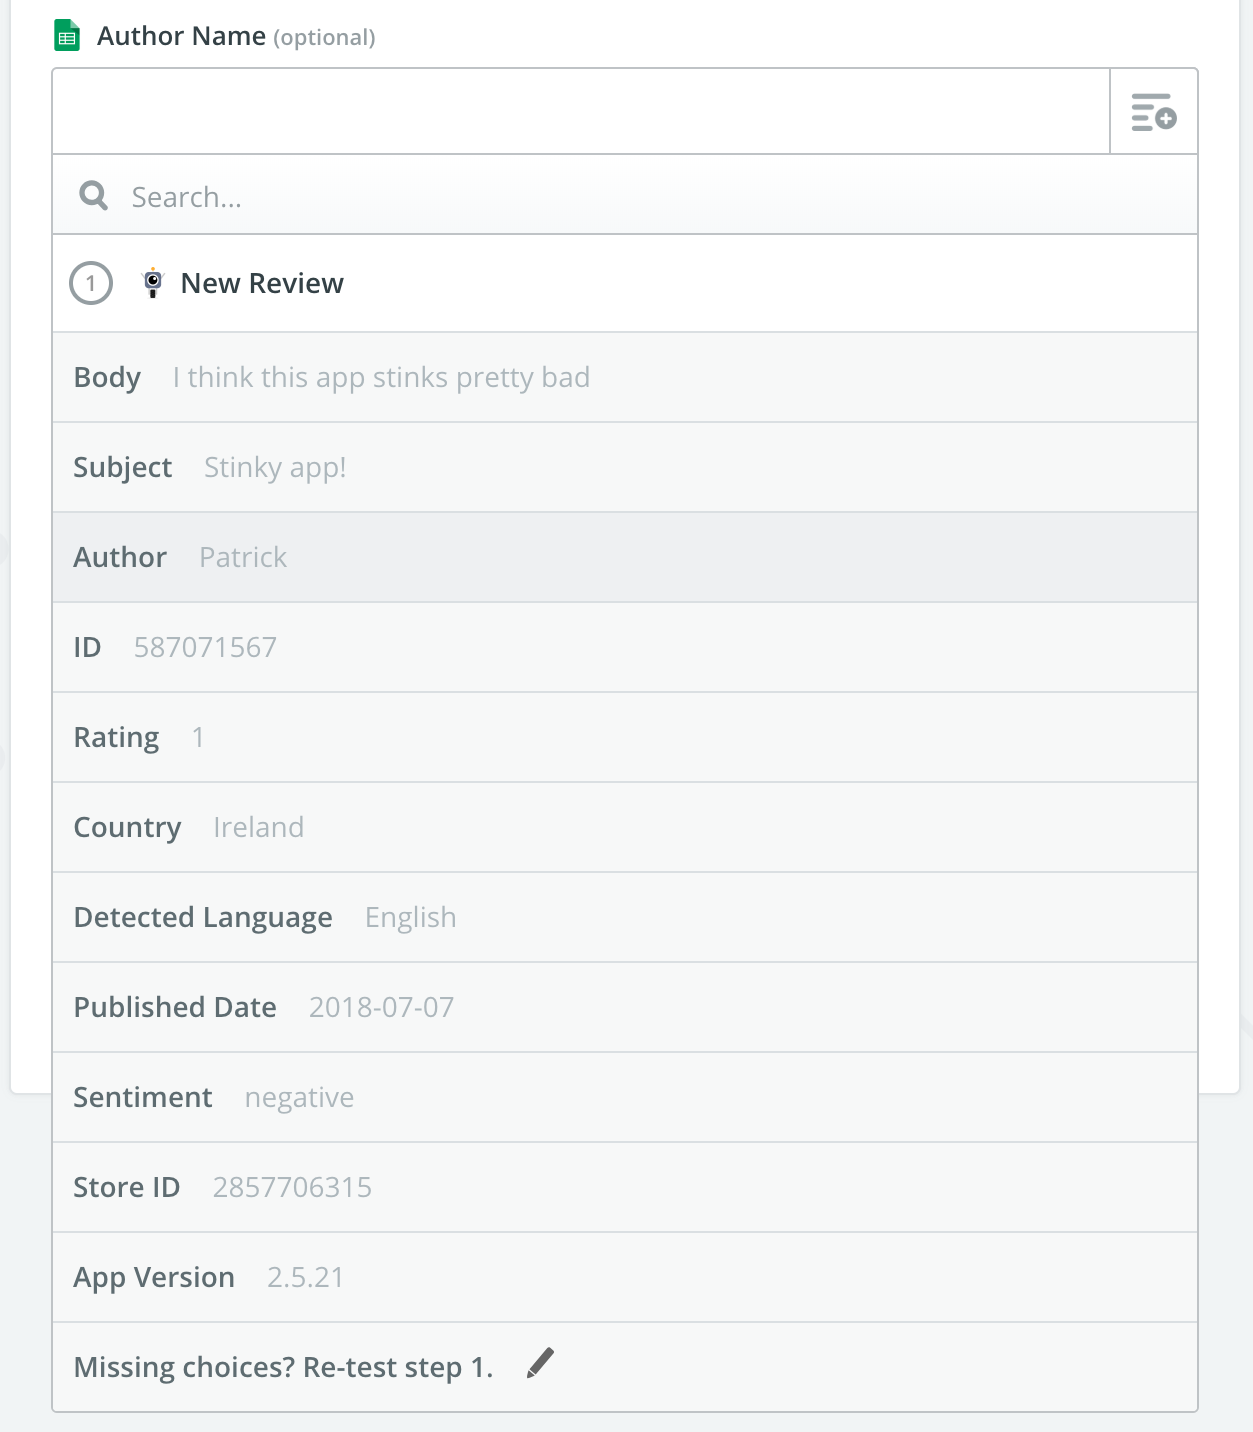
- Zapier will now fetch the most recently fetched review for your app to use as an example while configuring the Zap. Choose “Pull in Samples”. Note: You must have at least one review in the selected app to proceed.

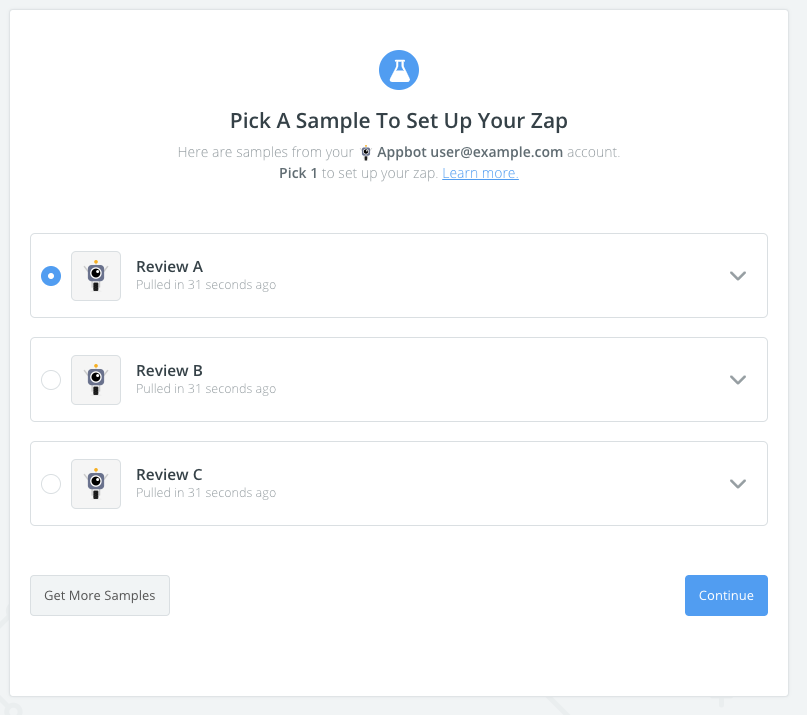
- If the test is successful, Zapier will show data from your app. You can view the format of the review data your Zap will have access to by expanding a review. Otherwise click select “Review A” and choose “Continue”.

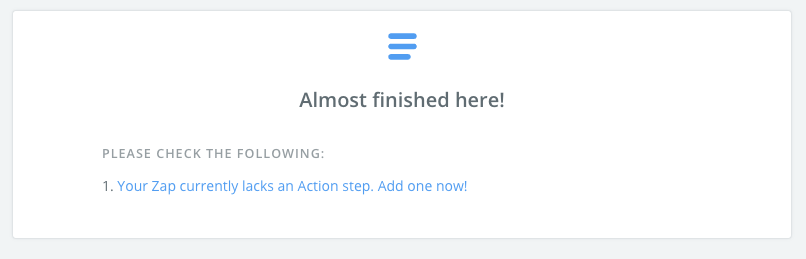
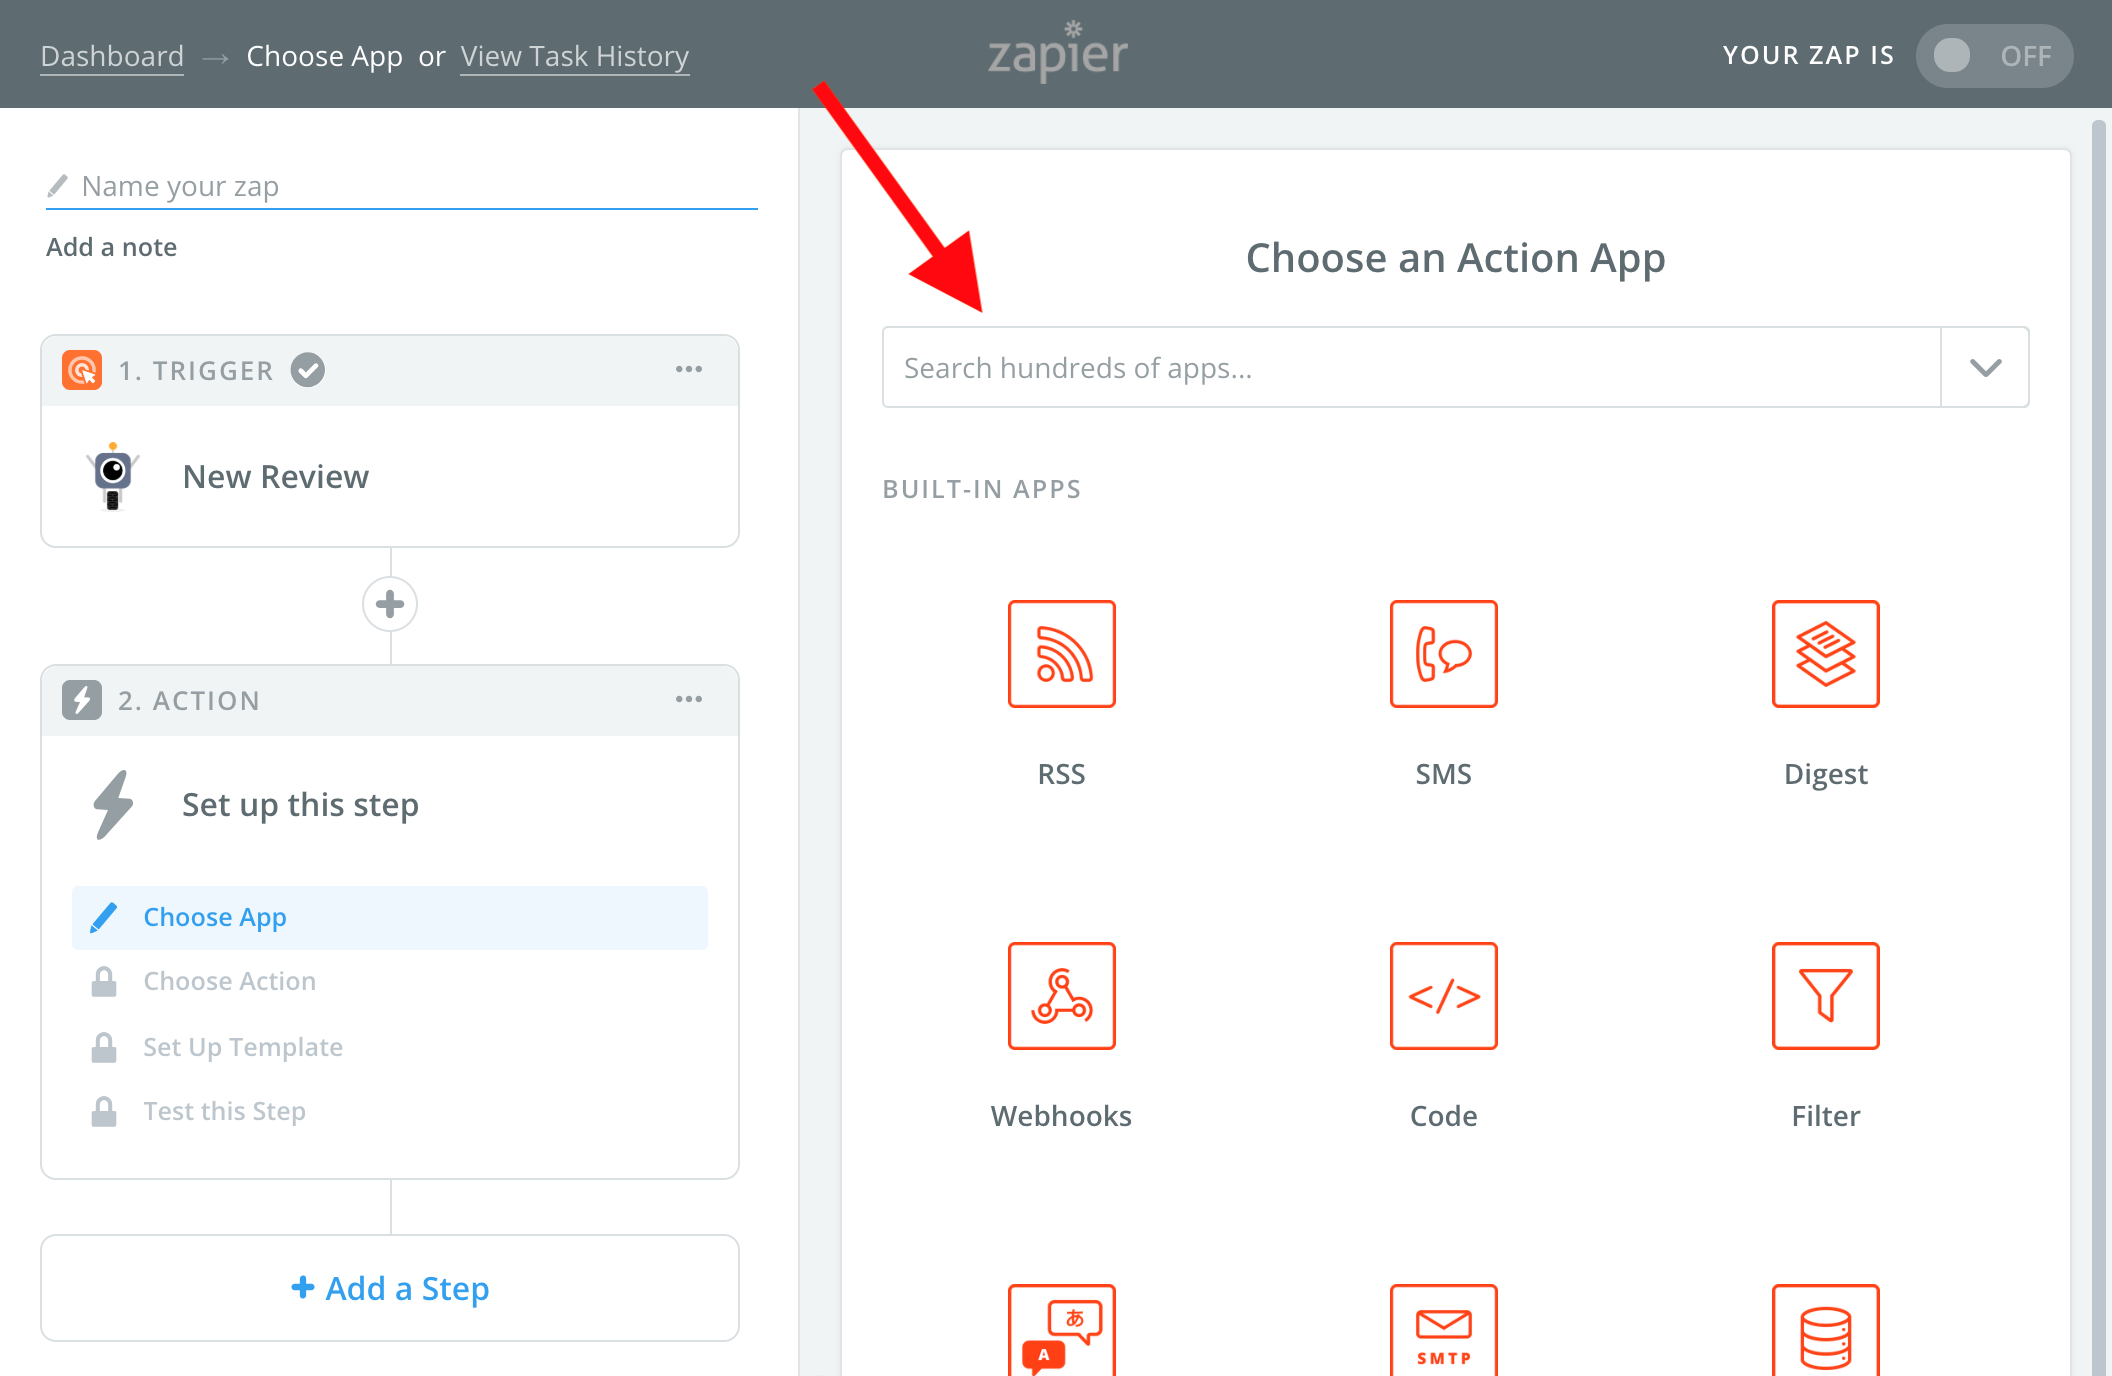
- You have set up the Trigger phase, now you must select a Zapier action. Click “Add one now!” to proceed.

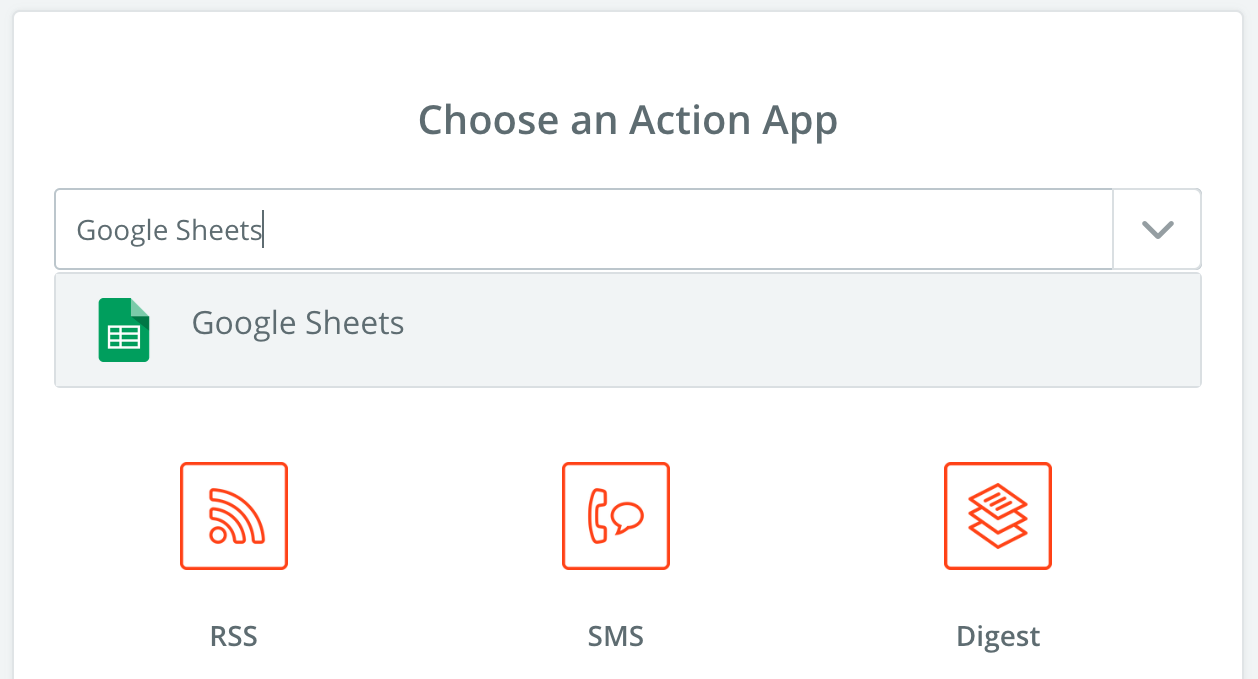
- Choose the action you wish to connect to your Appbot reviews. Any Zapier action is supported, but for the purposes of this guide we have chosen Google Sheets.


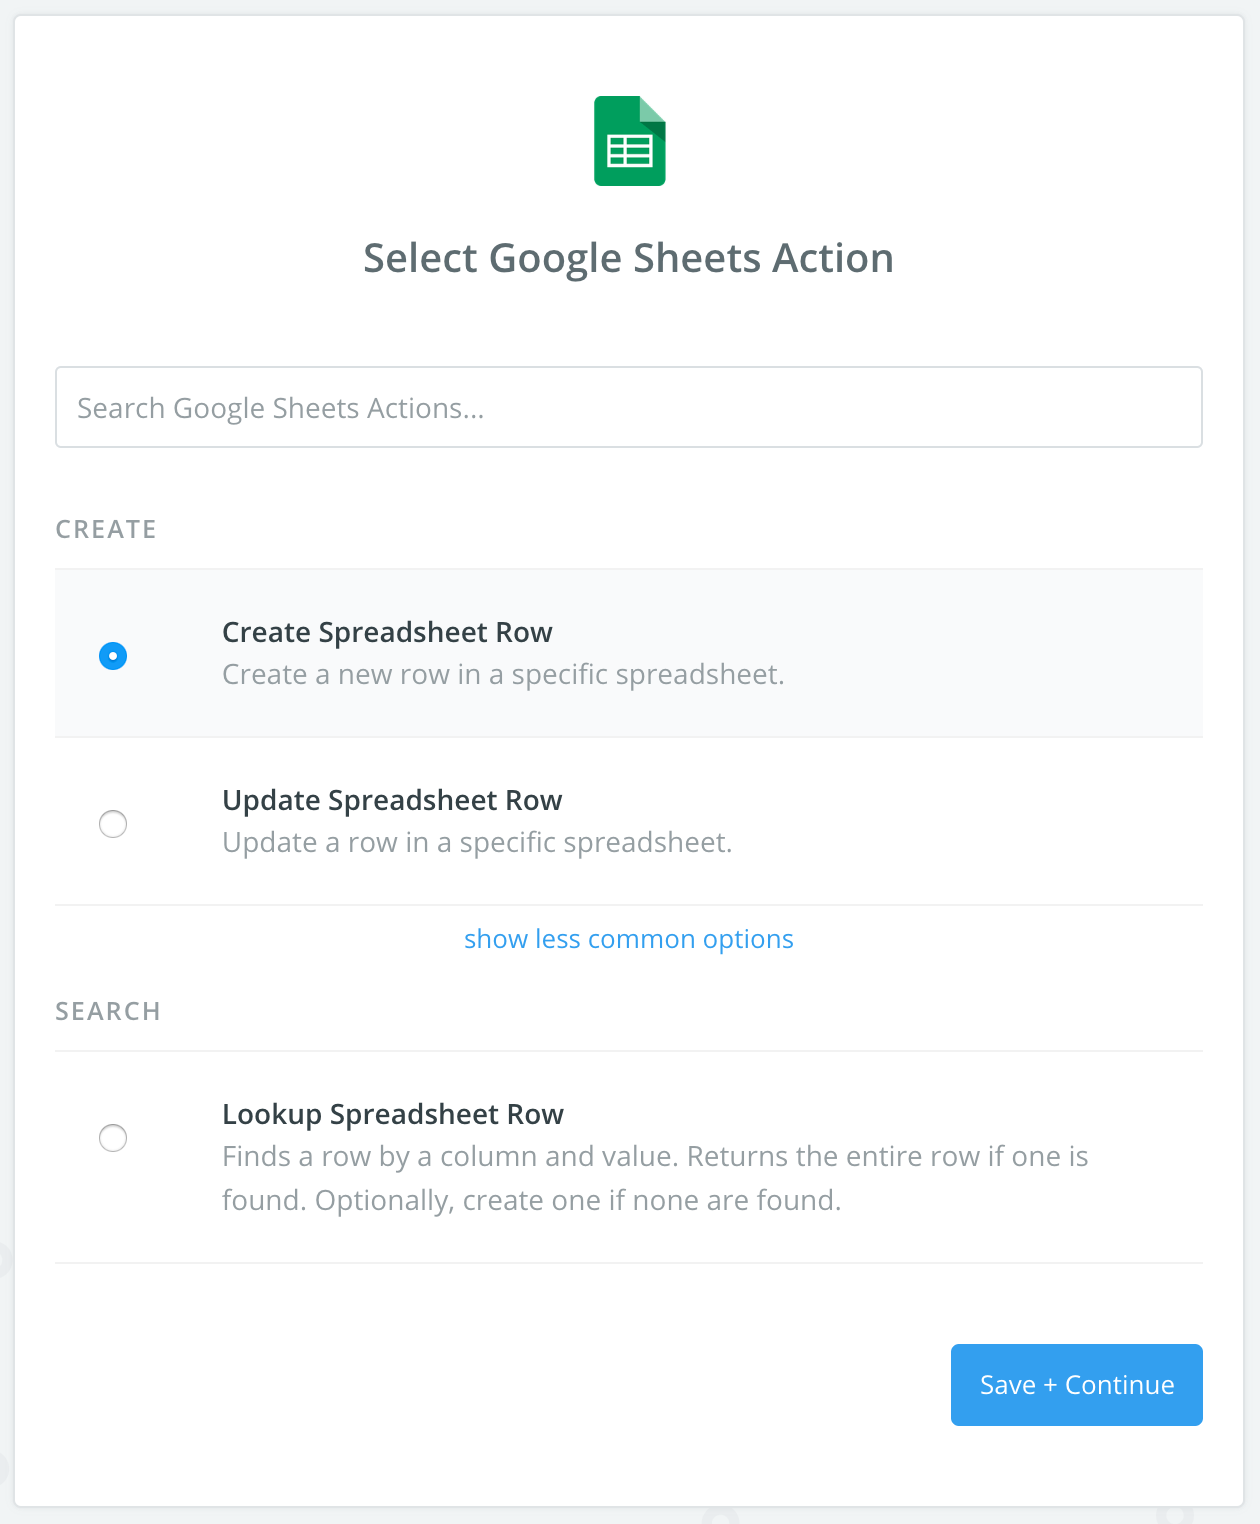
- Select the relevant trigger from your chosen Action App.

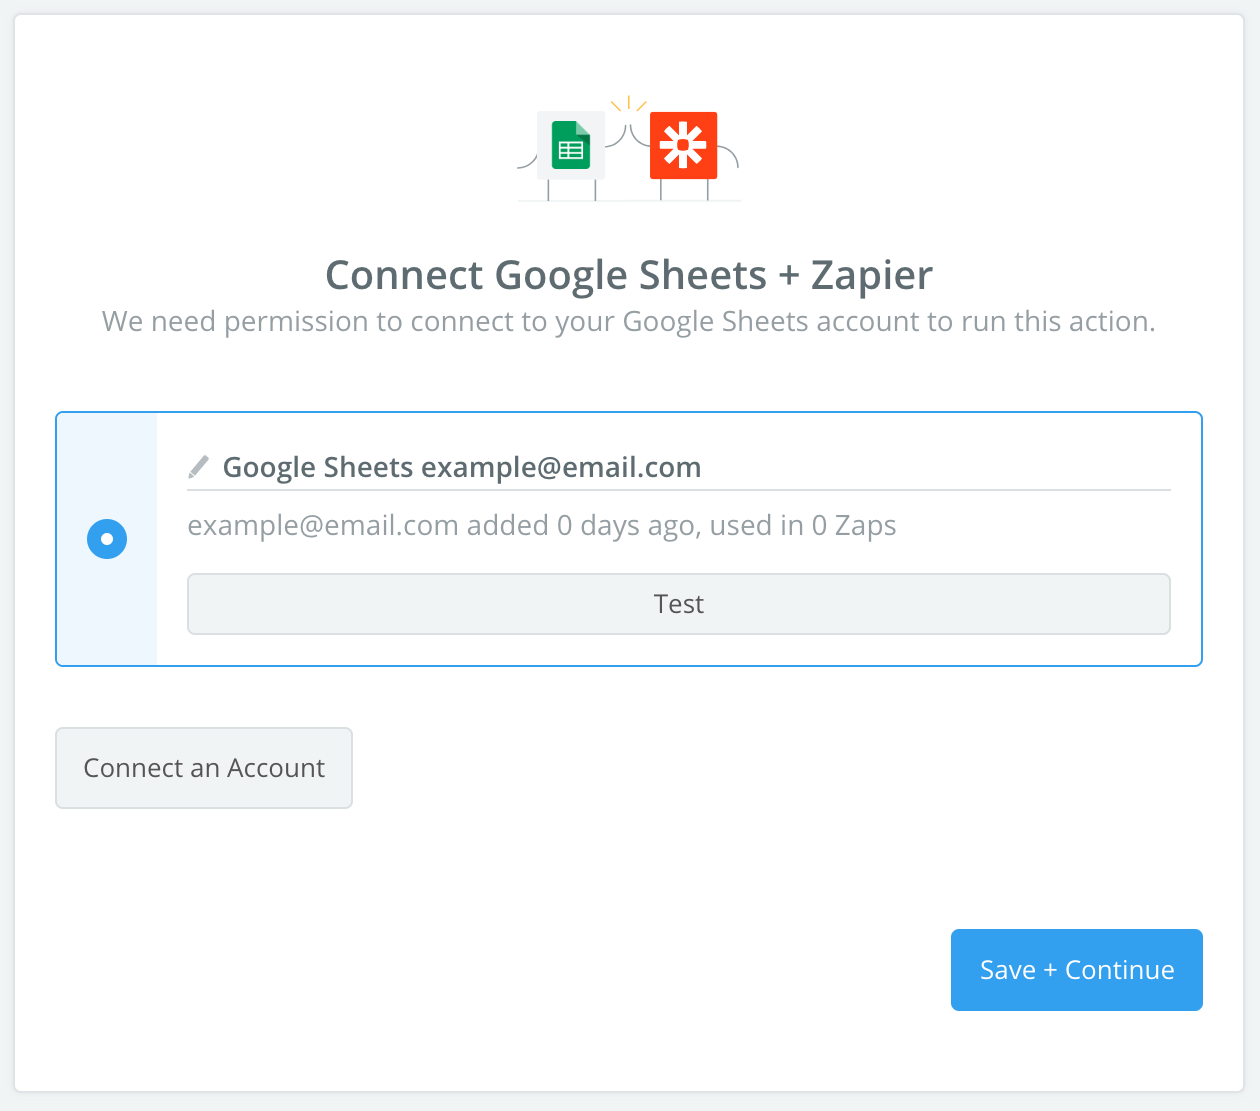
- Connect any relevant accounts necessary to operate the service.

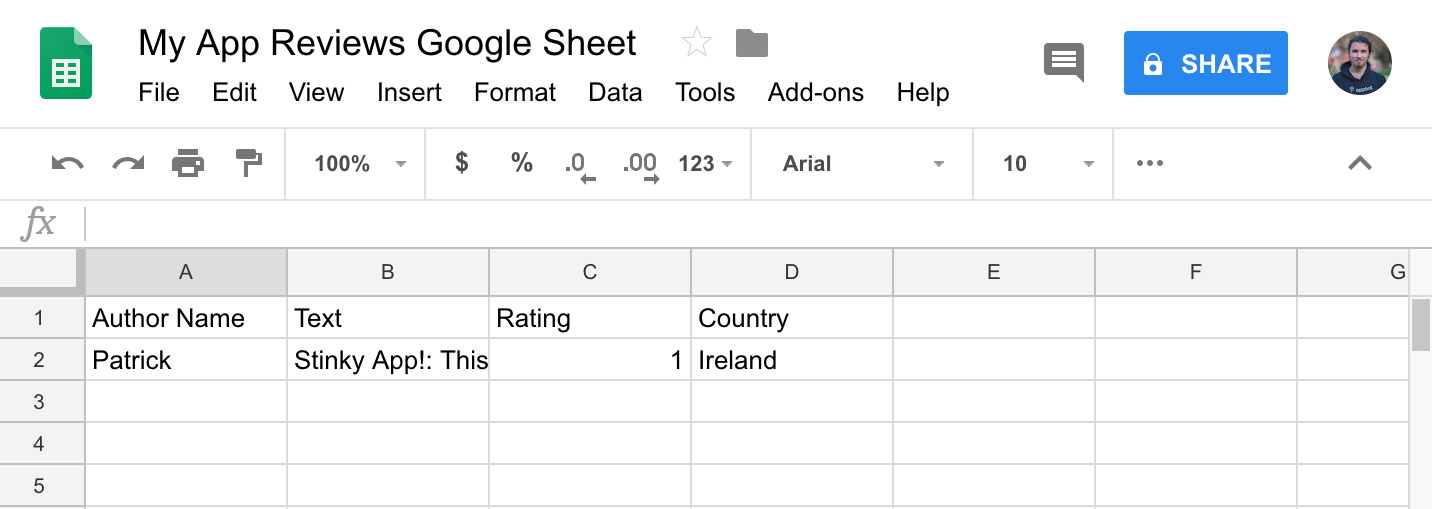
- In the case of the Google Sheets example, we have created a Google Sheet with columns named appropriately for our app reviews.

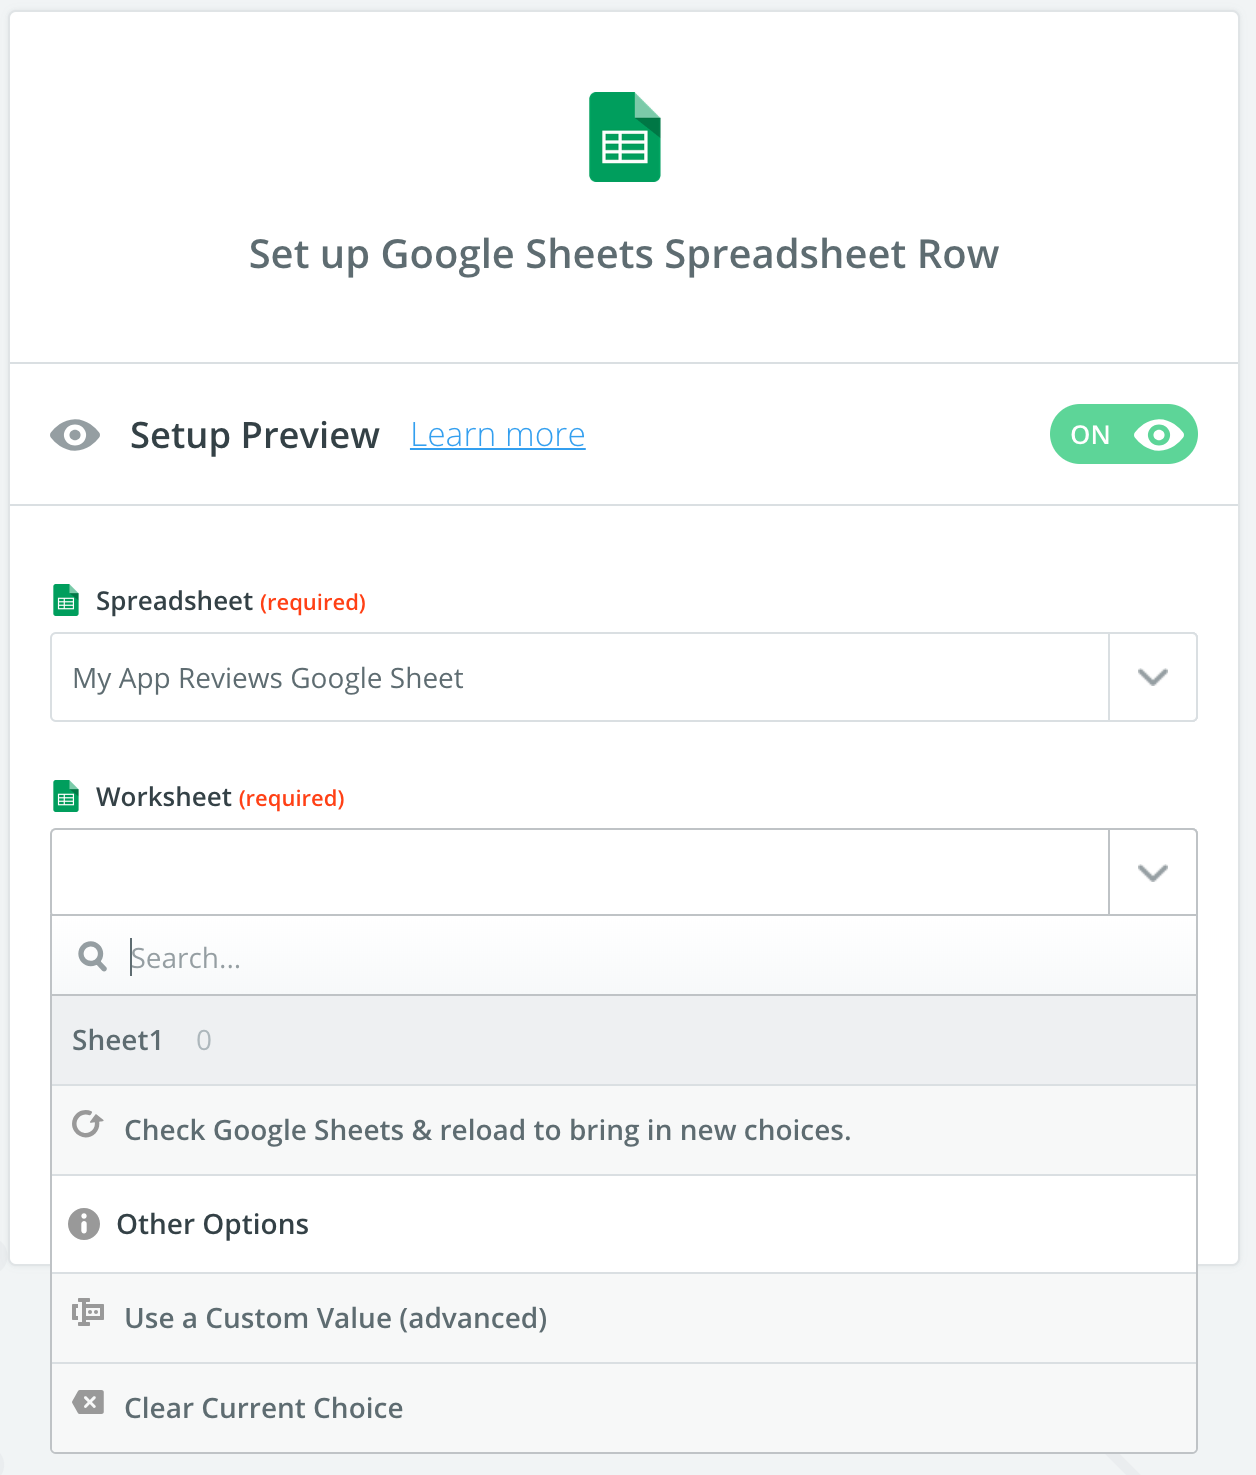
- We select the relevant spreadsheet.

and worksheet to insert reviews into.

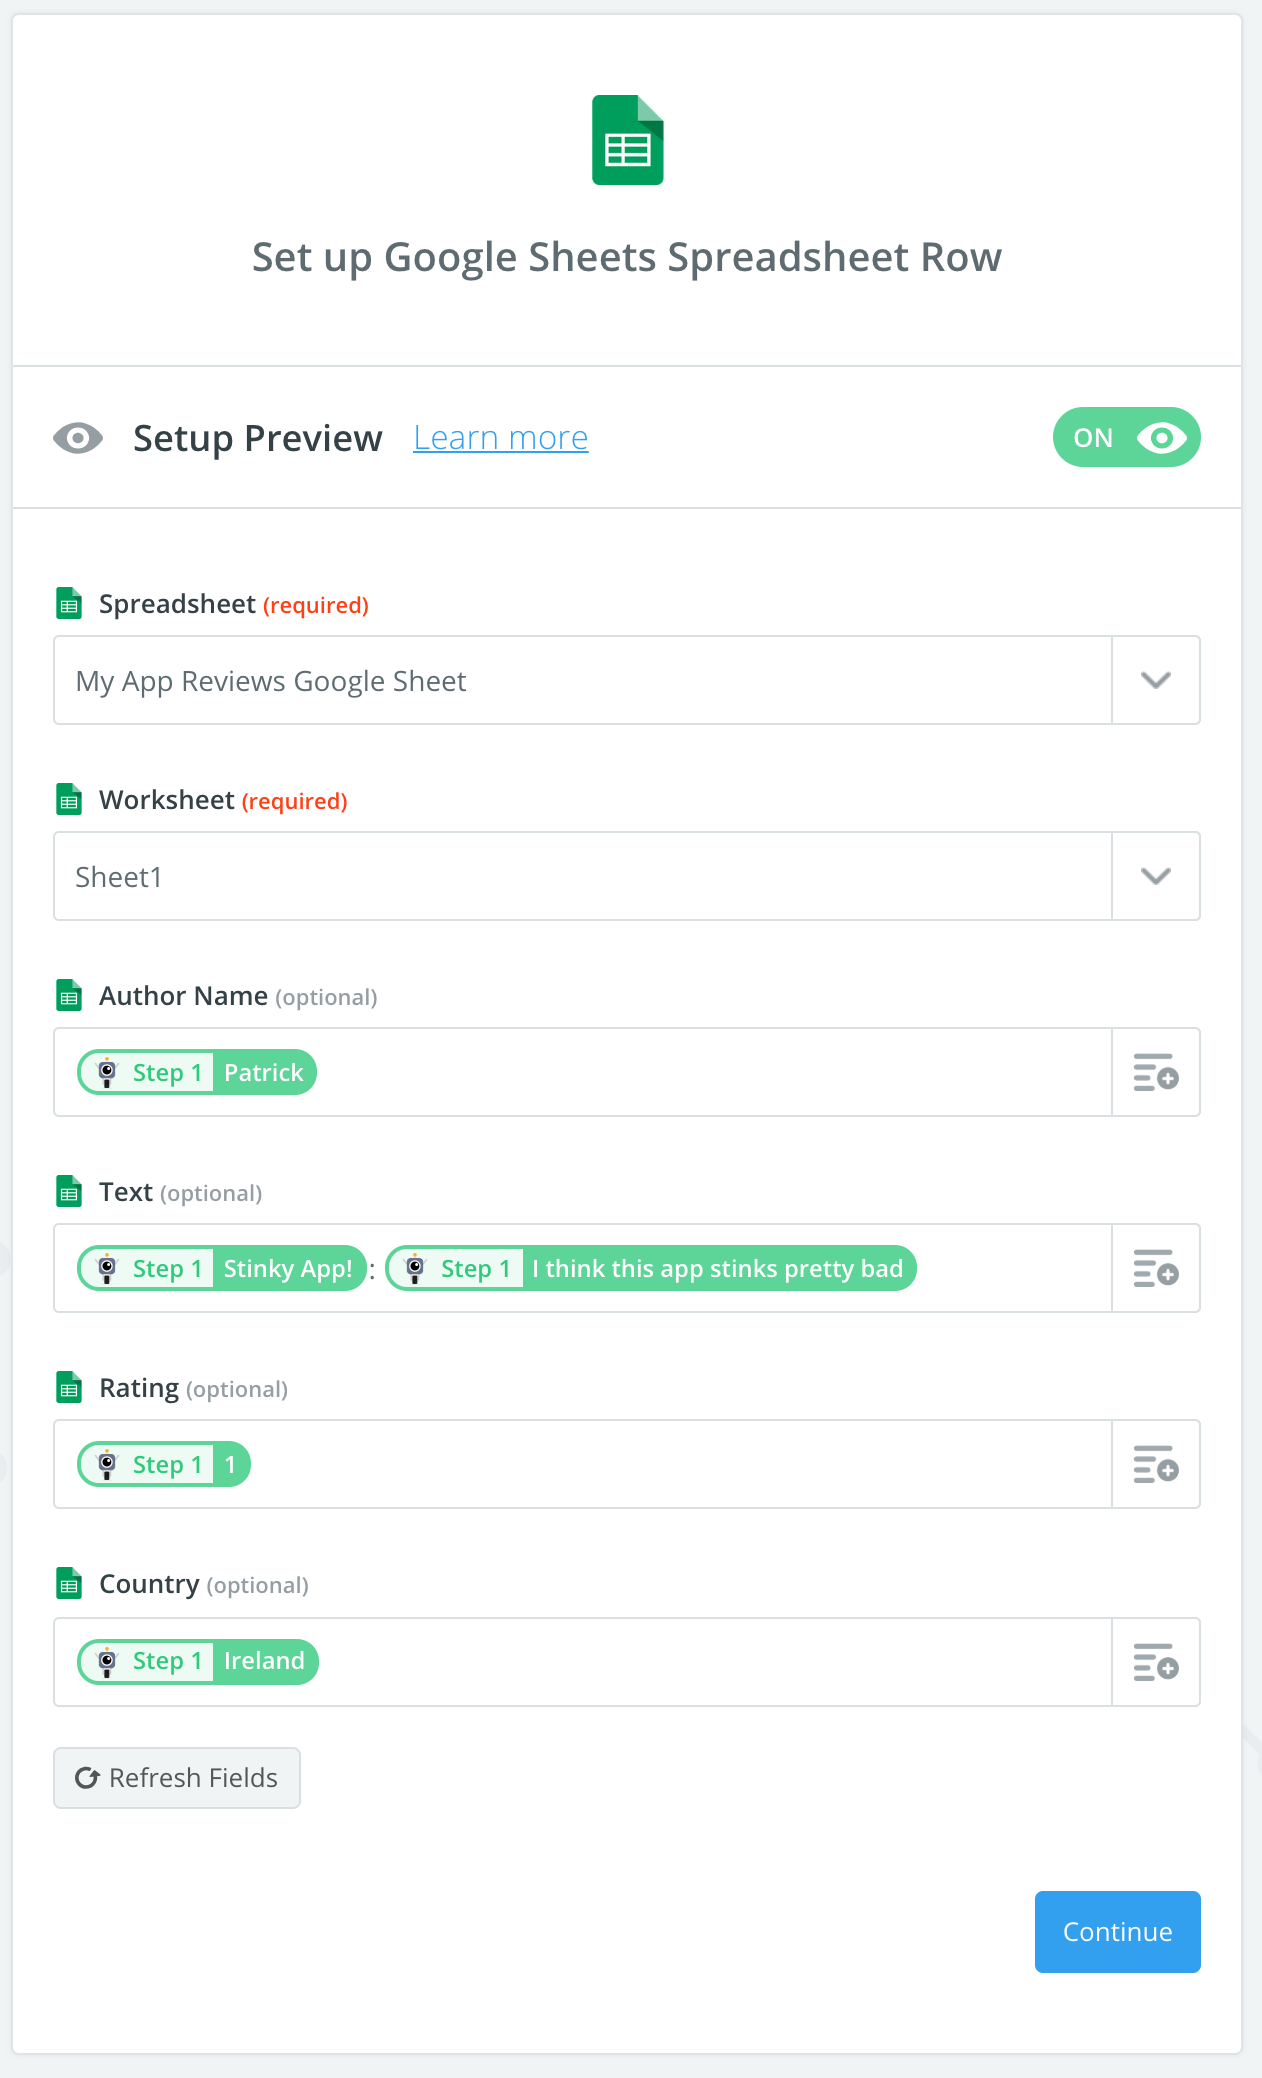
- Once selected, Zapier now wants to know how we will map the Review data we receive to the four different columns in the spreadsheet. For each of the columns, select the button to the right.

- Select whatever Review attributes you would like to be placed in the relevant column. You can place one or many, and you can separate them with any characters you like.

- Here we have mapped the Author name, Rating and Country to the fields with the same name. But for the Text column, we have placed both the Subject and the Body into the column, separated by a colon.

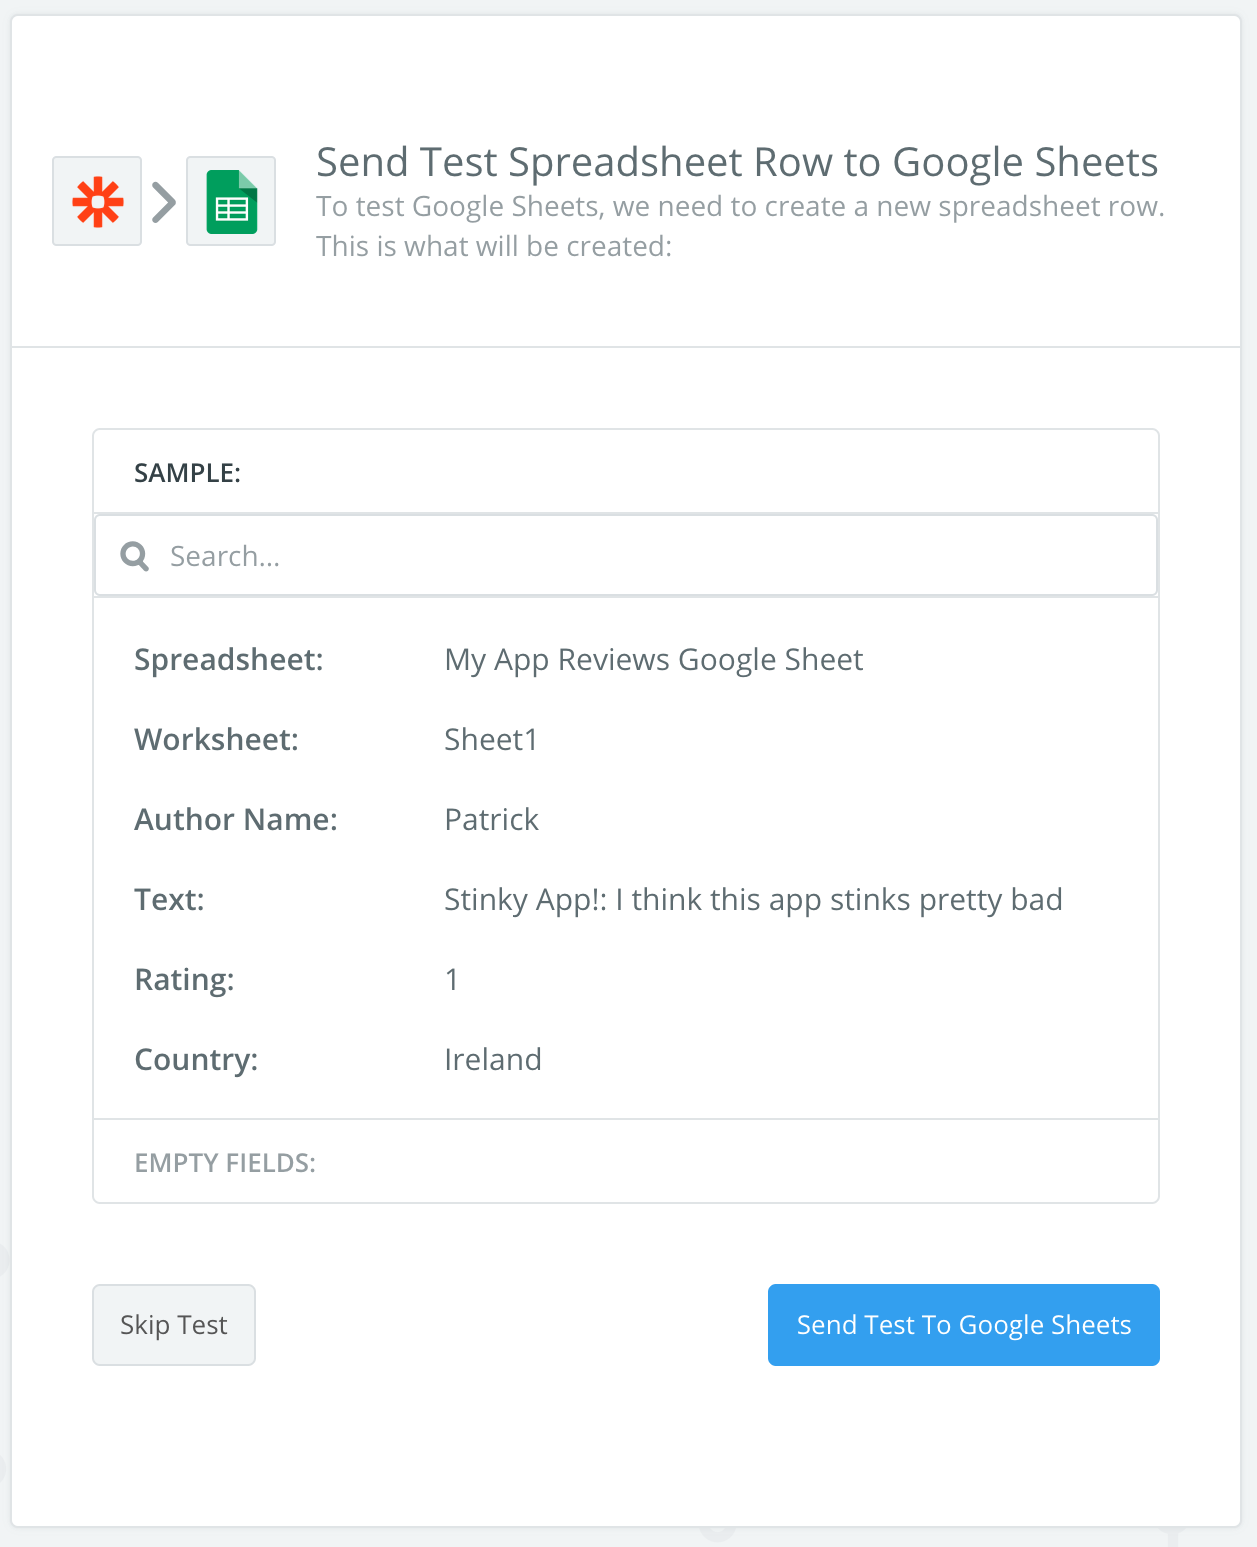
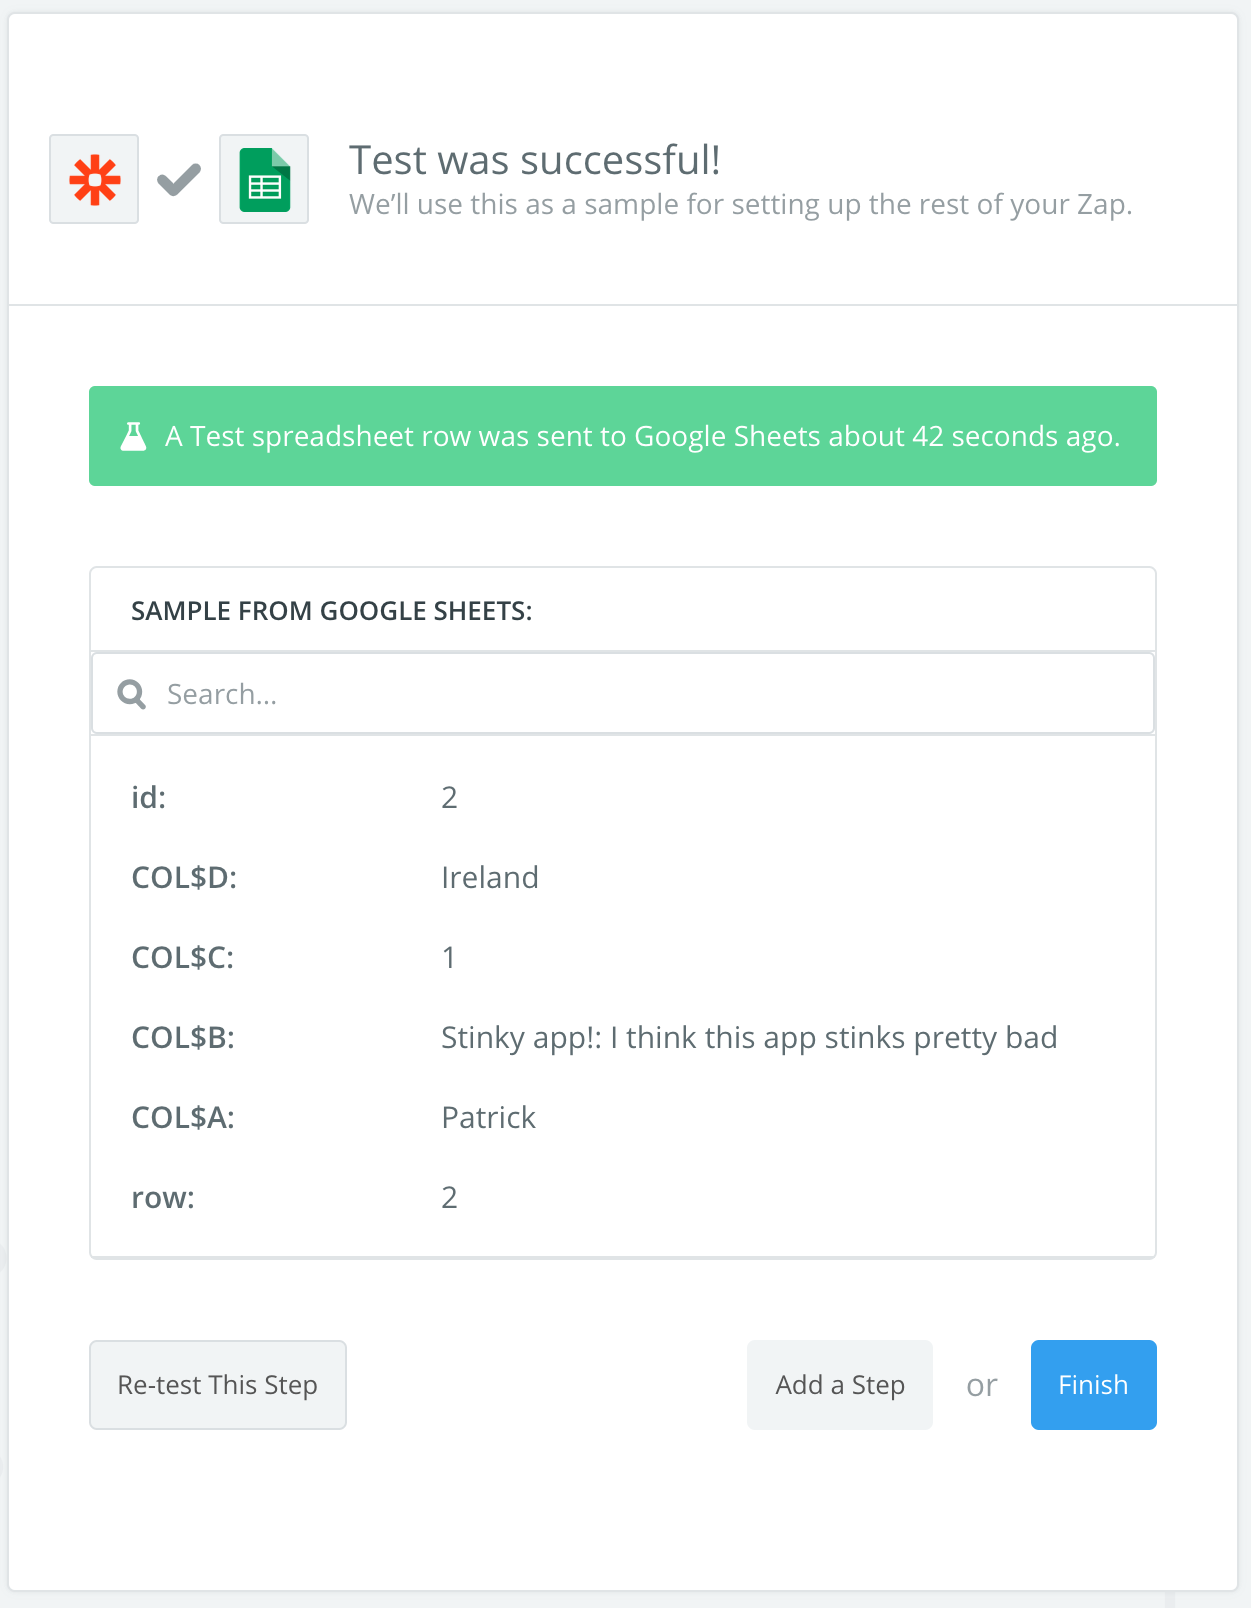
- You have the option to send a test row to the Google Sheet, click “Send Test To Google Sheets” and verify it is inserted into the sheet as desired.

Here’s how the results of the test will look:

- Choose “Finish”.

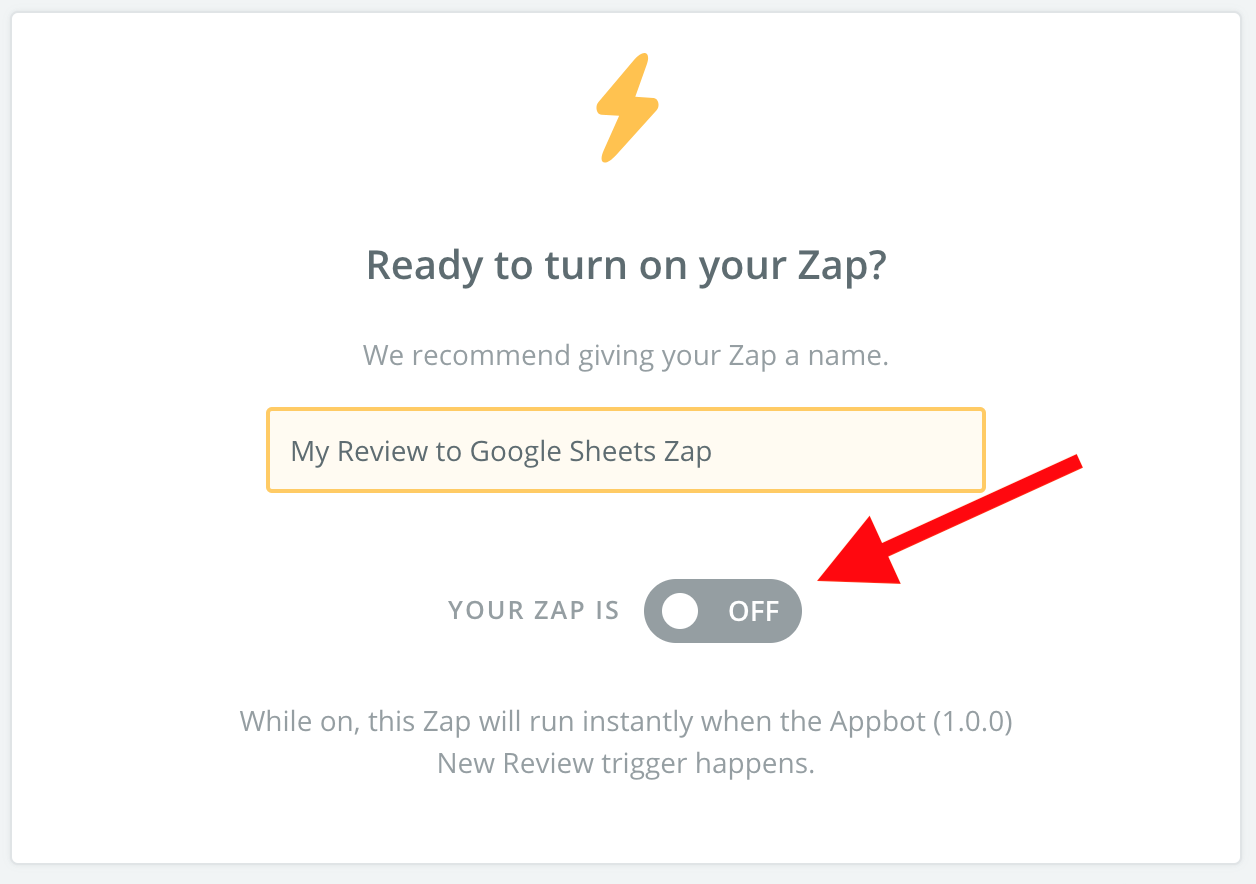
- Give your Zap and name and switch the “Off” button to “On” to turn the Zap on.

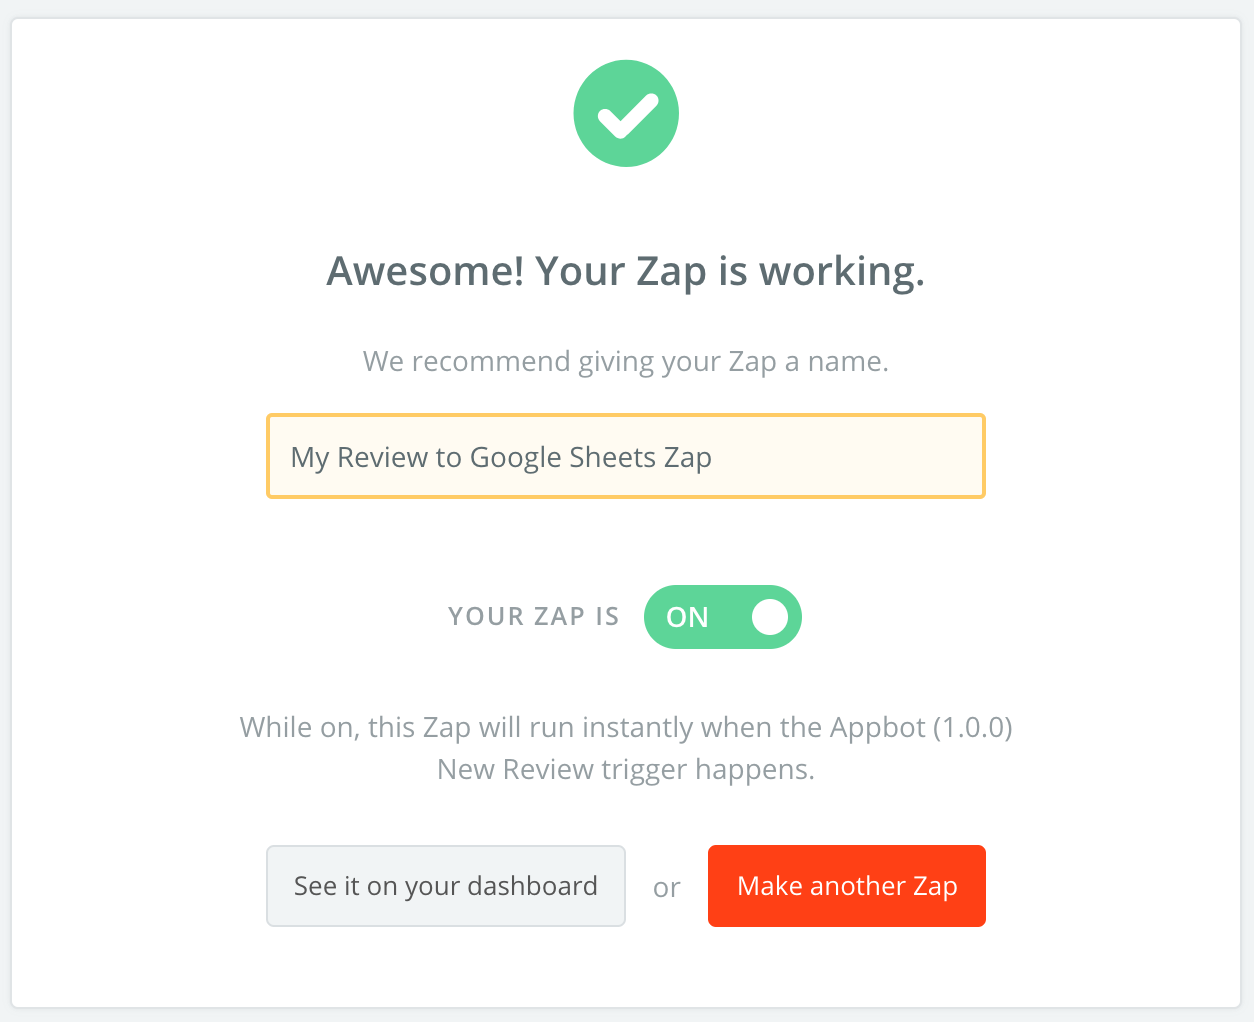
- If you see the success screen, your Zap is now operational!