Appbot Dashboards save teams hours every week reporting on app reviews.
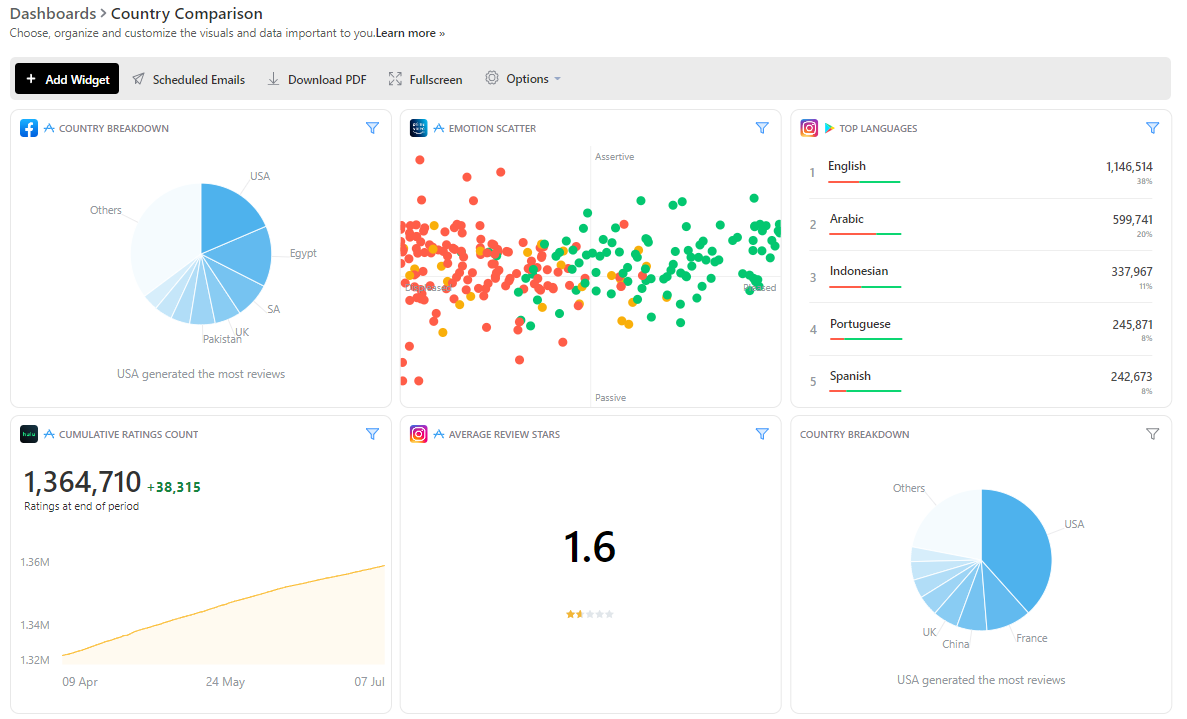
Dashboards make it easy to select the metrics from Appbot that are the most useful for your team and save them all in one place for quick reference. You can make as many Dashboards as you like, and everyone in your Appbot team can see them.
Dashboards can show data for multiple apps, can be exported to PDF and can also be automatically emailed to you using the email scheduling feature.
Skip ahead to learn more about:
How To Build A Dashboard
Creating a new dashboard is easy:
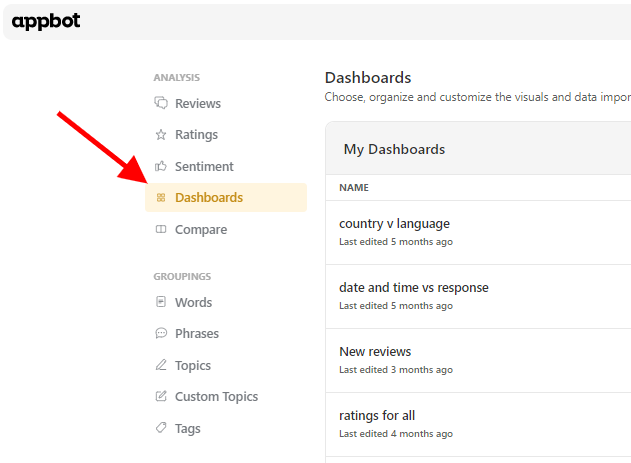
- You can access and create new dashboards by clicking Dashboards on the left navigation bar.

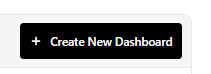
- Press the ‘Create New Dashboard’ button in the top right corner of the Dashboards page.

- Give your new dashboard a name and press ‘Create Dashboard’.
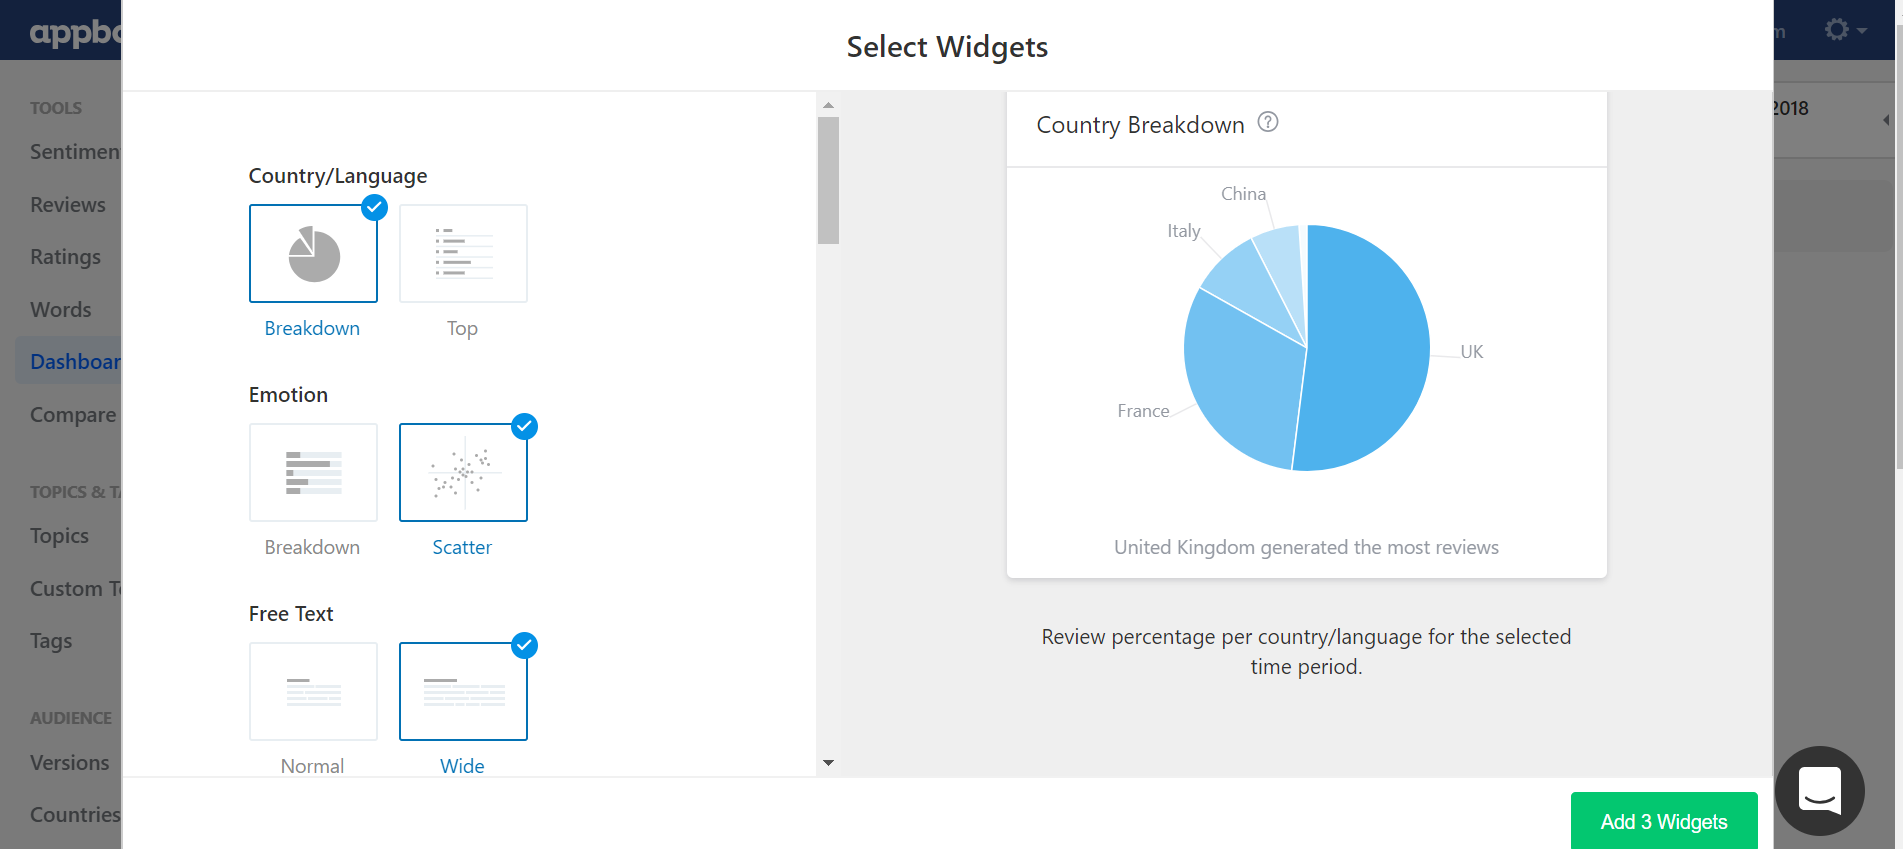
 Pick a few widgets from the left-hand menu to add to your new dashboard and press the ‘Add Widgets’ button. Tip: You can hover over the widgets to preview what they look like. You can find more information about each widget in the Appbot Widget Guide.

Congratulations, you’ve learned how to build a custom dashboard and your new dashboard has been created! You’ll be immediately taken to your new dashboard. You’ll also see your new dashboard appear in the dashboards list under ‘My Dashboards’.
Adding Widgets To Your Dashboard
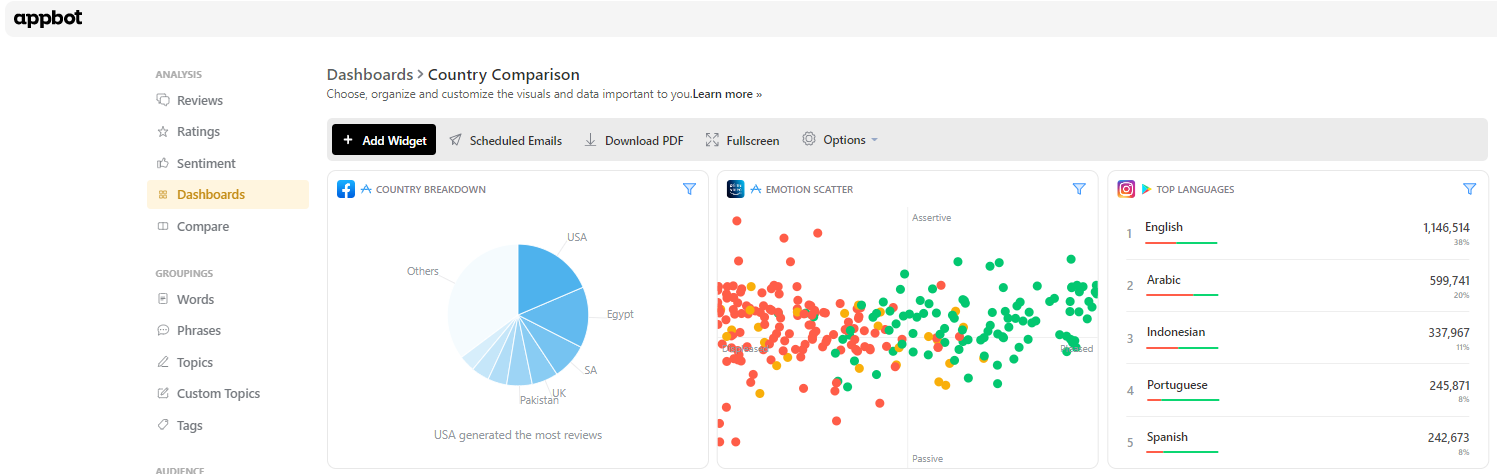
The next part of how to build a custom dashboard is adding widgets. To add a widget, navigate to the dashboard and press on the blue ‘Add Widget’ button at the top of the screen.

Renaming & Applying Filters To Widgets
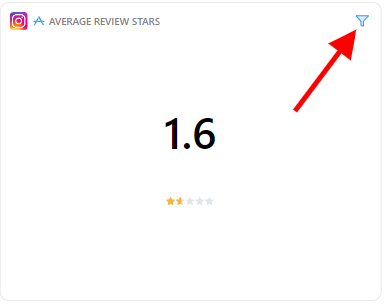
Each widget on your custom dashboard can be renamed and filtered to only show data for a particular country, app version or star rating.
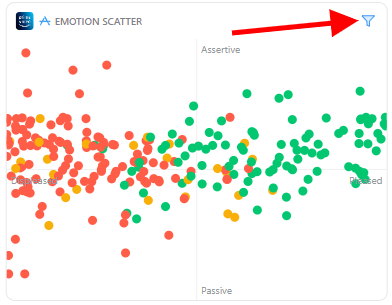
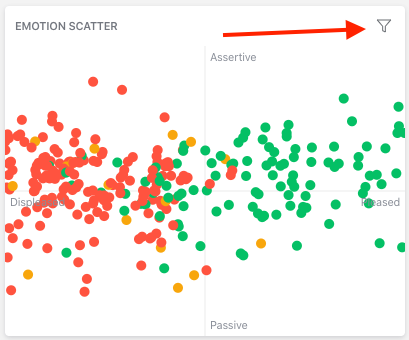
To edit a widget, press on the filter icon in the top right corner.
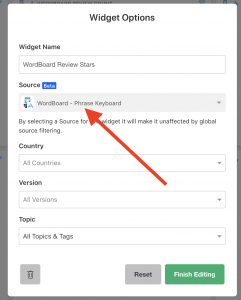
You’ll see a few different options for the selected widget:
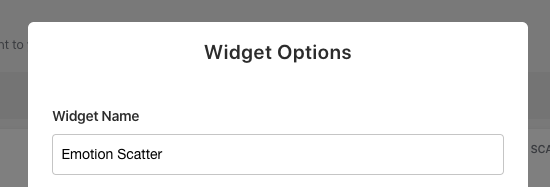
- Widget Name: This is where you can easily change the name by typing a new one in the box.

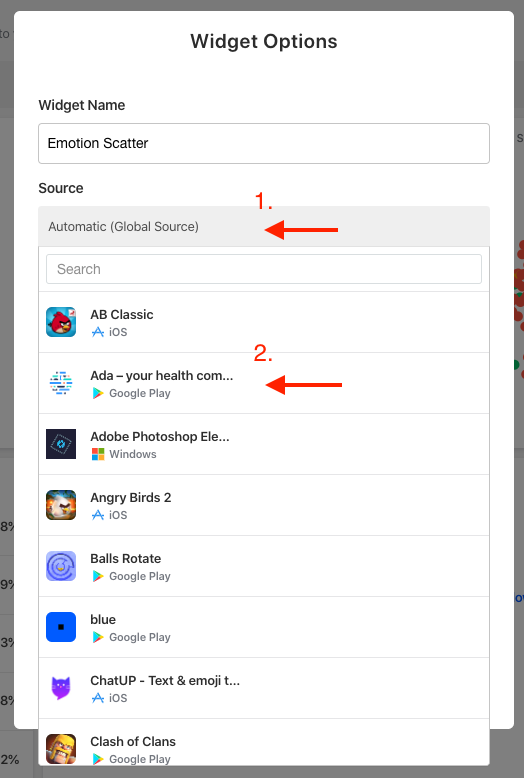
- Filter By App: Below the widget name, you can click the source dropdown to update the source of the widget. This allows you to show different sources alongside each other in the same dashboard.

- Once a new source is selected, the widget will show the app and store icon in the top left:

- Other Filters: Further down you can also adjust the widget to show data for a particular country, source version, topics or star rating.Once you’ve made the necessary changes, press the green ‘Finish Editing’ button at the bottom of the window.
Multiple Source / App Dashboards
A popular use case of Dashboards is displaying multiple apps / sources on the same Dashboard.
To “pin” a widget to a particular app / source, first click on the filter icon on a widget.
Then select the app / source from the dropdown. That widget will always show that app.
Repeat the process for every widget you would like to “pin” to an app or source.
Removing Widgets From Your Dashboard
To remove a widget from your dashboard, press on the ‘filter icon’ at the top right of it.
Press the ‘trashcan icon’ at the bottom of the window that pops up to remove that widget from your dashboard.
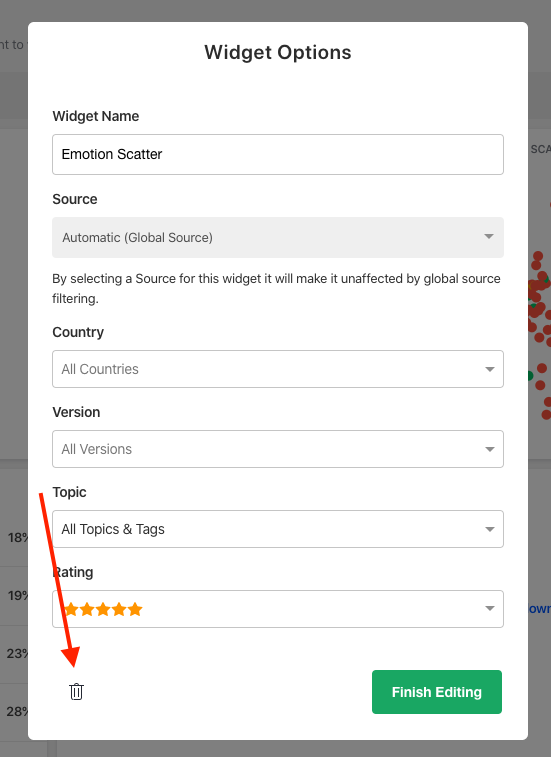
Your widget has now been deleted.
Re-arranging Your Dashboard
Don’t like where your widgets sit on your dashboard? No problem! Just click in the top bar of any of your widgets and drag it to where you want it. Easy!
Viewing Your Dashboard Fullscreen
Want a full immersive dashboard experience? Press the fullscreen button!

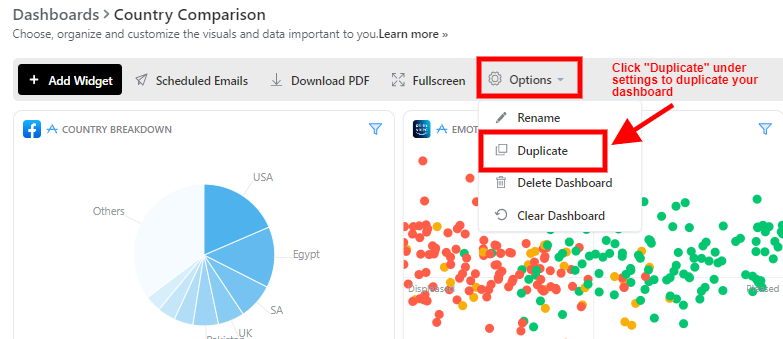
Duplicating Your Dashboard
Making a copy of one of your dashboards is also easy, all you need to do is to go to Settings and click ‘Duplicate’.
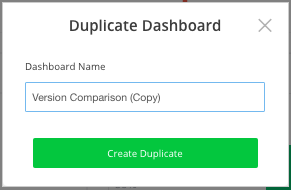
You’ll get the option to enter a name for the new dashboard. Select ‘Create Duplicate’ once you’re happy.
You’ll now have a copy of this dashboard in your dashboard list.
Deleting A Dashboard
To permanently delete one of your dashboards, navigate to the dashboard you wish to delete, select Settings, and click ‘Delete Dashboard’.
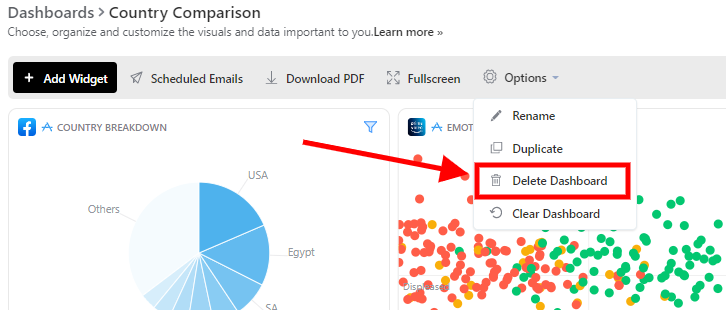
Select ‘Delete Dashboard’ on the popup that appears to permanently delete this Dashboard
Clearing A Dashboard
To completely empty your dashboard, is navigate to Settings, and click ‘Clear Dashboard’.
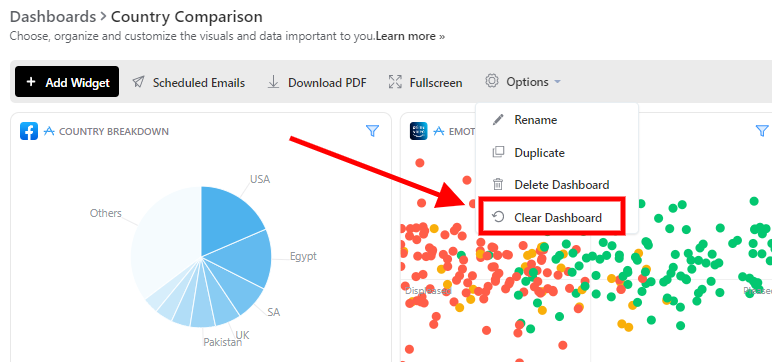
Select ‘Clear Dashboard’ on the popup to confirm that you want to empty the dashboard of all widgets.
Sharing Dashboards with your team
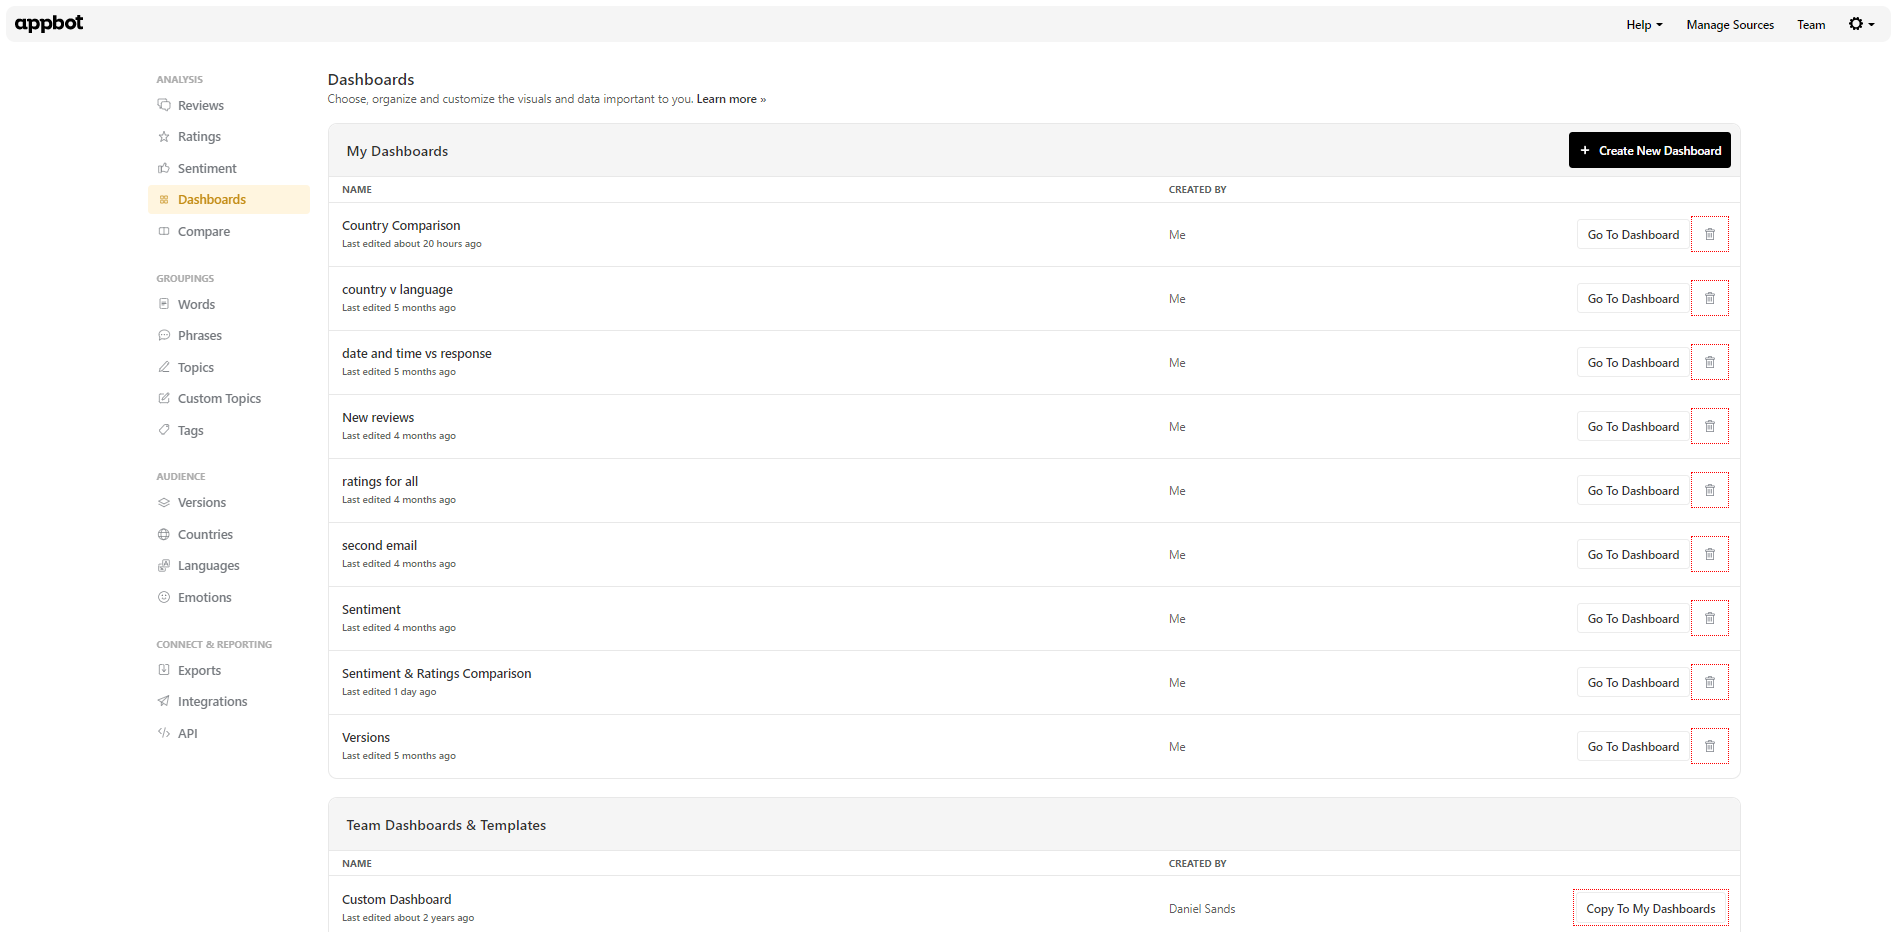
You will see all the dashboards that you’ve created at the top of the Dashboards page under ‘My Dashboards’.
Your team members will see the dashboards you created under the ‘Team Dashboards’ section, further down the page.
Only the creator of each dashboard can edit it. If one of your team members wants to edit a dashboard you created the only way to do this is to create a copy by clicking ‘Copy To My Dashboards’, and then edit the copy. The team member will then see both versions of that dashboard – one in the ‘My Dashboards’ section and one in the ‘Team Dashboards’ section. This feature prevents other people from altering your dashboards without your knowledge.
If you want to collaborate on editing Dashboards with your team we suggest using a versioned naming convention, following this template/naming convention: “Dashboard name v0.1” etc. If a team member updates the Dashboard they increase the version number on the copy they create. This way the whole team can see which version is most current.
Have Your Dashboard Emailed To You
Once you’ve created your Dashboard, you can schedule your dashboard to be sent to your email inbox on a regular basis.
Learn more about Scheduling your Dashboards here.
If you need any further assistance, hesitate to contact us with any questions about creating or editing dashboards, or check out our FAQ section.